


DIY Cement Planters
Hi everyone! I’m Emily from Painting it Purple, and I’m so excited to be a part of the Craftaholics Anonymous® Creative Team this year! I think 2015 is going to be a very creative year for me.
If you follow along with my blog then you know we just moved into a new house, yay! I’ve been working on a million home DIY projects but this one has to be my favorite so far. I absolutely love industrial home decor and I’ve recently started introducing some cement projects to our home. These DIY Cement Planters using Plastic Cups are a great project to start you off and they are really cute! You can use them to hold craft supplies, flowers or just as decoration on a shelf! We’ve got them all over our house now….. I think I’m obsessed!
How to Make Cement Planters
- Quick Dry Cement
- Water
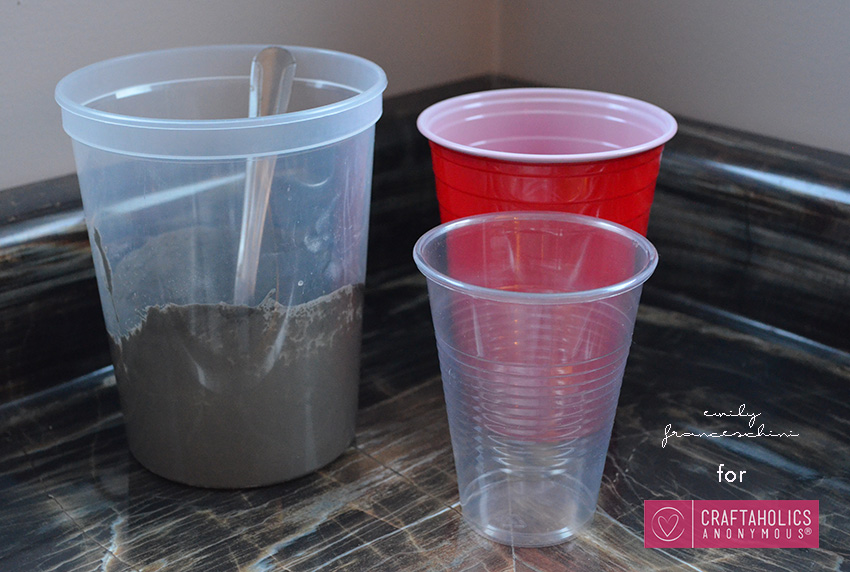
- Red Solo Cup
- 5 or 6 oz plastic cup – Make sure this cup fits inside your red cup with about a half inch gap all around so you have room to fill in the cement.
- Plastic Spoon – or an old spoon you can use just for cement projects.
- Plastic container to mix the cement – a cleaned out old food container works perfect for this!
- Oil
- Sandpaper or sanding tool (optional)
- Paint and paint brush (optional)
- Follow the instructions on your cement package to mix your cement. For the brand I used, I mixed in four parts cement and one part water. You want it to be thick but not too thick. This part is tricky. I’ve read somewhere that it should be the same consistency as peanut butter.
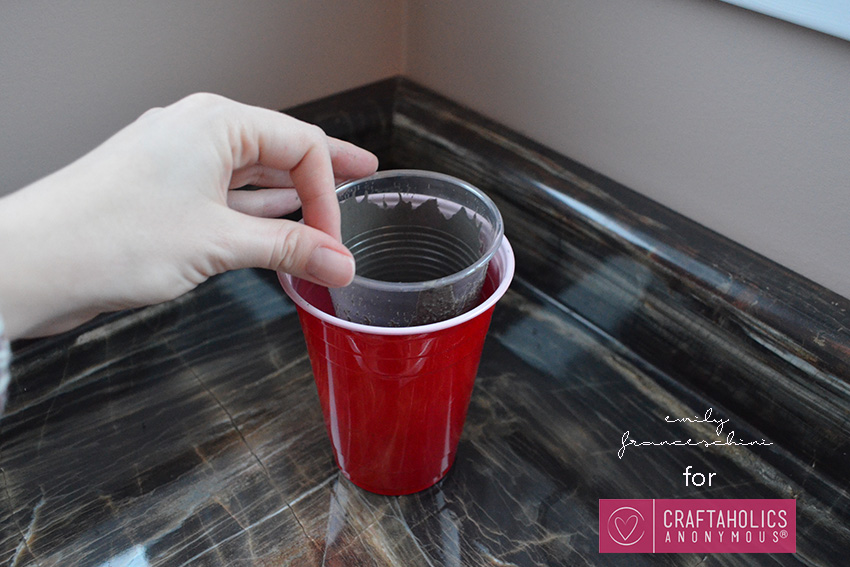
- Grease your cups. Use some cooking oil on a paper towel to wipe the inside of the larger cup and the outside of the smaller cup.
- Fill the bottom half of the red cup with cement. Then place the second cup inside and push down making sure there is 1/2inch of space at the base. You will want to fill this cup with some stones to keep it from lifting as you continue.
- Spoon in the cement mixture into the space between the two cups. Make sure you are filling in all the gaps. Tap around the cup a few times to make sure there are no air bubbles.
- Fill to the top of the smaller cup and flatten with your spoon. Depending on the cement you use, you may be able to peel away the cups after 20 minutes, but I let mine dry overnight just to be safe.
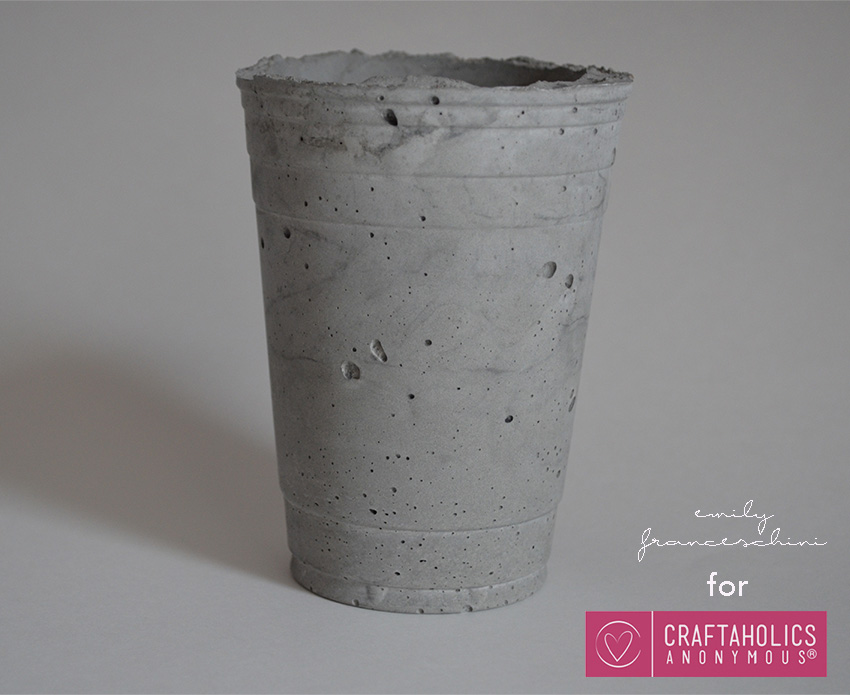
- The top edges will probably be pretty rough, you can sand them to get rid of all the bumps using sand paper or a sanding tool. I liked that it had this imperfection so I just sanded down some of the edges that were sharp.
- Now you can decorate your cement planter! I used acrylic paint and some tape to make mine pretty. I went with the dip dyed look.
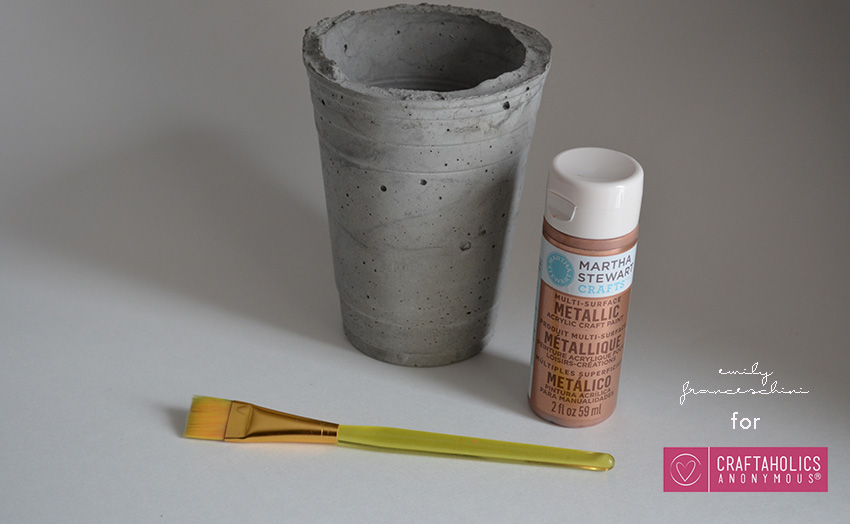
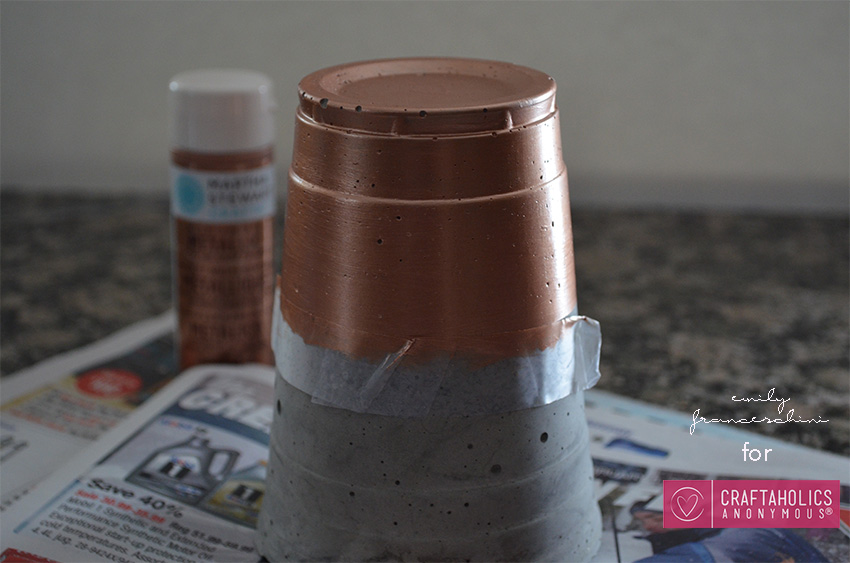
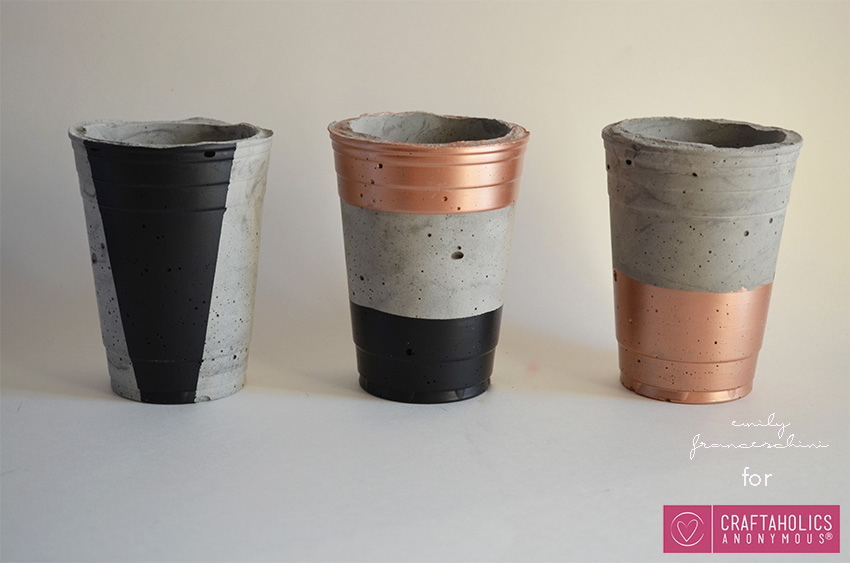
I’m in love with the colours I used. The copper and black go great together and they match our kitchen perfectly! The last step is to seal the planter. I used an acrylic varnish for this step.
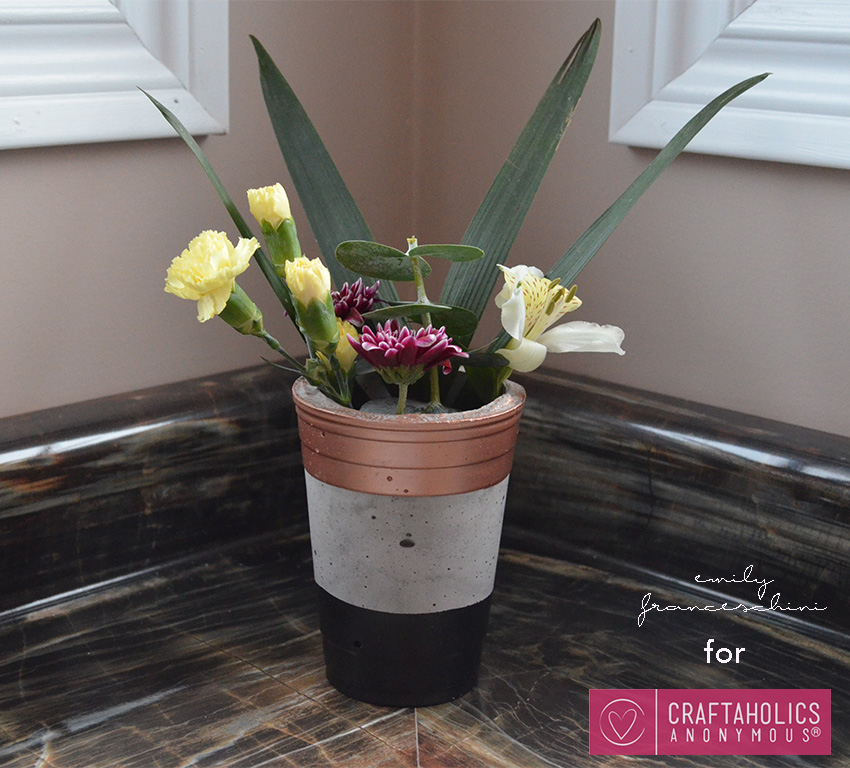
I filled mine with some water and found these pretty flowers at the grocery store. I think they look perfect in our kitchen!

Looking for more spring projects? Be sure to check these out!

Emily
Latest posts by Emily (see all)
- Woven DIY Christmas Ornament - Dec 03 2015
- DIY Owl Mask - Oct 02 2015
- DIY Ring Cones - Aug 27 2015
Those are REALLY cute!
Love these!!!
I really love the cement vases. I need to do this. thanks. Diane S.
I love the copper accent on this planter. It is really nice. Exploring all the info here. Wow!
Thank you for stopping by, Kim!