


Easy Crochet Bracelet Tutorial
Hi there, I’m San, the voice behind Loopsan and I’m so excited that I’m part of the 2014 Creative Team. I’m madly in love with crochet and my aim will be to get you as excited and “hooked” on crochet as I am.
To begin we’re starting off really really simple. Which means that even if you’ve ignored a crochet hook till now you shouldn’t have any problems making it. This is a fabulous project for a beginner crocheter!
How to Crochet a Chain Bracelet
You’ll need:
- a little bit of worsted weight yarn (I would use acrylic yarn for this project, especially when you’re a beginner – it’s easier to work with)
- size G (5 mm) crochet hook
- tapestry needle
- scissor
- 2 buttons (mine were from an old sweater, so recycling it is!)

How to make a slip knot:

Make a loop with your yarn, insert your hook through the loop, wrap your yarn around your hook and pull the yarn through the loop and pull tightly. You just made your first slip knot :)
Most of the crochet patterns start off with a slip knot. There is also another way to start your crochet adventure, but I’ll show you this next month.
How to chain crochet (abbreviation: ch):

after making your slip knot, wrap your yarn again once around your hook and pull the yarn through the loop, which was on your hook. You just made your first chain :). For the next chain just repeat what you just did.
Fasten off:
At the end of your crochet piece you’ll need to find a secure way to finish your piece. Just cut the yarn and pull it through the loop, which was on your hook. And that’s it :)
Let’s get started on our first project: Crochet Chain Bracelet

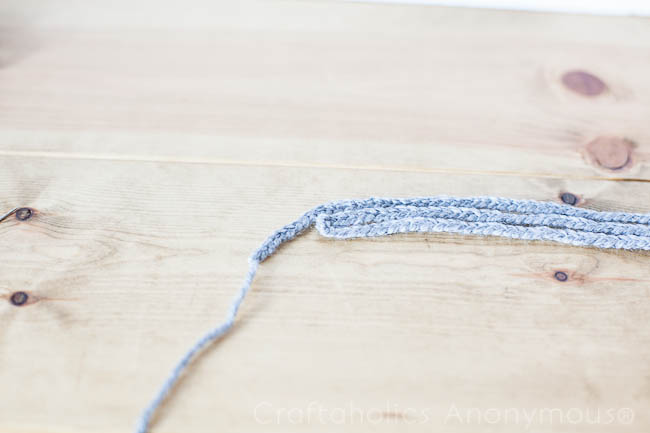
make 2 chains, which simply fit around your arm

sew the chains together on one side

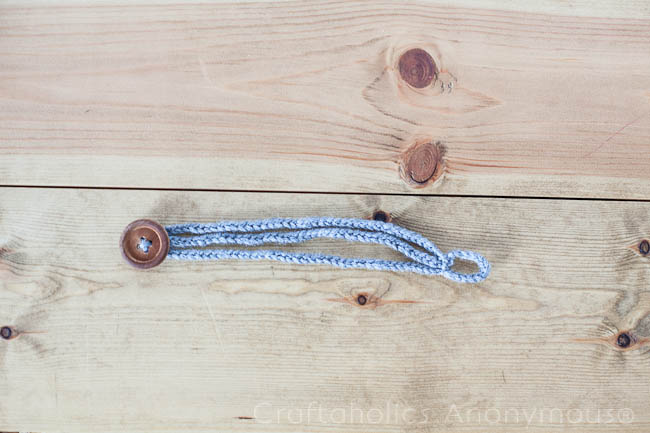
make a 3rd chain, which you don’t fasten off at this point, but sew the beginning together.

add your button
now we’re making the buttonhole on the other side. For this make your chain slightly longer than the other two and sew that end as a loop to the other two chains.
Your bracelet should look like this. It’s actually already good to go if you want to keep it really simple but I wanted to add an extra little touch to it.
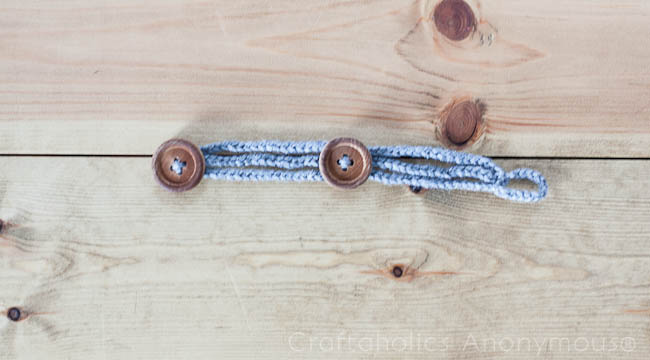
So add the second button in the middle between the first one and the buttonloop. Now enjoy wearing your new bracelet. And if this went too quick for you why not turn it into a headband with a long chain and more buttons? :)

I hope you liked this little introduction to crochet, if you want more free crochet pattern and ideas feel free to hop over to my blog. I would also LOVE LOVE LOVE to see some pictures of your finished projects so please post some to my facebook wall.
Do you crochet? Do you want to learn how to crochet? What things do you enjoy crocheting?
Happy Crocheting!
San
Want more craft/DIY ideas? Follow along on: Pinterest // Facebook // Twitter // Instagram
San
Latest posts by San (see all)
- Scotty – The Crochet Spider - Oct 20 2014
- How to Crochet Face Scrubbies Tutorial - Sep 17 2014
- Amigurumi Gnome Crochet Pattern - Jul 28 2014
Perfect, San. An excellent tutorial for an excellent beginner project.
x Dedri
Like to learn new things
Love your bracelet. You have great tutorials too.
Pingback: Craftaholics Anonymous® | Crochet Bunny Basket Tutorial
Hi there!
I love this tutorial, but since I am a beginner I’m a little confused on how to sew together the two chains. Any advice would be greatly appreciated!
i love this, I was just wondering if you had instructions on how to sew the strands together or a video of this whole process?
i love this, I was just wondering if you had instructions on how to sew the strands together or a video of this whole process?