


Sewing is one of my absolute favorite types of crafting. Although I will admit, I don’t do it nearly as often as I’d like. But there is one thing that I love to sew more than others and that is anything for my kiddos! I love to sew shorts, skirts, lovies, shirts, etc. for them. But I’ve never been able to put the size on the items I’ve sewn. Which is a bit of a problem when they become hand-me-downs and I have to guess which size it was when I sewed it. So for this month’s Canon post, I decided to try my hand at making my own DIY Fabric Labels!
DIY Fabric Labels


And of course, I couldn’t just make plain size labels…. I had to add in a little reminder of how much I love my kiddos! So I made a bunch of DIY Fabric Labels with, “Made with love by Mommy” on them AND the size.

Over the weekend I whipped up this darling little skirt with paper bag waist and lace trim detail for my little girl. It made me so happy to put my own fabric label on it! This skirt is very similar to this pom pom skirt I made last Christmas, except I used lace instead of pom pom trim.
Another added bonus to putting labels in your handmade clothing is it makes it easy for your child to know which side is the back. ha!

Here are the super simple handmade fabric labels I made with my PIXMA iP8720 Printer.
How to Make Fabric Labels Tutorial
Supplies:
- White Cotton Fabric
- Freezer paper
- Printer {I used my PIXMA iP8720 Printer}
- Scissors
- White Vinegar
- Cookie Sheet or flat dish
- Iron
- Cut your white fabric to 8.5×11 and a piece of Freezer paper to 8.5×11. Place the Freezer paper on your ironing board with paper side down. Then place your white fabric on top of the freezer paper. The shiny side of the freezer paper will be against the fabric.
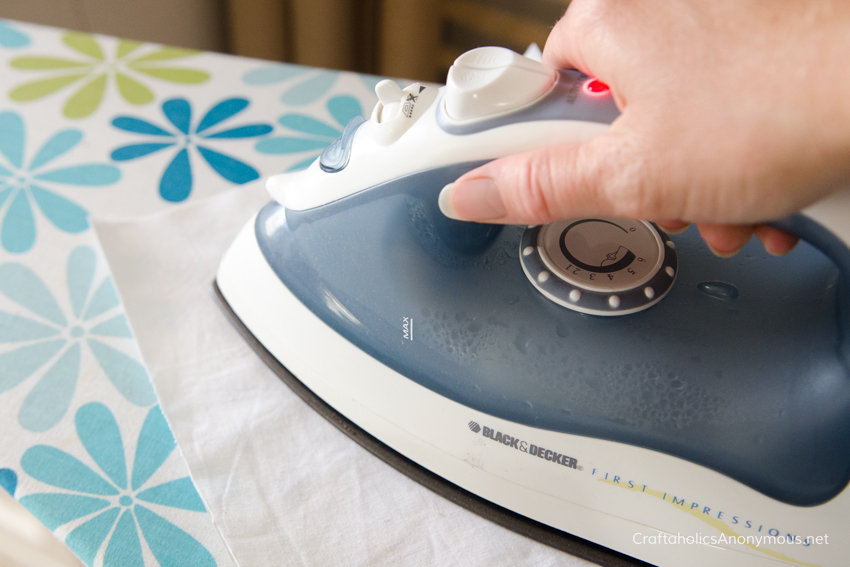
2. Use your iron on Cotton setting to press the fabric to the freezer paper. It takes only a couple seconds of the heat for the freezer paper to stick to the fabric. Trim off any excess or loose threads.

3. On your computer, design what you would like your label to say/look like. I used photoshop for this, but you could very easily use Word or another program you’re comfortable designing in. Then to print, try to flatten your fabric/freezer paper combo as much as possible and feed through your printer like you normally would. (The PIXMA iP8720 is ideal for this because it has a paper feed tray in the back.)
***IMPORTANT NOTE: ONLY USE BLACK COLORED INK. Using other colors may bleed.
*Side Note: I did not allow much of a margin on the sides of my label design and there were a couple issues with it not printing all the way to the edge. {see below} So when you make your label design, give yourself plenty of margins around the design to allow for printer error. Next time, instead of 4 columns, I would do 3 columns.

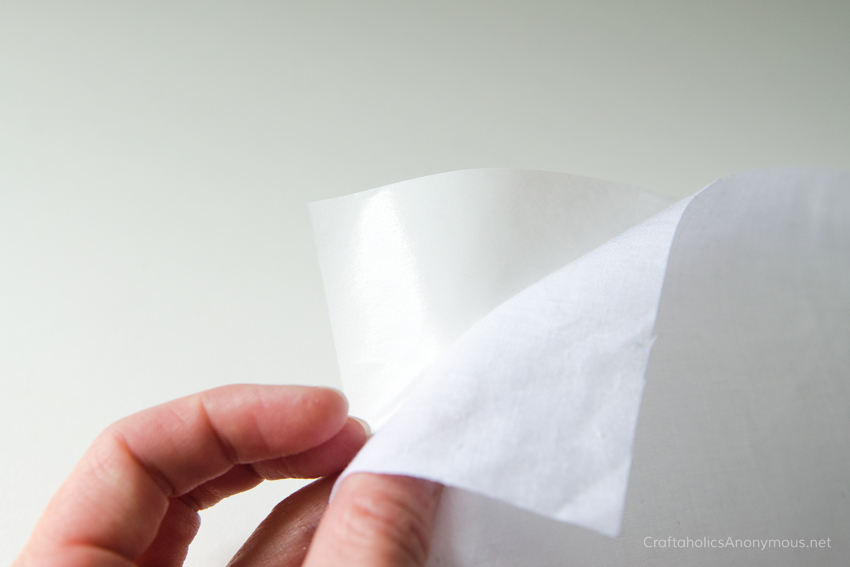
4. Peel your fabric labels off the freezer paper. It comes off easily!
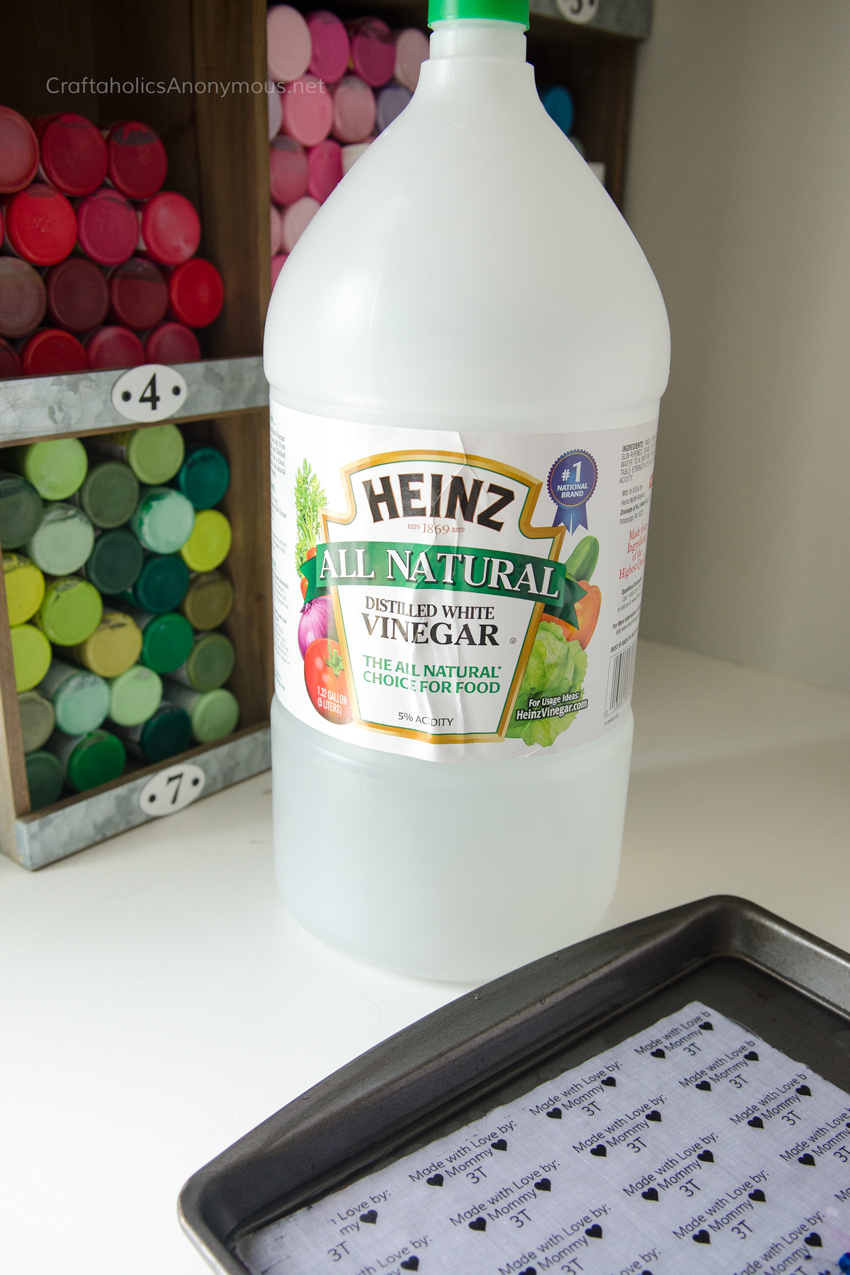
5. Pour vinegar into a cookie sheet and place your fabric labels in it to soak for 1-2 minutes. This helps set the ink. Allow your fabric labels to dry thoroughly. I threw mine in the dryer because I was impatient, but you can lay them flat to dry as well.

6. With your iron on Cotton setting again, heat set your labels. Go over each section for a few seconds to make sure the ink heats up nicely. This will help prevent fading when washed.

7. Then cut out each individual fabric label and sew them onto your handmade clothing! Or whatever you sewed! You can make fabric clothing labels to say anything you want :)
I hope this tutorial helps! DIY Fabric Labels are easy to make and add a personalized touch.

Disclosure: This post is brought to you by Canon. All opinions are my own.

Latest posts by Linda (see all)
- Powder Room Makeover - Mar 25 2019
- Raspberry Sweet Rolls Recipe - Mar 12 2019
- Farmhouse Spring Wreath - Feb 19 2019
Do you think this method would work with laser printers as well?
Candy, did you take the chance on ruining your printer? I wouldn’t.
Great post!
I am busy with some summer dresses for my grand-daughter, and will give it a try.
Also liked the post about mixed print shorts. As a “minimalist” in my own dress taste, I have not given it a thought to mix prints.
I have lots of fabric pieces too small for a whole garment but can mix and match. ;D
Hi.
I am from Lisbon – Portugal, loved your tutorial but i have a little “problem” : do not have freezer paper!
What can substitute it?
Wax paper, design paper….?
Sometimes we can not do the DIY because the material is unknown or very spencive if we buy it from Amazon or Ebay.
What she is calling freezer paper may also be called butcher paper. It is a paper with wax on only one side, unlike wax paper that has wax on both sides. Hope this helps you decide what you can get and use.
Thanks for information – a great idea.
That is a fabulous ideaL
Hi, great tutorial. Just one thing do you rinse the label sheet after soaking in the vinegar which I assume is neat straight from the bottle?
I used it straight from the bottle. And yes, you should rinse the fabric afterwards or it will be a bit smelly haha! Sorry, I forgot to add that in the directions.
Are you using special ink? You said you used a PIXMA printer but the photo is a Canon.
I used regular ink jet printer ink from Canon. The printer is a Canon PIXMA printer :)
If you trim with pinking shears, the fabric will not fray!
Oh good thinking! I did not think of that, but you are right on. Thanks!
Hi, love this idea but curious as to what freezer paper is? I’m in Australia – we have wax paper and baking paper. Would it be one of these? We do have freezer go-between but it is a plastic – I can’t imagine ironing it! Thanks!
It is plastic covered paper: http://amzn.to/2j7HOlC
Thanks so much for this. I’ve been making my own labels on inkjet & laser but I didn’t know about the vinegar.
Hi, just wanted to be sure, you use this technique with a laser printer and it worked fine? Thank you!
No, I used an Inkjet printer. I have not tried a laser printer. Sorry!
Hallo, I’m from the Netherlands.
Thank you for the tip. However, I did change it a little bit. First I print the freezer paper, than I fixed the paper on the cotton. So it was no need to have a cotton piece put in the printer.
Els
Hi Els,
Could you please explain how you print on freezer paper?
I am wondering if you have reversed the printed image, so that when it is ironed on to the cotton, the ink is transferred to the fabric in mirror-image (therefore ending the readable way round).
What is freezer paper
It is plastic coated paper usually used when baking: http://amzn.to/2j7HOlC
what in the world is “freezer paper”? never heard of it before… don’t know what to use as substitute.
It is plastic coated paper used in baking: http://amzn.to/2j7HOlC
Love this idea. Just wondering what type of white fabric you used that won’t fray or did you do something to the edges to stop fraying?
What is freezer paper? Never heard of it before! : )
It is plastic coated paper used for baking usually. This is the brand I use: http://amzn.to/2j7HOlC
We are in South Africa and I am from the UK, Freezer paper is BAKING PAPER.
Why would freezer paper be used for baking? We use parchment paper for baking and freezer paper for wrapping things for putting in the freezer. Hence the name Freezer Paper
Another thing that might help keep labels from fraying is to use steam-a-seam or something similar to hold them in place while you stitch them in place. It will hold by itself fine but not forever, especially on small pieces that get lots of washing, like kids clothes.
This would also be a good way to add quick care instructions to things which are gifts. I always send them along with things, but I’m sure people either lose them or forget entirely.
Thank you for the tip!
Cutting the cotton (or silk) squares on the bias helps with fraying. Backing silk with very light weight iron on pellon (after the printing and curing process) makes them very stable.
Thanks for the tip!
This is such a clever idea, especially adding the size. And I love the fabric on the skirt!
thanks so much ! I am definitely going to make some because the storebought ones are expensive and not great quality
Thank you so much for this tutorial. It sounds very easy to do. Going to make labels to put on my grandbabies sewing projects I make for them.
Hi! Would this only work with white cotton or do you think patterned or colored cotton would work as well?
Thanks in advance! Love this idea <3
That is a good question. I am not sure. But I’m thinking synthetic materials {polyester, lycra, etc} may not allow the ink to adhere as well and therefore, may not be permanent. Hope that helps a little!
I’ll try it out as soon as I get some freezer paper and let you know! :) Because ones with fun prints behind them would be so cute i think!
You could sew your printed labels onto the cotton print fabric and then sew that onto the clothing. The label would just be a bit bgger. I have some clothes with labels like that and they are so pretty
Hi my printer is HP Envoy5640, which doesn’t feed from the top, the paper feed is from the bottom of the printer, so it has to turn in side the printer and comes out the front, will this still work?
not sure wether to try it just I paper get stuck, your instructions were clear and easy to follow.
So very happy to see this post. I have often thought about labels and use to use the ones that were made for me in another state.
I got allot of flack because they were scratchy and would be cut out.
I hope these will be soft after printing and sewing.
Beautiful post! Thank you! I’d like to start making cute things for my little girls and it would be so adorable to have homemade tags. I haven’t used Photoshop in a long time but I might have to whip it out just to design these!
Thank you for the great tutorial, I am going to have to give this a try.
Excelente, justo lo que estaba buscando. Haré mi prueba de etiqueta hoy mismo .
Gracias
Thank you !
Thank you for this awesome tutorial.
Just made my first labels and over the moon with them.
Just one question……do you rinse the vinegar out after soaking?
yes you can
Thanx for this tutorial. Excellent
I’m going to try this as I have always embroidered my labels but it takes do much time.
Thank you for the tutorial! i was wondering if you need to put something along the edges of the labels to prevent them from fraying in the wash.
Hi Kate, yes you will want to stitch around the edges or else use Fray Check :) Happy crafting!
This is great! If you cut your fabric on the bias you won’t have fraying ?
Ah yes!!! Smart!
Fab , just done a sheet of labels on my old Epson , thanks for the tips Linda
This is awesome!! Totally going to try this!! Thank you!!