











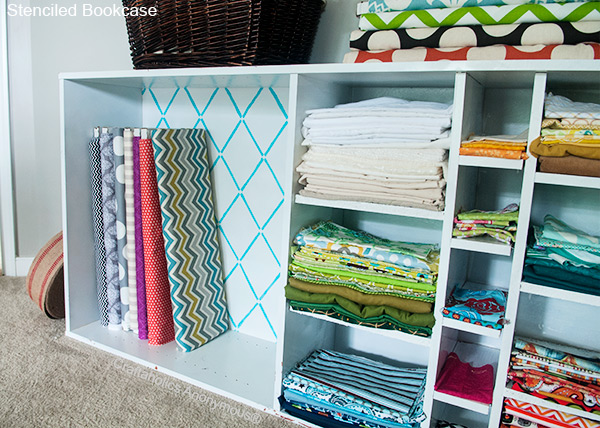
Happy {giveaway} Thursday! Today I am going to show you how to stencil AND giveaway a stencil from Cutting Edge Stencils! Yay!! So check out the bookcase I stenciled in my craft room. It turned out gorgeous!
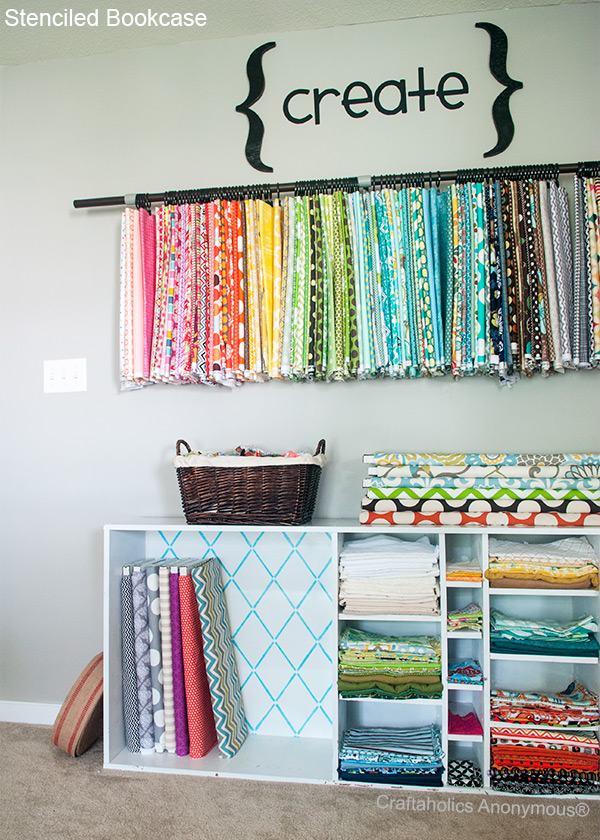

I stenciled the back of my fabric bookcase {originally found on the side of the road!} and made it look stellar! I used the Harlequin Trellis All Over stencil made by Cutting Edge Stencils. And I think it turned out fantastic!
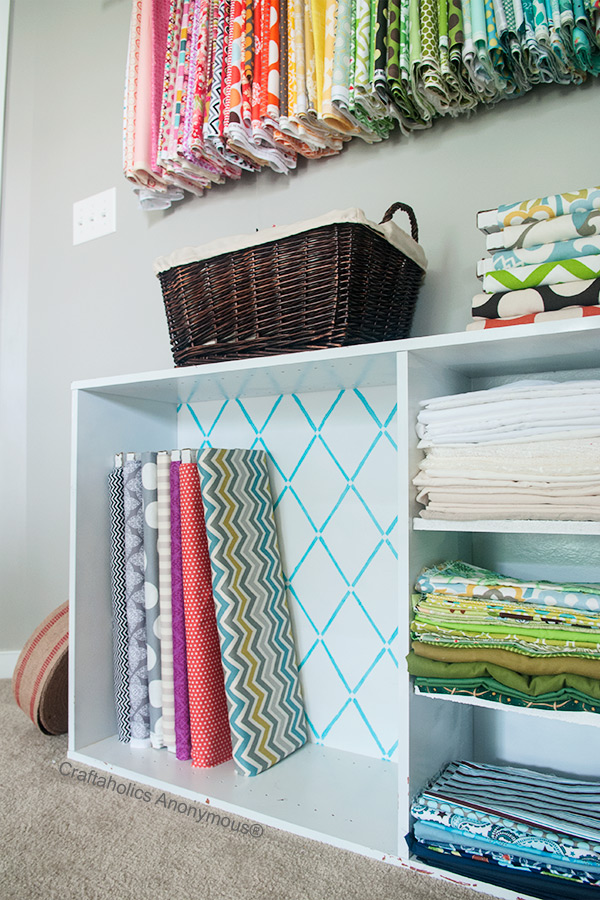
I stenciled a turquoise paint on the back of the white book shelf. I wanted a hint of color so that it didn’t interfere with the colors of fabric I put in front of it.
Okay, are you ready to learn how to stencil? Here we go!
How to Stencil
Supplies: stencil, paint {i used craft paint}, dense foam roller, small paint brushes, repositional spray adhesive, paper towels/wet wipes {i highly recommend wet wipes!}, painters tape
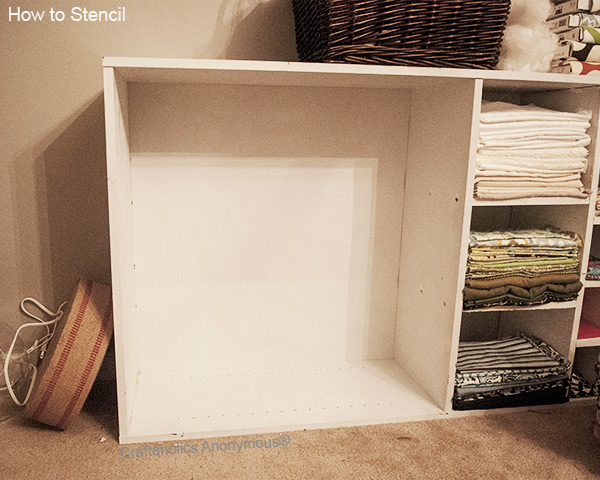
1. Make sure your surface is clean.
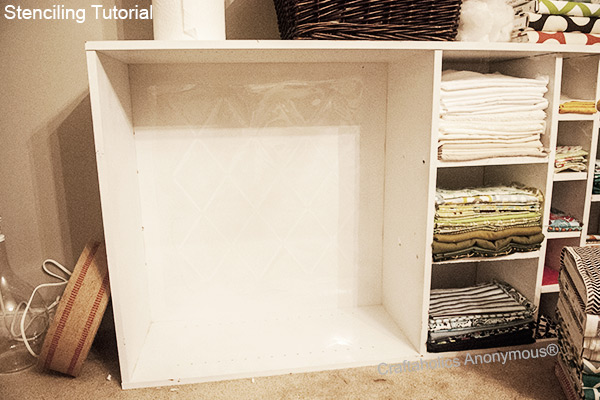
2. Spray one side of the stencil with spray adhesive. {you can find it in the adhesive section} Allow to dry for a few seconds and then place it on the surface you are stenciling and press it down. Cutting Edge Stencils has this handy stencil level that attaches to your stencil to help you keep it level. I did not use it because the my surface was so small, but on large projects like my craft room wall, this level would be very helpful!
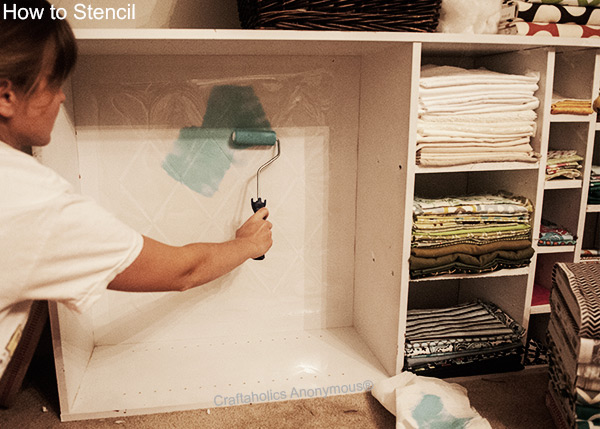
3. Using the high density foam roller, apply paint to it and then remove the excess with a paper towel so that it is a dry brush. {err, foam roller} Basically, you want some paint on the roller, but you need to apply some pressure to get the paint out. This will help prevent leaks under the stencil.
4. Once you have covered all the open lines of the stencil, allow to dry. Then apply a second coat of paint {if needed}. But I’ve found that you usually do have to do 2 coats no matter what colors you’re using.
Stenciling the Edges
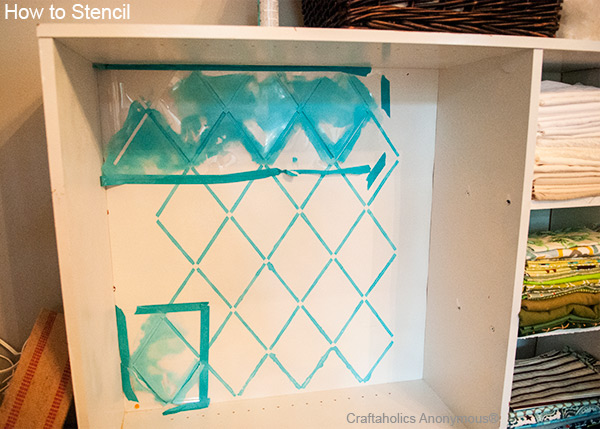
5. Cutting Edge stencils come with a small single stencil and top part stencil of your stencil design so you can do smaller areas and the tops easier. Along with the spray adhesive, I used painters tape to hold these smaller stencils in place because I had to bend them in order to stencil the corners.
6. As you can see, I did have some leakage under my stencils. Use the small brushes with the base color {in this case, white} for touch ups.
TRICK: Since I used craft paint, I was able to wipe off the turquoise paint leaks with wet wipes. I did not even use white paint for any touch ups. The craft paint was water soluble, so it was easy to get the excess paint off with a wet wipe. I found it worked best to do the “wet wipe touch ups” immediately after taking off the stencil, while the paint was still slightly damp. It wiped right off and was super easy!
I really like how Cutting Edge Stencils includes these smaller stencils with your larger stencil. They are super helpful and a lot easier to use than the larger one for small spots.
Check out the Cutting Edge Youtube channel for how to videos or their blog.
Cutting Edge Stencils are lighter weight than other stencils I’ve used. Which made it easier to bend when stenciling, but they also came rolled up in a ball from being shipped and I had to flatten them. So there is a give and take there.
Cutting Edge Stencils DISCOUNT: Discount: get 10% off with code: CRAFT
Cutting Edge Stencil GIVEAWAY

One lucky reader will win a stencil of their choice! {up to $50 value} Use the giveaway widget below to enter.
a Rafflecopter giveaway
Disclosure: This post is brought to you by Cutting Edge Stencils. I received free product to try. I only promote high quality products that I think you’ll enjoy. All opinions are 100% mine. Please see my disclosure page for a complete statement.

Latest posts by Linda (see all)
- Powder Room Makeover - Mar 25 2019
- Raspberry Sweet Rolls Recipe - Mar 12 2019
- Farmhouse Spring Wreath - Feb 19 2019
I have been wanting to stencil a wall in my house. Not sure if I want to try my pantry or my closet first =)
I would love to try to stencil the main floor bathroom. Thanks for hosting!
I like the way your bookshelf turned out, so I’d probably copy you :-)
My craft walls and desk
Oooh, that’s a hard one… But, I’d have to say the “reading nook” I plan to make out of the closet in my boys soon-to-be playroom. :)
i would like to do a cute end table
I would love to stencil the back wall of my dining room.
My girls’ room needs a overhaul so I would love to use a stencil in there!
I would love to stencil one wall in my powder room.
I am looking to stencil the front of my file cabinet. I picked it up for $5 at an auction and it’s UG-LY. If I could paint and stencil it, it will fit perfectly with my office theme and look spectacular!
I would so love to win this!
My little girls room in our new house. What a joy it would be for her to wake up in her very own flower garden :)
I have been dying to stencil a wall in my bedroom. This would make it super simple!
I want to do a stencil on a gallery wall I’m planning in my hallway.
So cute, fun, and simple! Love the fabric storage! Cute, cute! Just wish I had that much cute fabric!
I would love to stencil my stairway walls and a big clunky metal desk we have in our office nook.
These look so fun!
I’d like to stencil my powder room!
I have a new “craft cabinet” (since there’s no room for me to have a craft room) and I would love to do some cute stenciling on the sides of it!
I’d love to stencil a wall in the nursery I’m currently decoarting!
I would like to stencil a wall in my living room and a corresponding wall in my dining area the tie them together.
Cute! I would love to win a stencil like the one you used on your bookcase. I want to use it on the risers on my staircase!!!
I love to stencil and would so love to win this one!!!! This is Awesome!! I would love to stencil on a wall in my living room. This would be great for that!! Thanks for this fabulous giveaway!!
I have a bookcase that would look fabulous with a stenciled back!
I would love to stencil the wall in my sewing room. And can I please say that I am totally jealous of your fabric idea of hang in them. Love it!
I would like to put some words of wisdom on our dinning room wall, or a family tree. You are the best, just love CraftaholicsAnnonymous. :-)
I have two boring nightstands I’d love to stencil!
A quote for a wall in my craft room
I plan on decorating my son’s room and some pillows with the birch tree stencil. I’ve been in love with it for months!
i LOVE LOVE LOVE stencils! i would use it on anything i could get my hands on without getting in trouble!
I’d like to stencil my bathroom walls.
My daughters room!
I’d like to stencil my guest bedroom walls. Thanks for the chance!
I’d like to stencil my wall.
I would love to stencil my office floor. its concrete.
The back of an office cabinet!
Beautiful project and outcome. Thank you.
Great job on your stencil! I am always afraid it will bleed through but yours turned out great!
I would like to do something new to my craft room!
I really want to stencil one od the walls in my family room. It would add so much to that room! Thank you for the awesome giveaway1
This would be an awesome give away
I love the stenciling on the book shelf!
Gives me ideas for my small crafting area in my
apartment bedroom…Love the way you also hang
your fabrics….great ideas!
I’d like to stencil the wall behind my wall mounted tv.
i would stencil either my kitchen cabinets or the bathroom. those need a pop of excitement.
Awesome stenciling!! Great way to had a little pizaze!! Thanks for the giveaway!!
I would love to stencil my craft room!
I’m thinking that I’d like to stencil the walls of my craft room closet.
I love it! Fantastic tutorial. I hope I win. I’m feeling creative!!!!
I would like to stencil my walls.
I’d love to stencil a wall or two!! Most likely the bonus room!
I need to spruce up the wall of my little princess’ bedroom