


Tutorial Week: One of my fabulous readers, Jodi, sent me a link to a project inspired by Country Living’s Pine Cone Door Hanging. And needless to say, I fell in love with the concept. So here’s my twist on a CL classic. {This was a last minute addition to Tutorial Week.}
Ok, back to tutorial mode. Where was I? Oh, this would be a great project for the kiddos to help out with: they could round up the pine cones and help hot glue (with assistance!) the ribbon on. This should take you all of 5 minutes to do or so.

Supplies needed:
- 7 Pine Cones, cleaned off (you can do more if you want)
- Ribbon, cut into seven 18″ strips and one 6″ strip (I used 5/8″ ribbon)
- Frame (mine is an 11″x14″)
- Scissors
- Hot Glue Gun

Take each pine cone and put a dot of glue on the top.
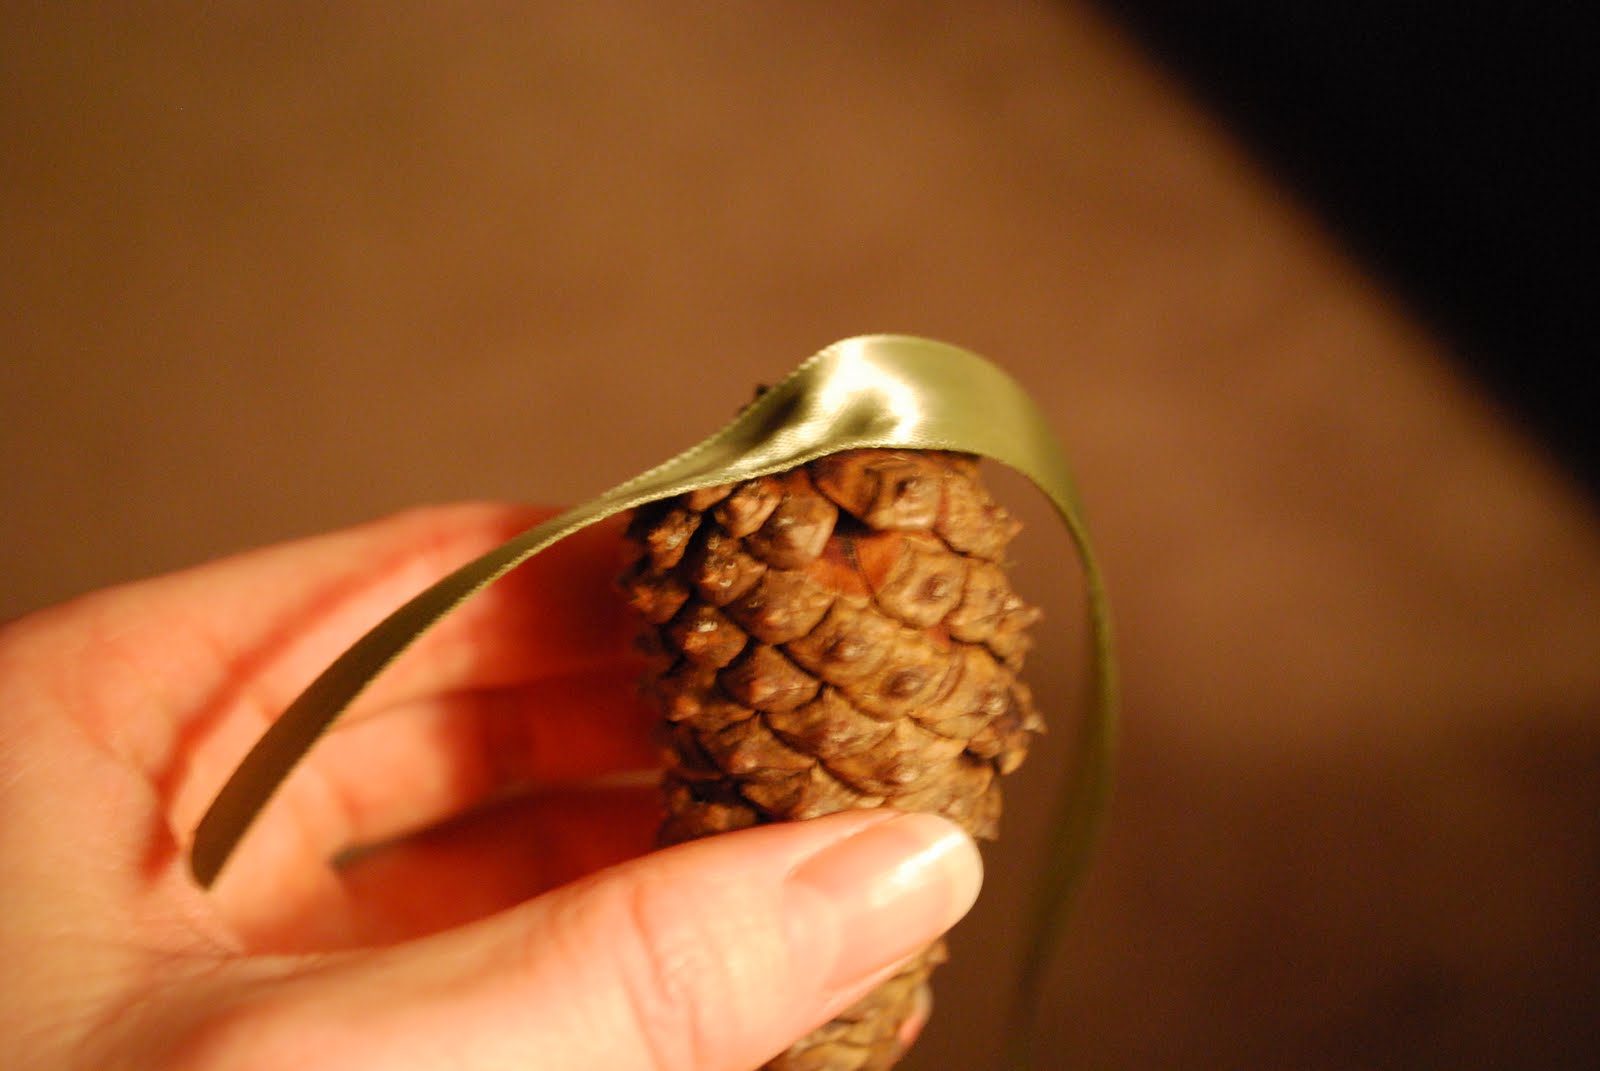
And press ribbon in place. Leave about 3″ over hang. You can trim it later if you don’t like the look or want a shorter over hang.

Then arrange and stagger your pine cones so that they hang at different lengths. Determine how far you want them to hang down (measuring with your frame) and pinch the ribbon at your chosen length.
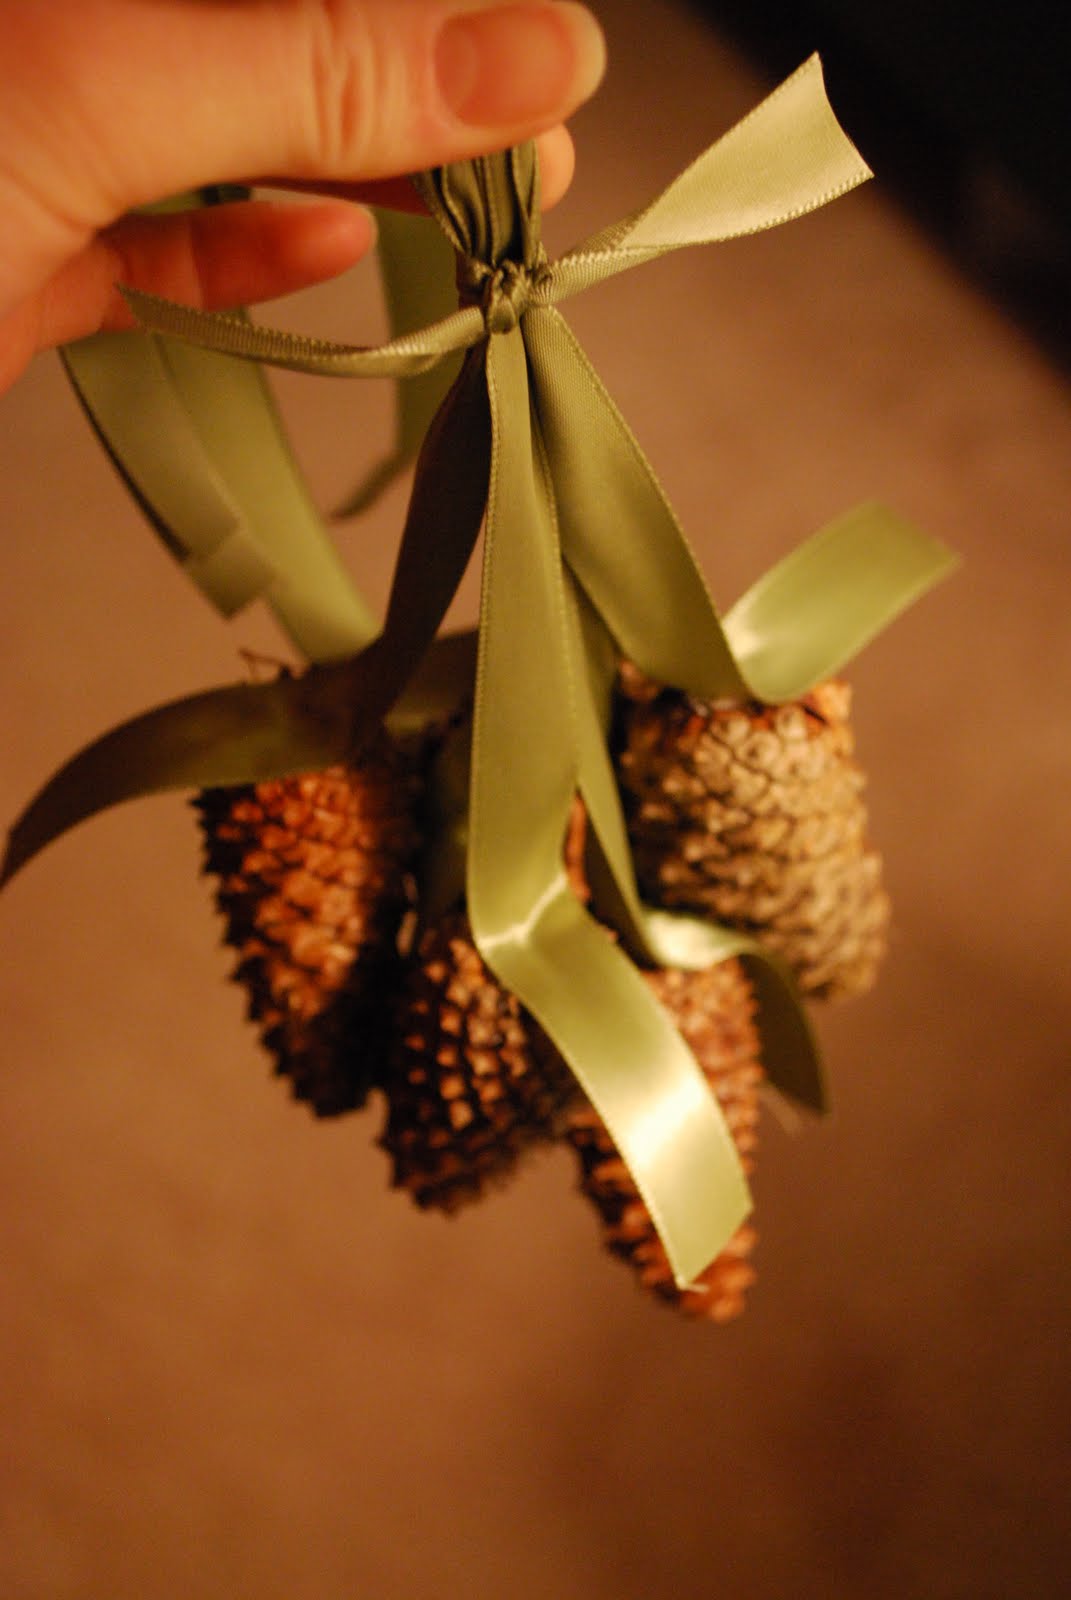
Now take your 6″ strip of ribbon and wrap it around the ribbon and tie a knot.Then trim your ribbon as necessary.
To hang your pine cones, hammer a pin or tiny nail through the ribbon and into the wall right below the knot. Be sure to catch all the ribbon strands with the pin/nail.You’ll probably want to arrange your pine cones a little. Mine got jumbled in the hanging process. After you have your pine cones situated, hang your frame. I found it was easier that way, than trying to redo the pine cones if I hung the frame wrong.
I just love this simple wall hanging! So simple, so gorgeous!


Hi! I'm Linda, the craft addict behind Craftaholics Anonymous®, a craft blog. Crafting is cheaper than therapy, right? When I'm not DIYing something, I can be found taxiing around our 4 crazy kids or working out. Or shoe shopping... because you can never have too many shoes! Happy crafting! ♥
Latest posts by Linda (see all)
- Powder Room Makeover - Mar 25 2019
- Raspberry Sweet Rolls Recipe - Mar 12 2019
- Farmhouse Spring Wreath - Feb 19 2019
super cute! I love it
Beautiful project, thanks for linking up!
This is so cute! I filed this away at thecraftersfilebox.com.
Thanks so much for sharing! Can't wait to see what you do next! :)
This is a great project! I just bought a huge bag of pinecones for 25 cents at the thrift store and I have tons of frames so I'm going to make this. Thanks for the inspiration.
Jane
Cute cute Cute!! Gonna do it!
Keelie
I LOVE this idea! It has the 3 elements for me; quick, easy, and inexpensive! Looks gorgeous too. I've used tons of pine cones this year (made my own tree from them, knock of of one I saw in Target – posted on my blog). I think I may have to find an empty frame today!
How creative, I love it!!
Beautiful & chic! Love it!
What a great project!! Cheap and fairly easy!!
I LOVE this!! And you could "glitter" it or put faux snow on it!!
I'm a glitter freak!!
Lou Cinda :)
That is gorgeous! How do you do it all? All the time? I am featuring this one too! (at somedaycrafts.blogspot.com) People will love this one!
That's beautiful! We'll be trying this for sure.
Wow…What a great idea! I love it!
Fun idea, I am excited to try it.
This looks really rich. Wonderful idea.
@cheapchichome.blogspot.com
I love it too! I am totally doing this! My neighbor has a ton of pinecones on their lawn so I just have to go swipe some!
I am so loving this one that I am going to click "follow" so that I can come by more often. Please visit, see my craft and don't forget to click "follow" & "subscribe" so that we can share our creativity often.
Really cute, fresh idea!
This is my favorite project yet….love it. Laura @ the mansion
What a fun little project! I love it! Thanks for sharing! I'm so glad I found your project so that I could be a part of tutorial week. I love those 2-minute fabric flowers! Adorable. Thanks!
Happy Thanksgiving!
Linda I love this!! Thanks for linking !!! See ya next Wednesday!
Becca @ Blue Cricket Design
I love this Thanks for posting to the party.
Happy Thanksgiving,
Cheri
I love it!
Creative wall art for the holiday is totally my thing – TFS!
That is just too cute!
Happy Thanksgiving!
Dena
I love your use of natural materials and how simple but elegant it turned out.
That turned out great!
Thank you for sharing your project, it came out great!
SheilaC
oh good grief! how simple is that…I LOVE it!!!
Love it!! Thanks for sharing
barbara jean
You've been featured.
Cheri
A total winner! It's sweet, price efficient, unique and easy! Love it.
Thanks for linking up!
FJ Donna
No matter what others say, I think it is still interesting and useful maybe necessary to improve some minor things
Pingback: fall or winter decor | Craftaholics Anonymous™