


I don’t currently have a baby, so I traded my sister this Straight-Jacket Swaddler in exchange for pictures of my nephew using it!

It’s nice and tight, holding in the baby with secure Velcro; with a strap between the legs to keep it from ending up around your baby’s face. And not to worry, my daughter used one I made and was secure at night, but still able to wiggle her arms out the top in the morning when she was really awake and trying.
So let’s make one!
Supplies:
- 1 light weight receiving blanket or 1/2 yd of lightweight flannel – washed, dried and ironed
- 1/2 yd (18″) of 2″ wide Velcro
- washable marking pen
- basic sewing supplies.
- Optional:
- double fold biased tape for edging (I did not use this, but will show you where you can if you want to.)
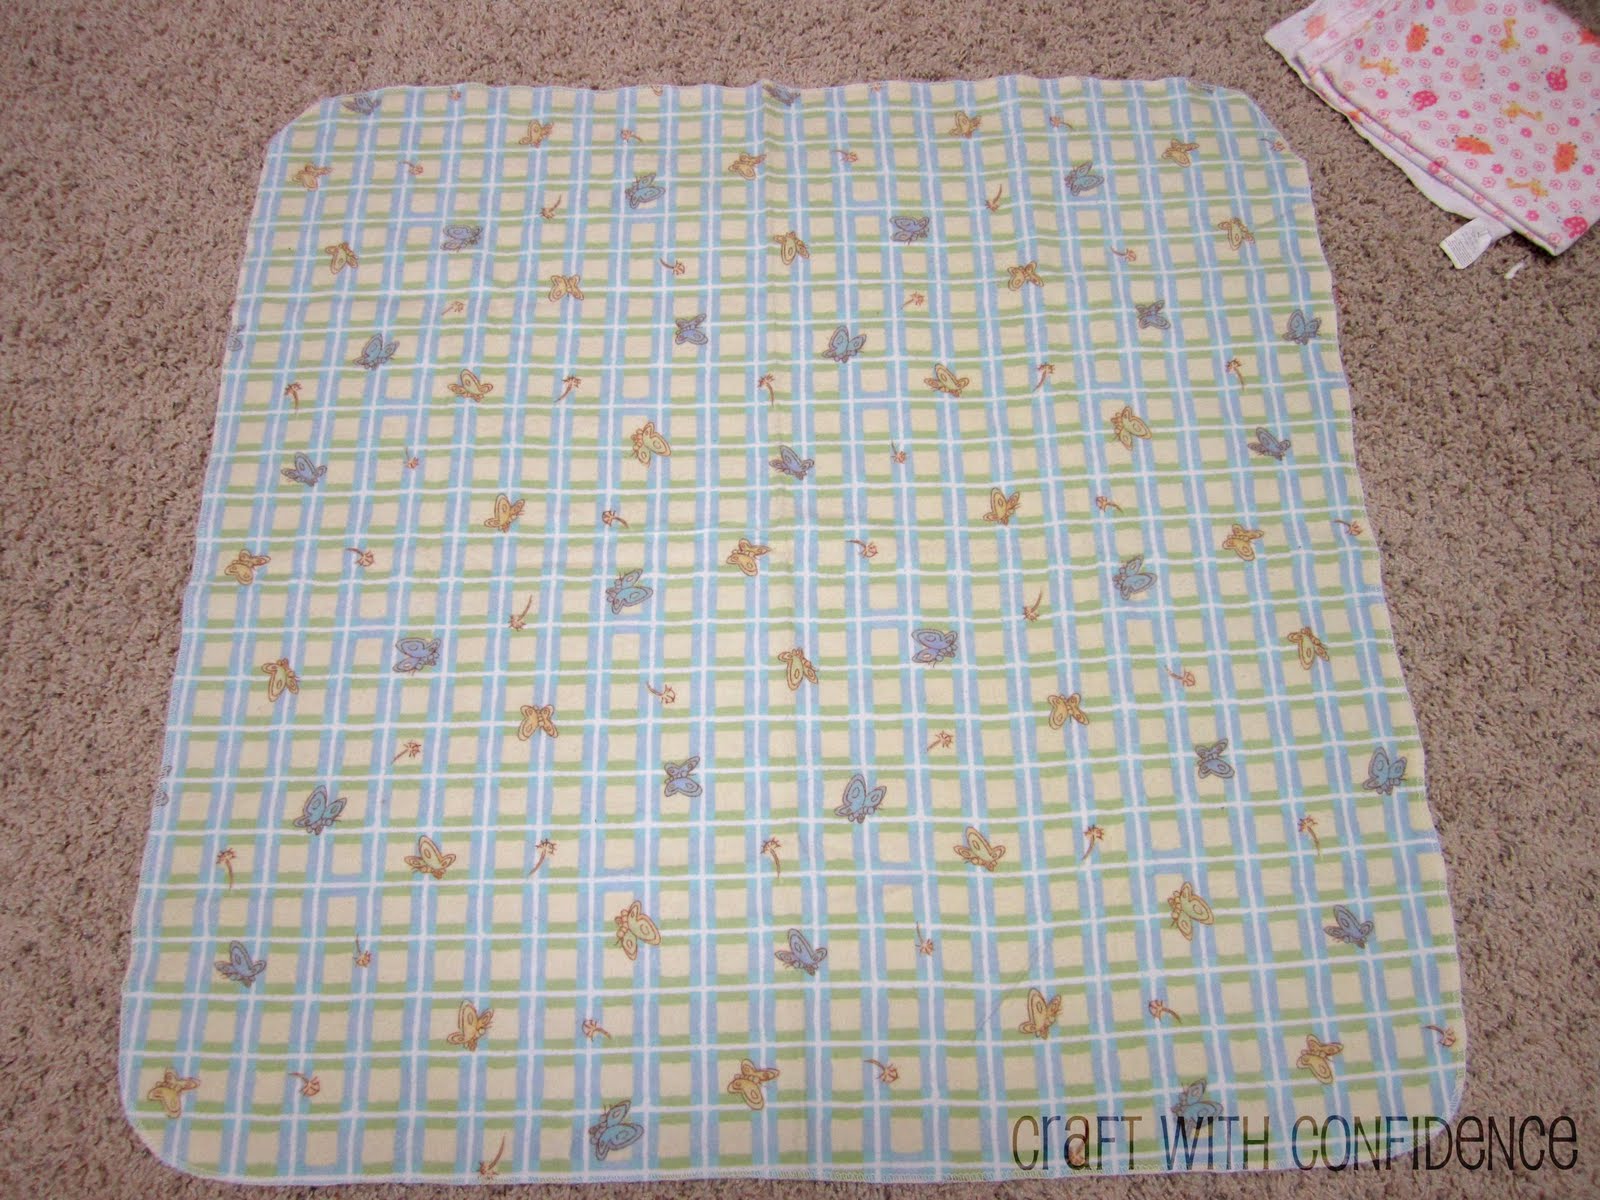
Cut a rectangle that is 27 1/2″ wide,

and 12″ tall.
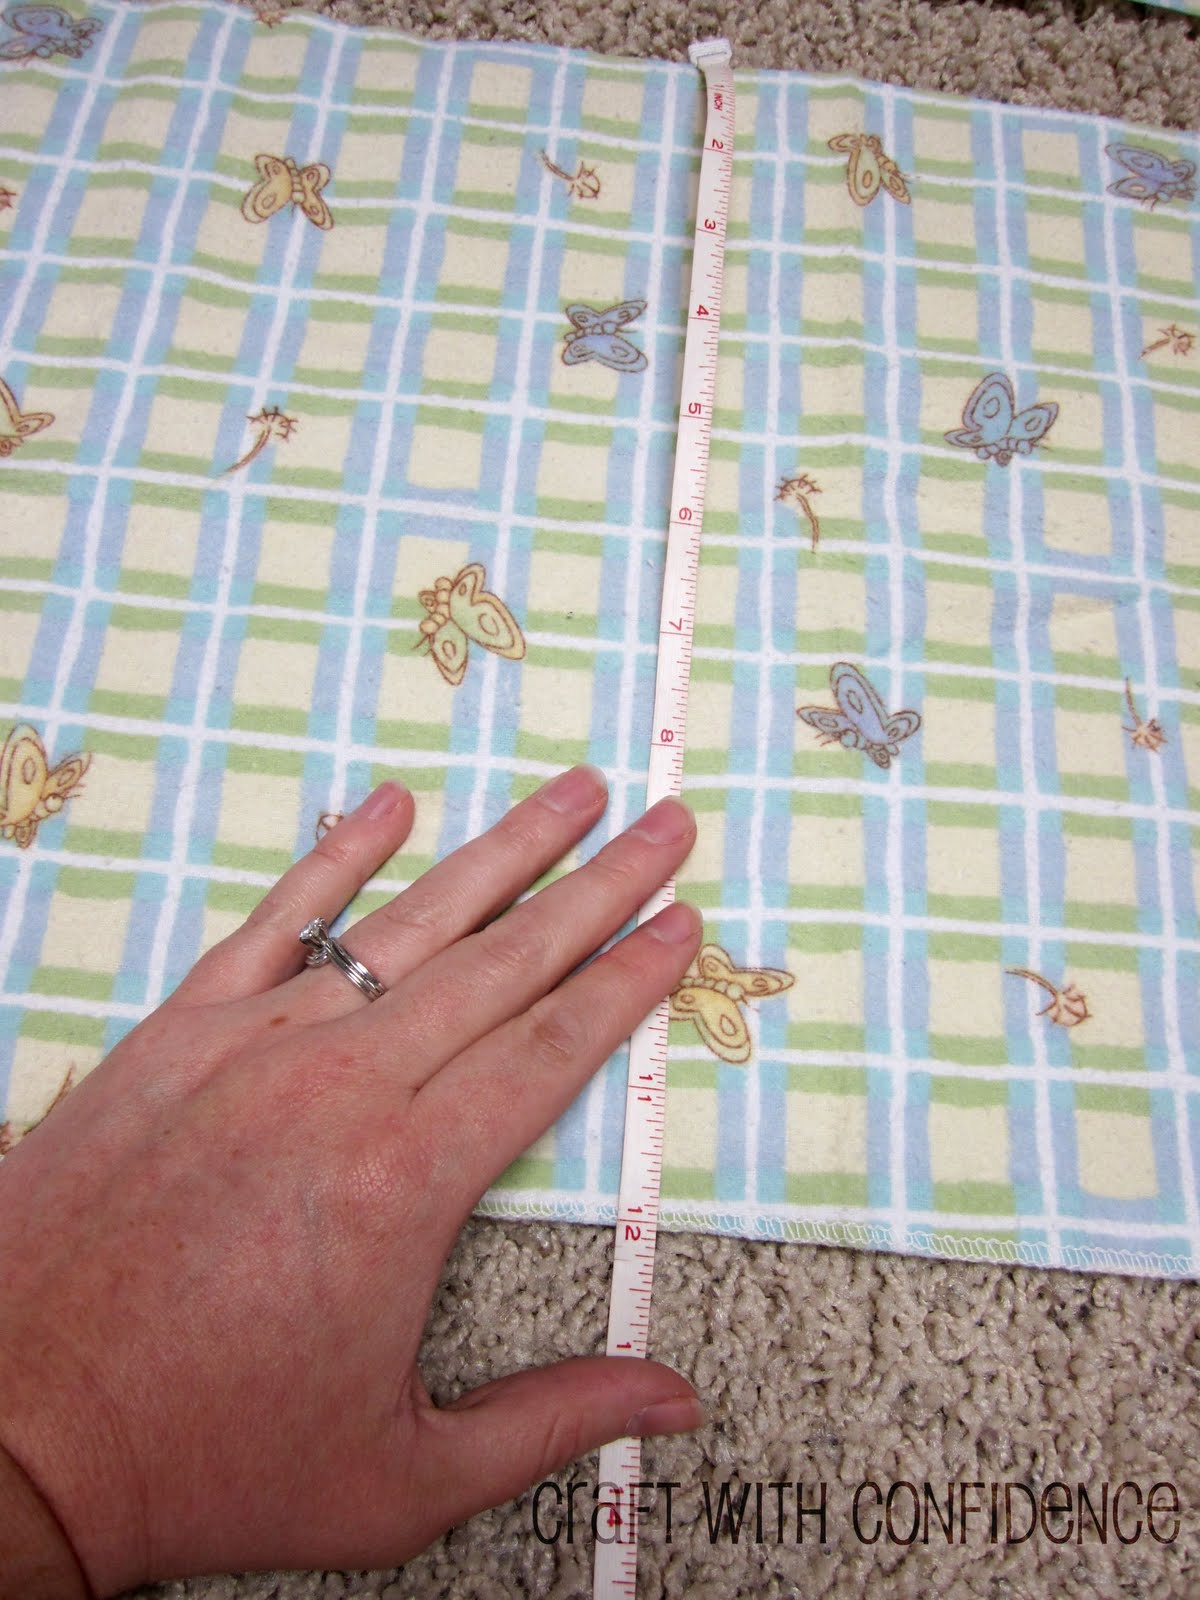
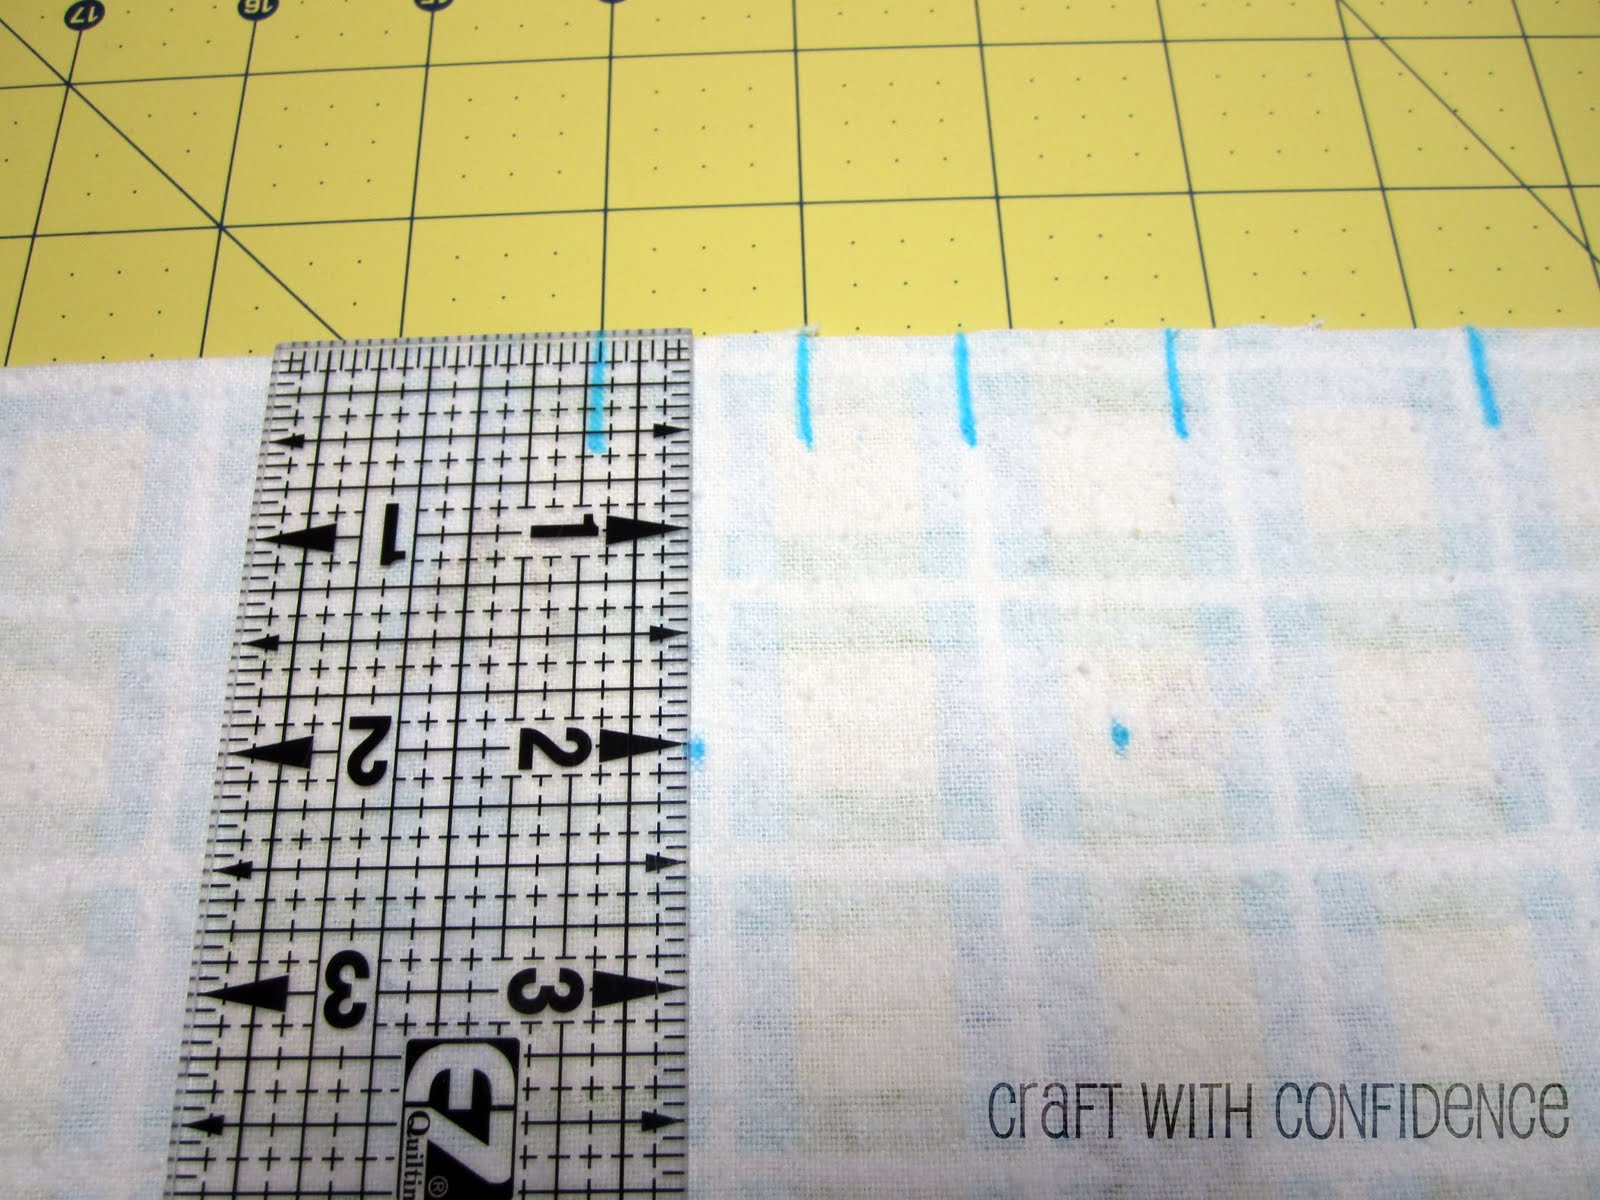
The next step is to create a spot for the neck of your baby with four darts using your marking pen. To mark the darts, lay your rectangle wrong side up and measure 6″ from the center of the top right rounded corner (or 7″ from the right edge) along the top long side and make the first mark. Your markings will be spaced like the following picture shows; you should have 8 marks.
(Spaces from the first mark right to left: 1″ – 3/4″ – 1″ – 1 1/2″ – 1″ – 3/4″ – 1″)
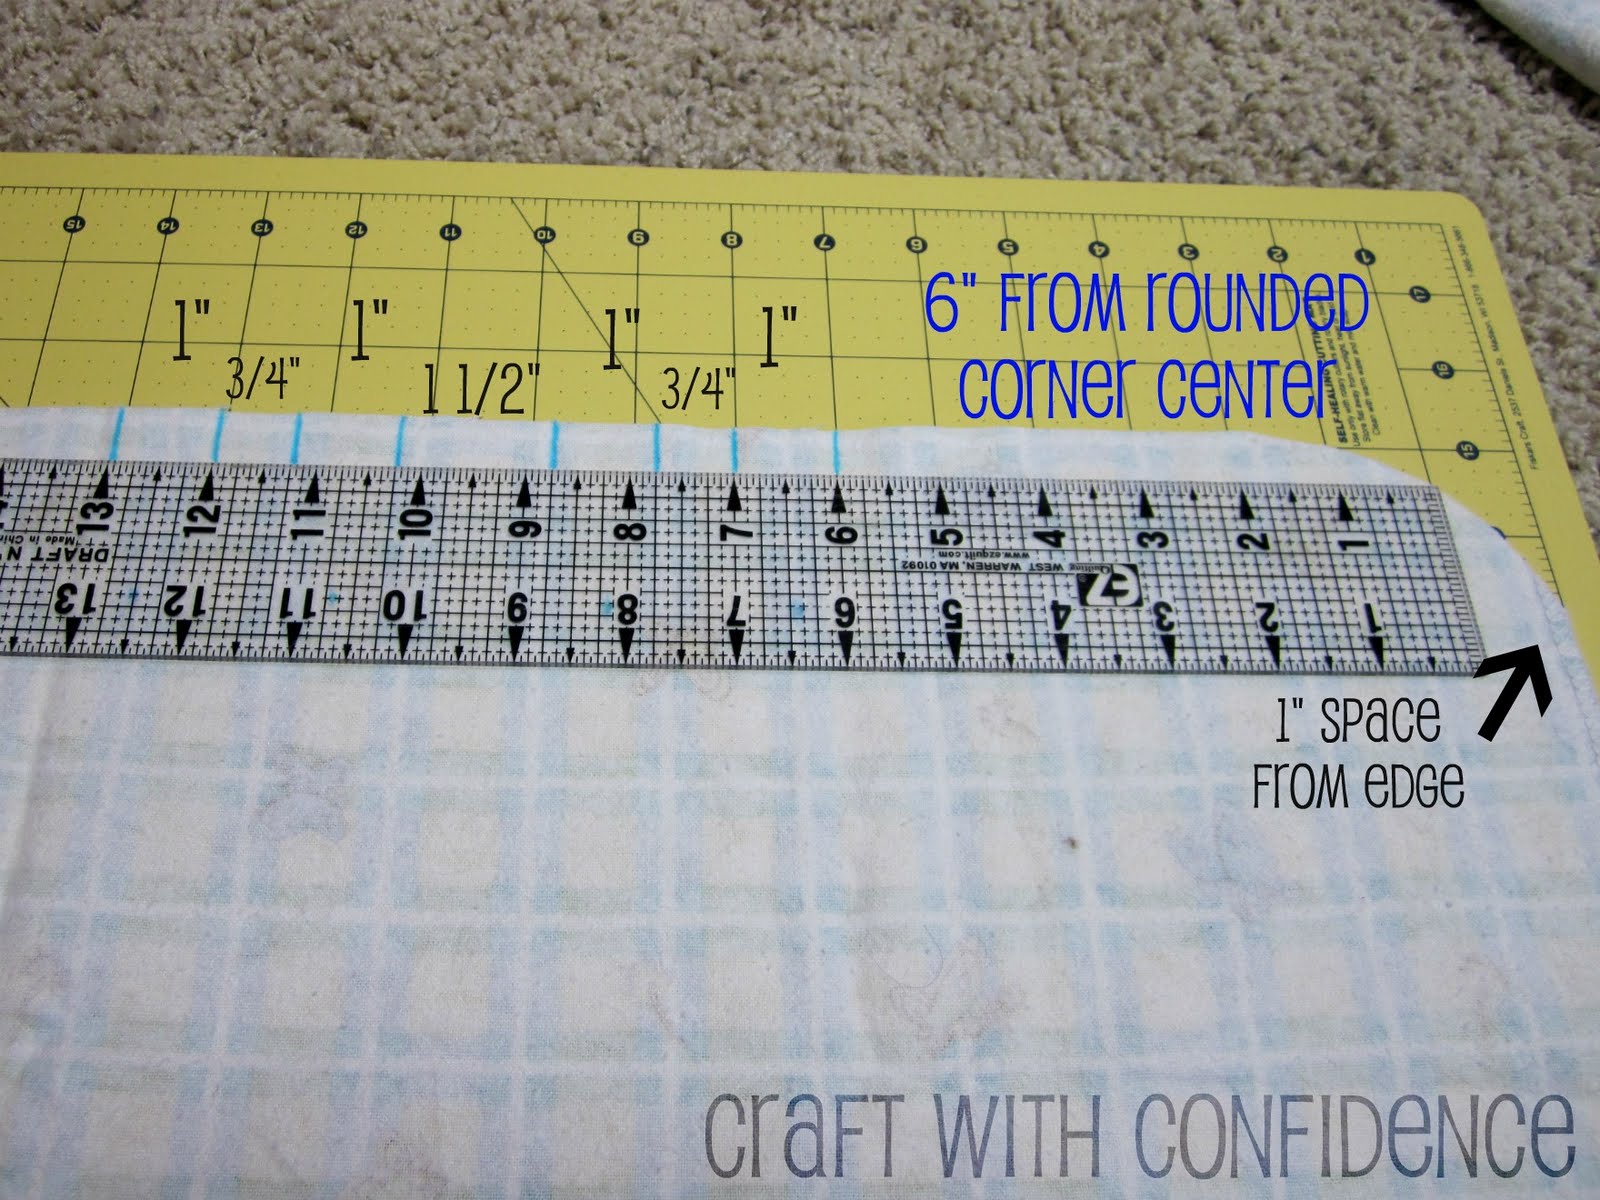
In the center of each 1″ space you just marked, measure down 2″ and make a dot.
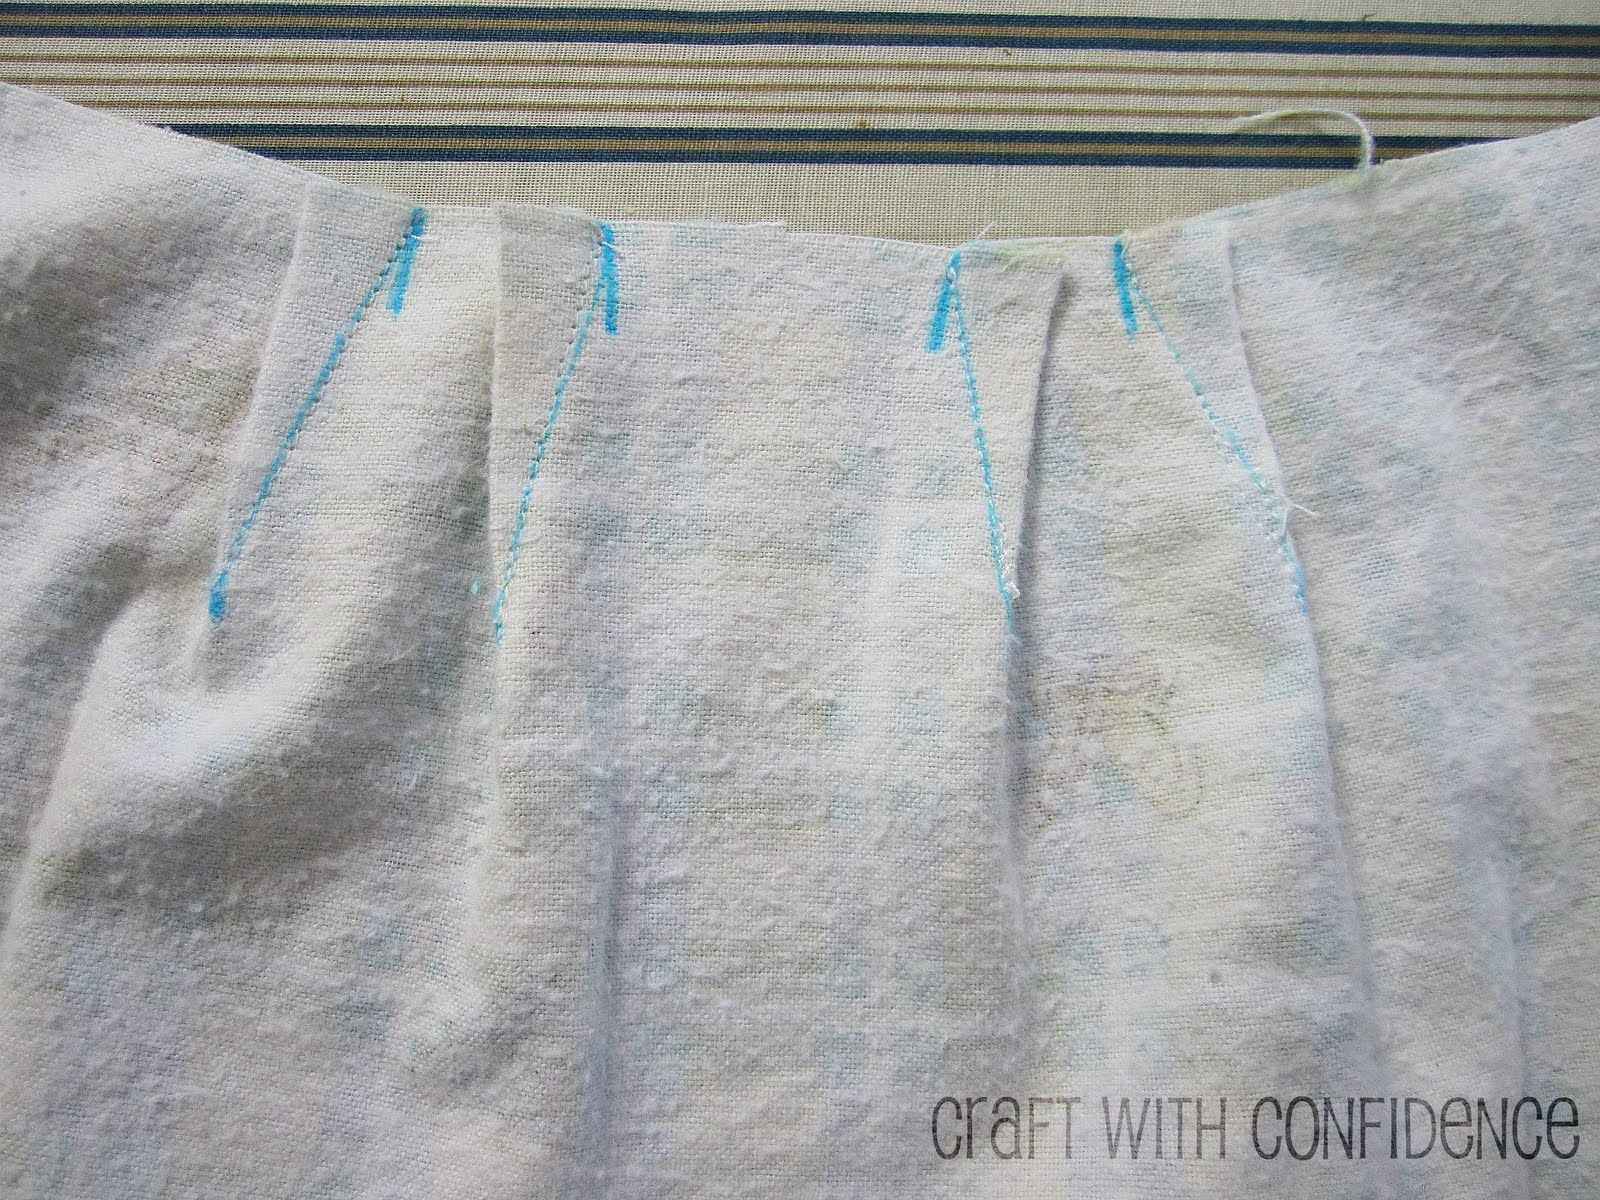
Connect the 1″ marks to the dots to make 4 triangle darts.

Fold the fabric to match up the lines and sew along the lines, backstitching at start and stop on all for darts.
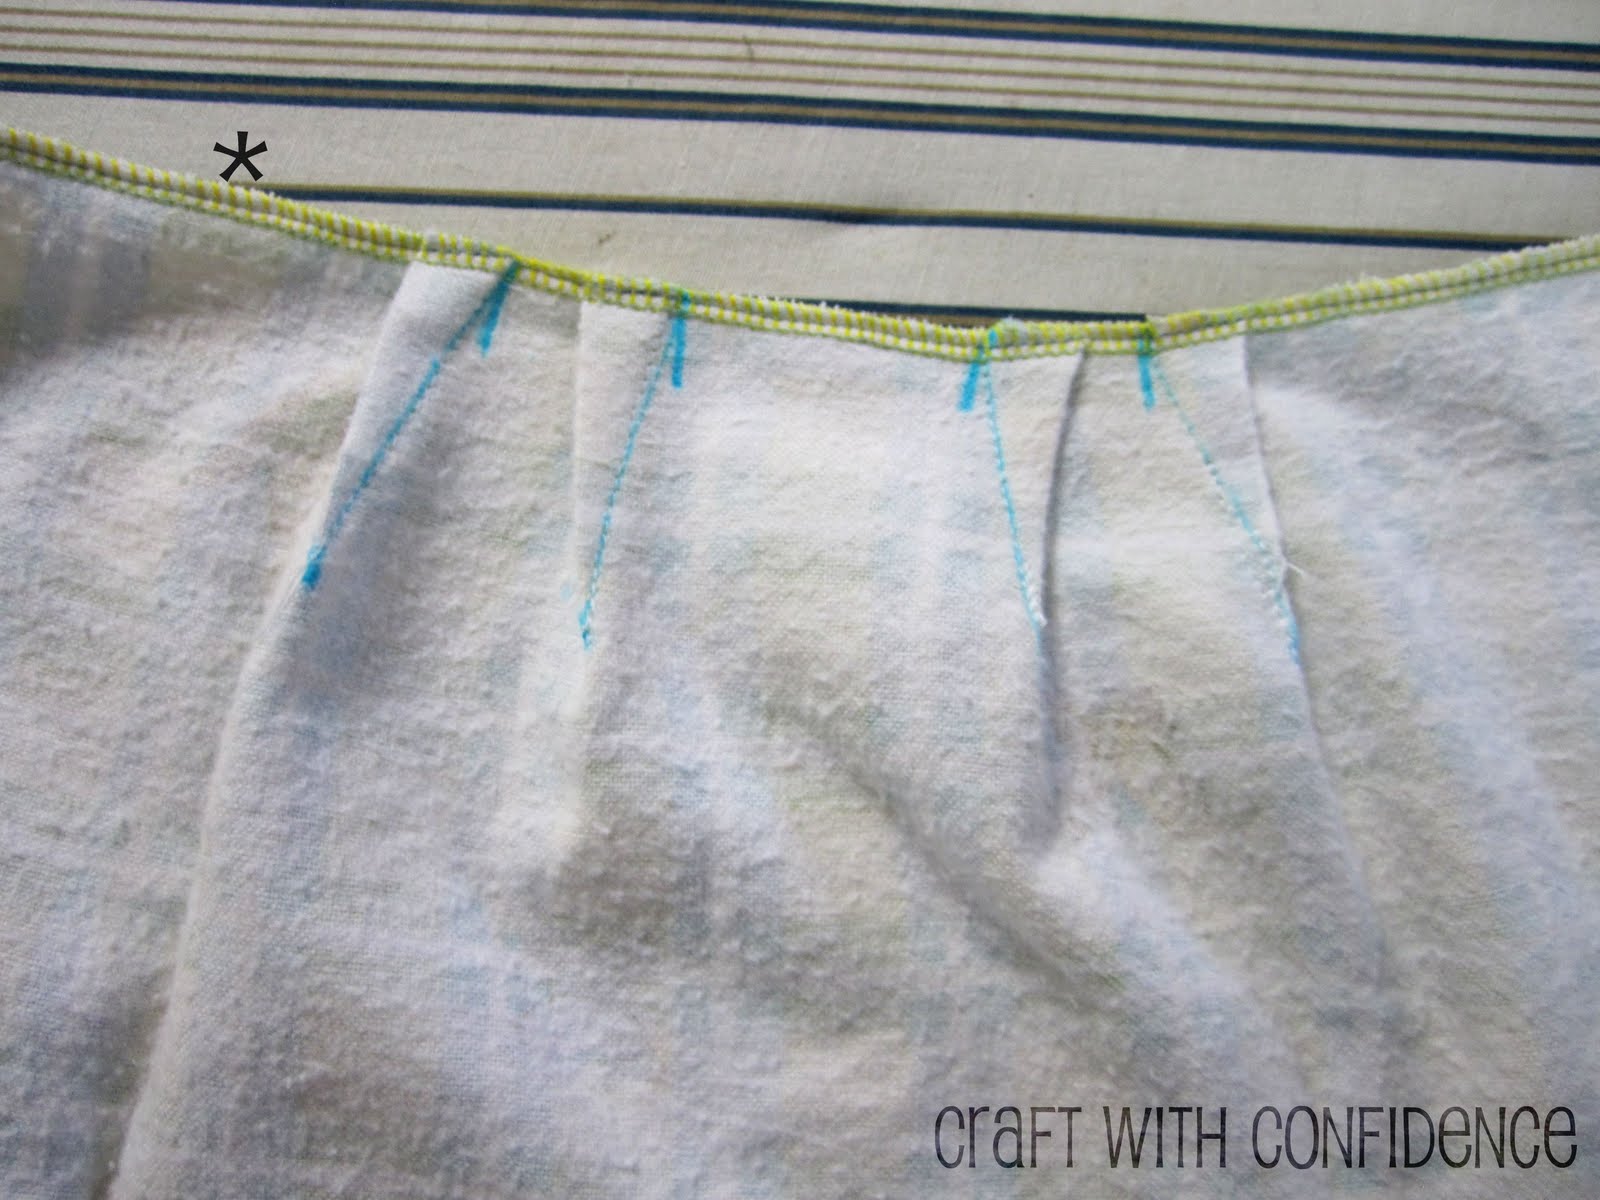

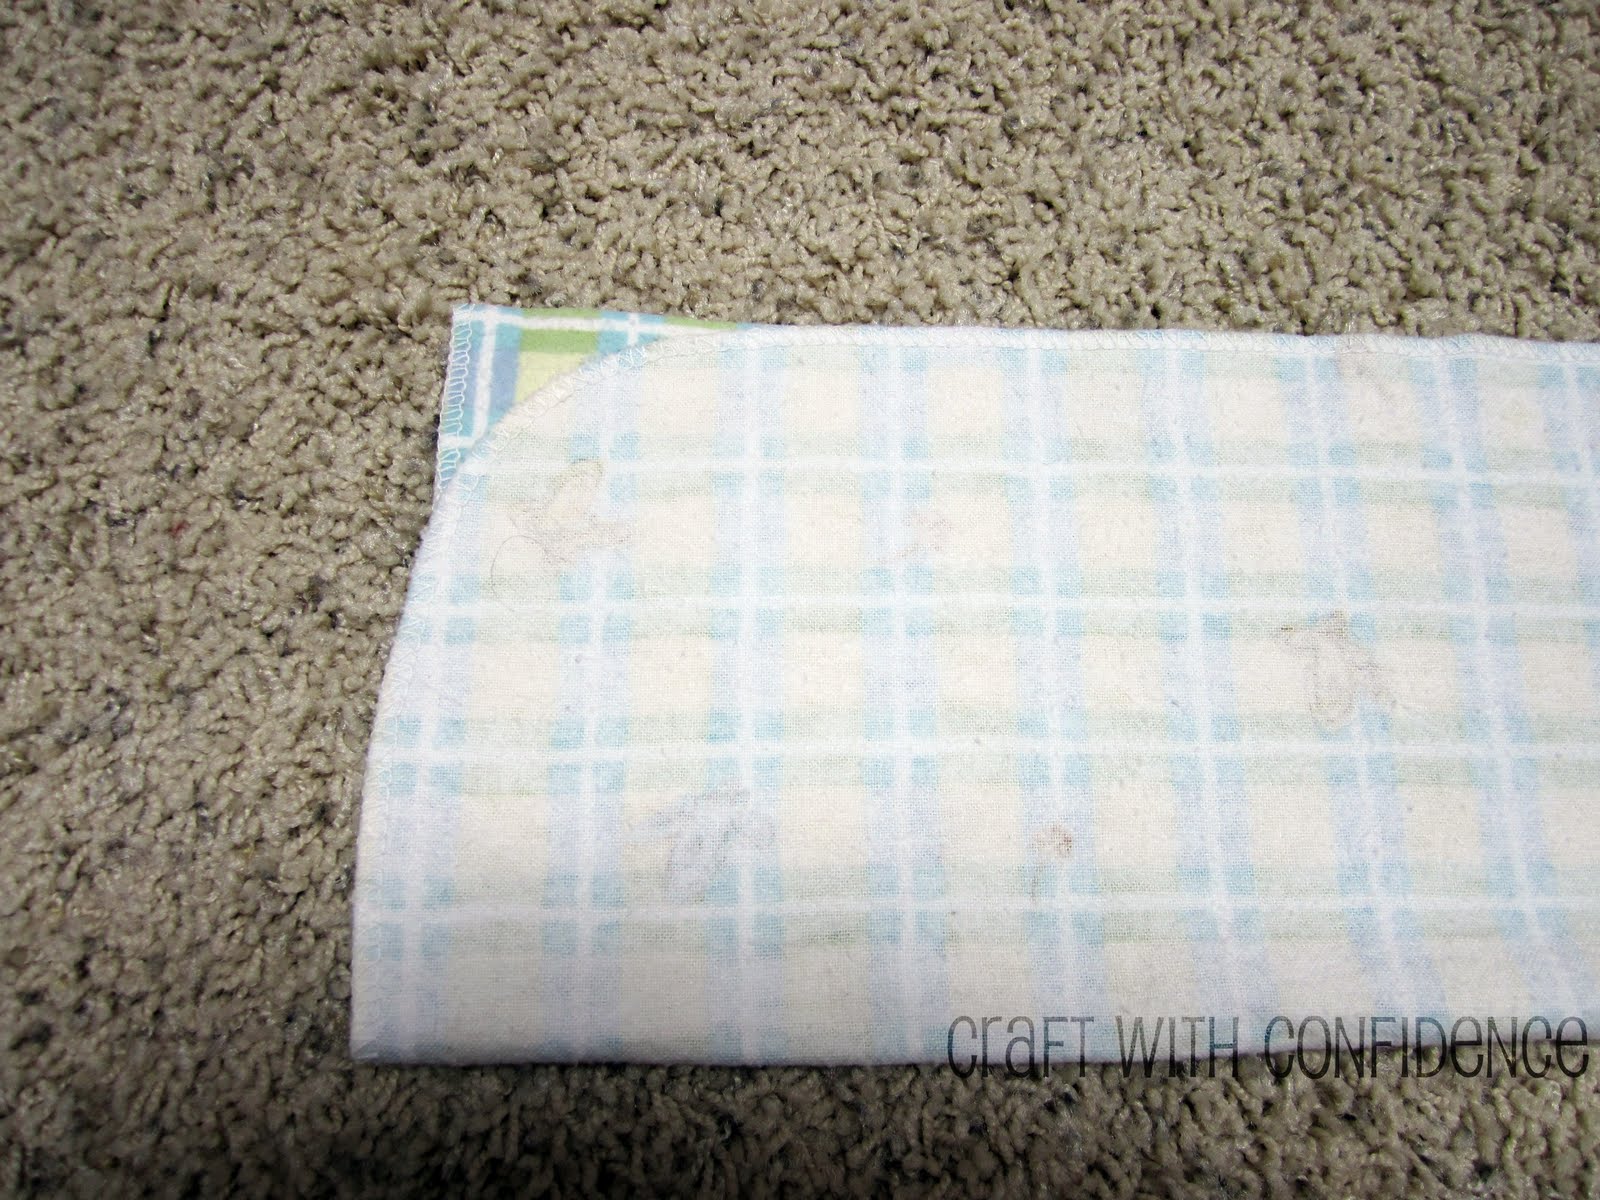
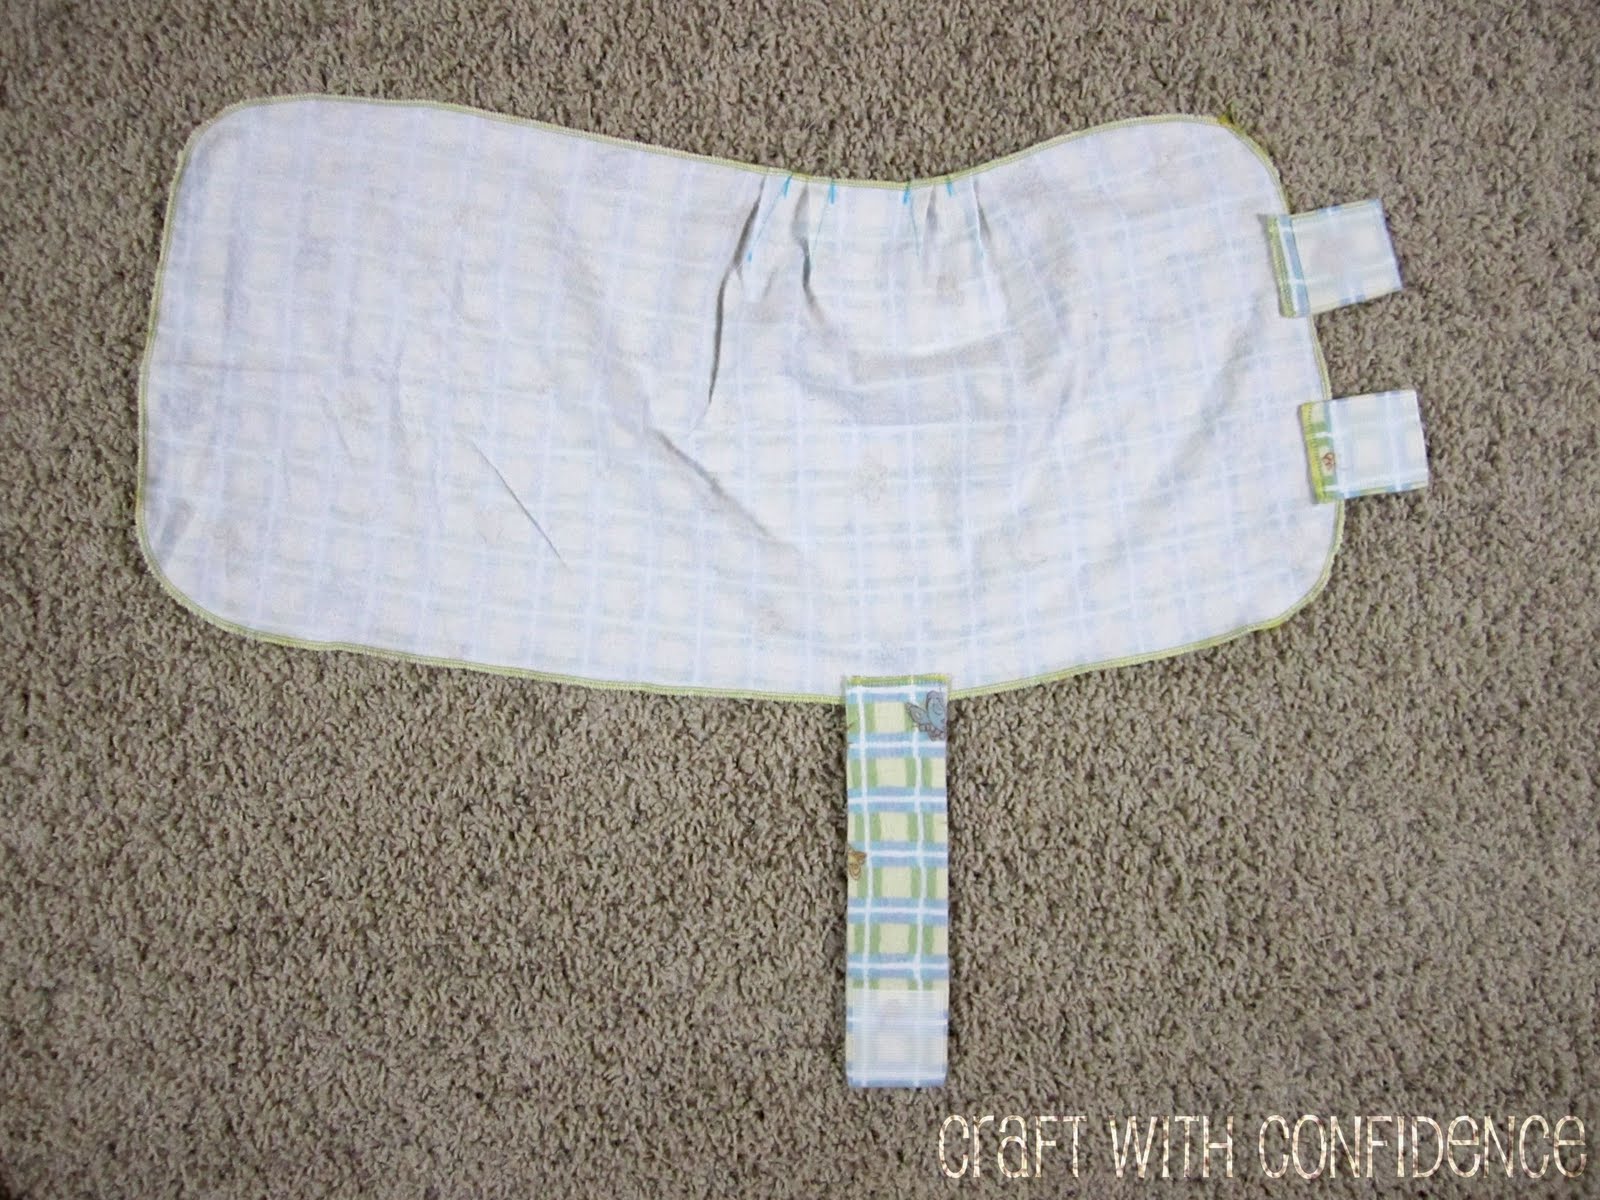
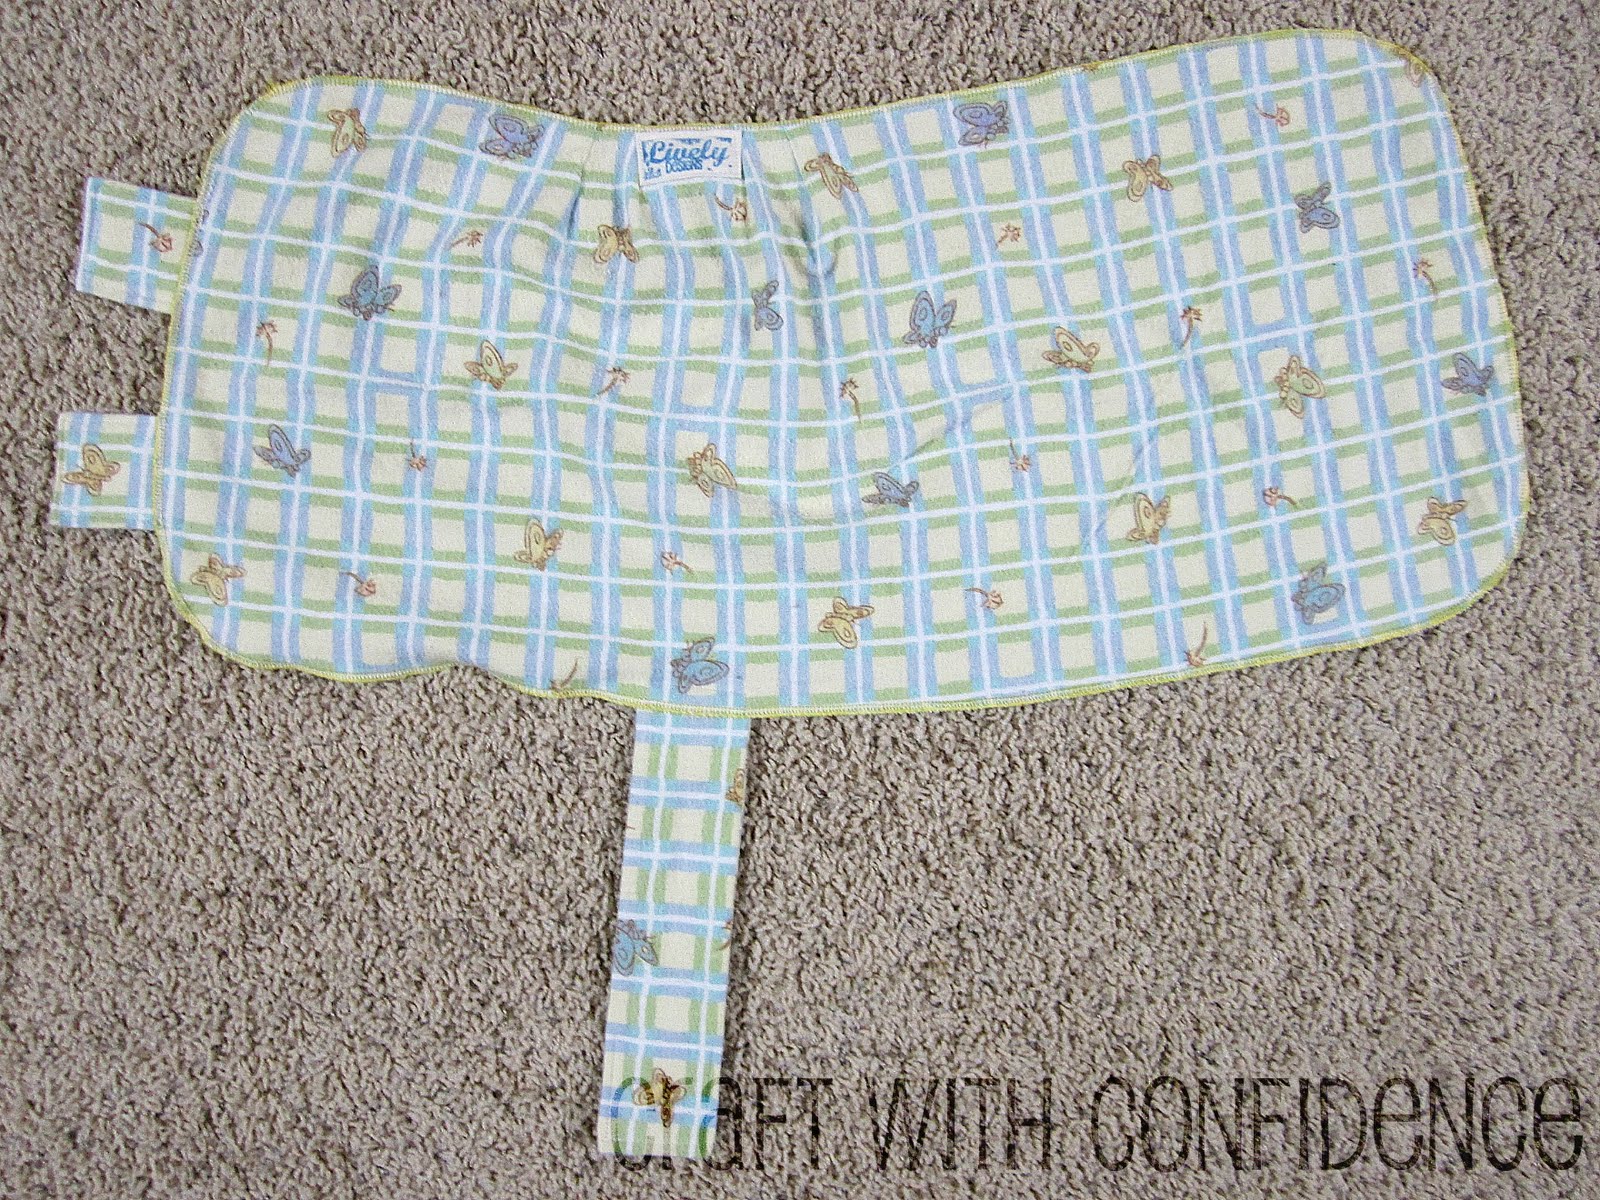
Turn and press. Serge/zig-zag unfinished edge.
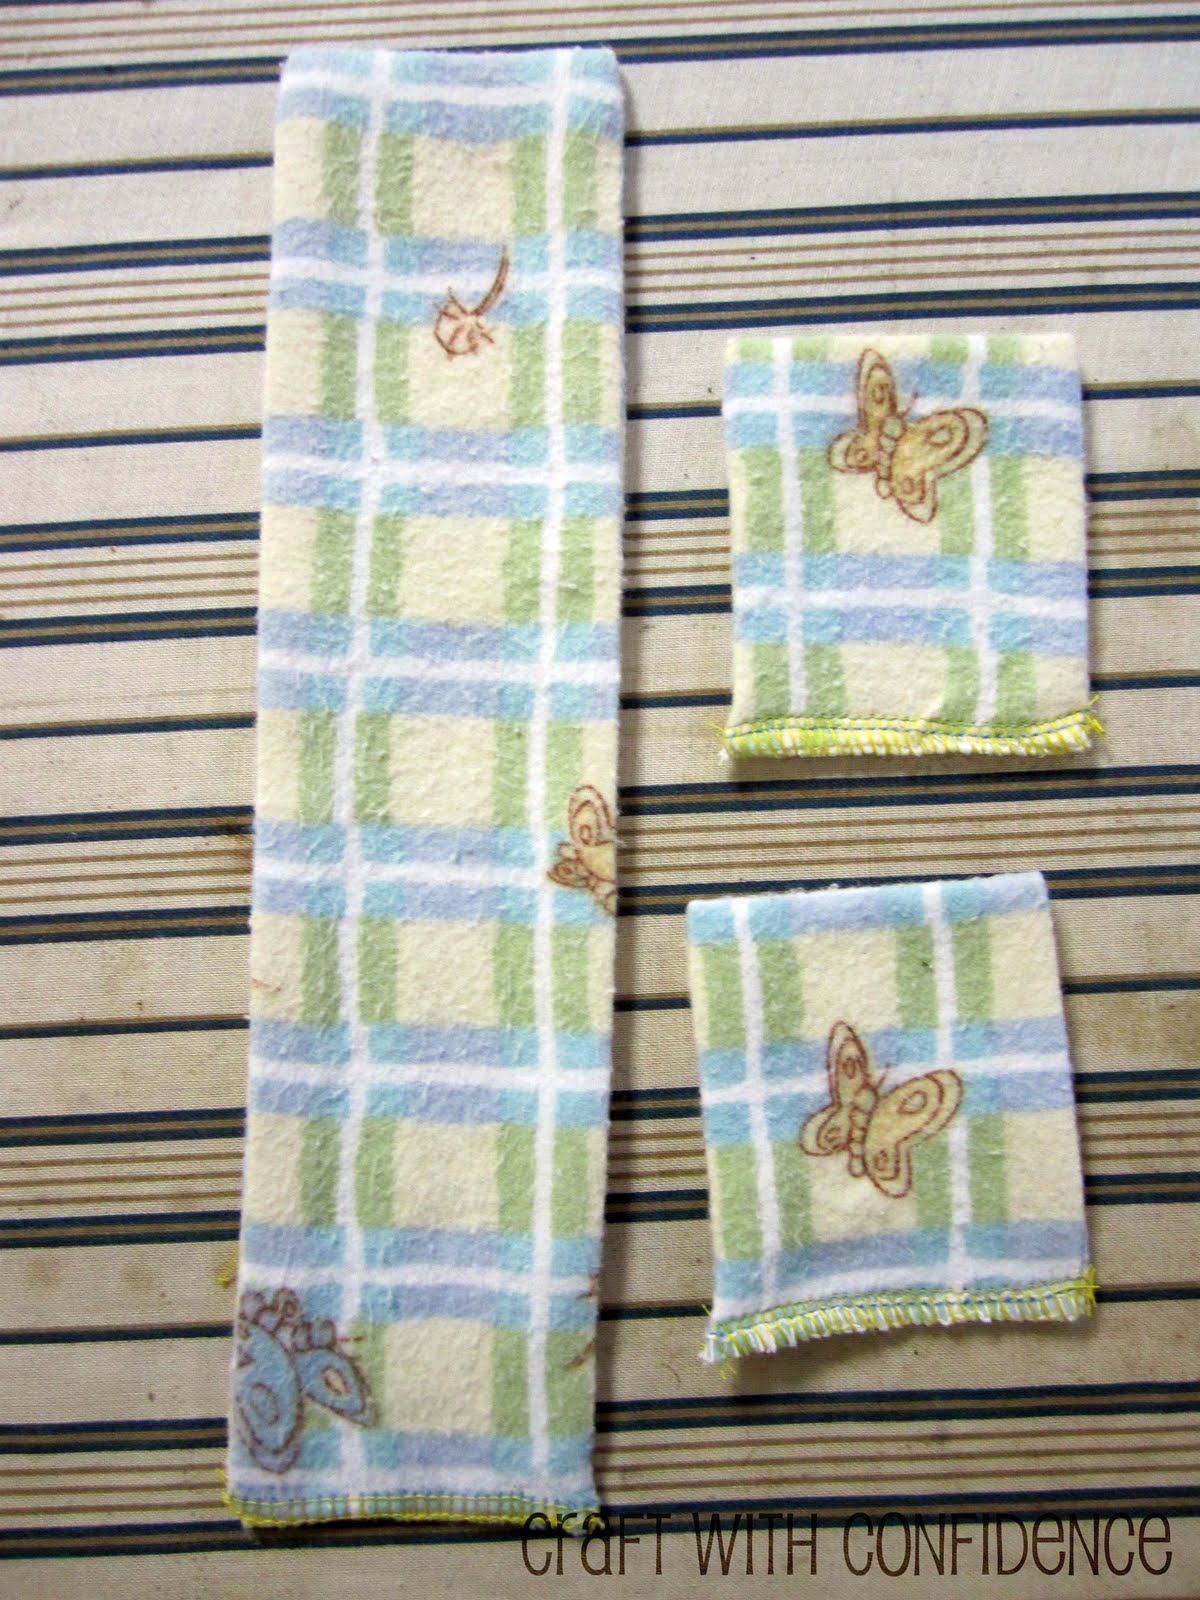
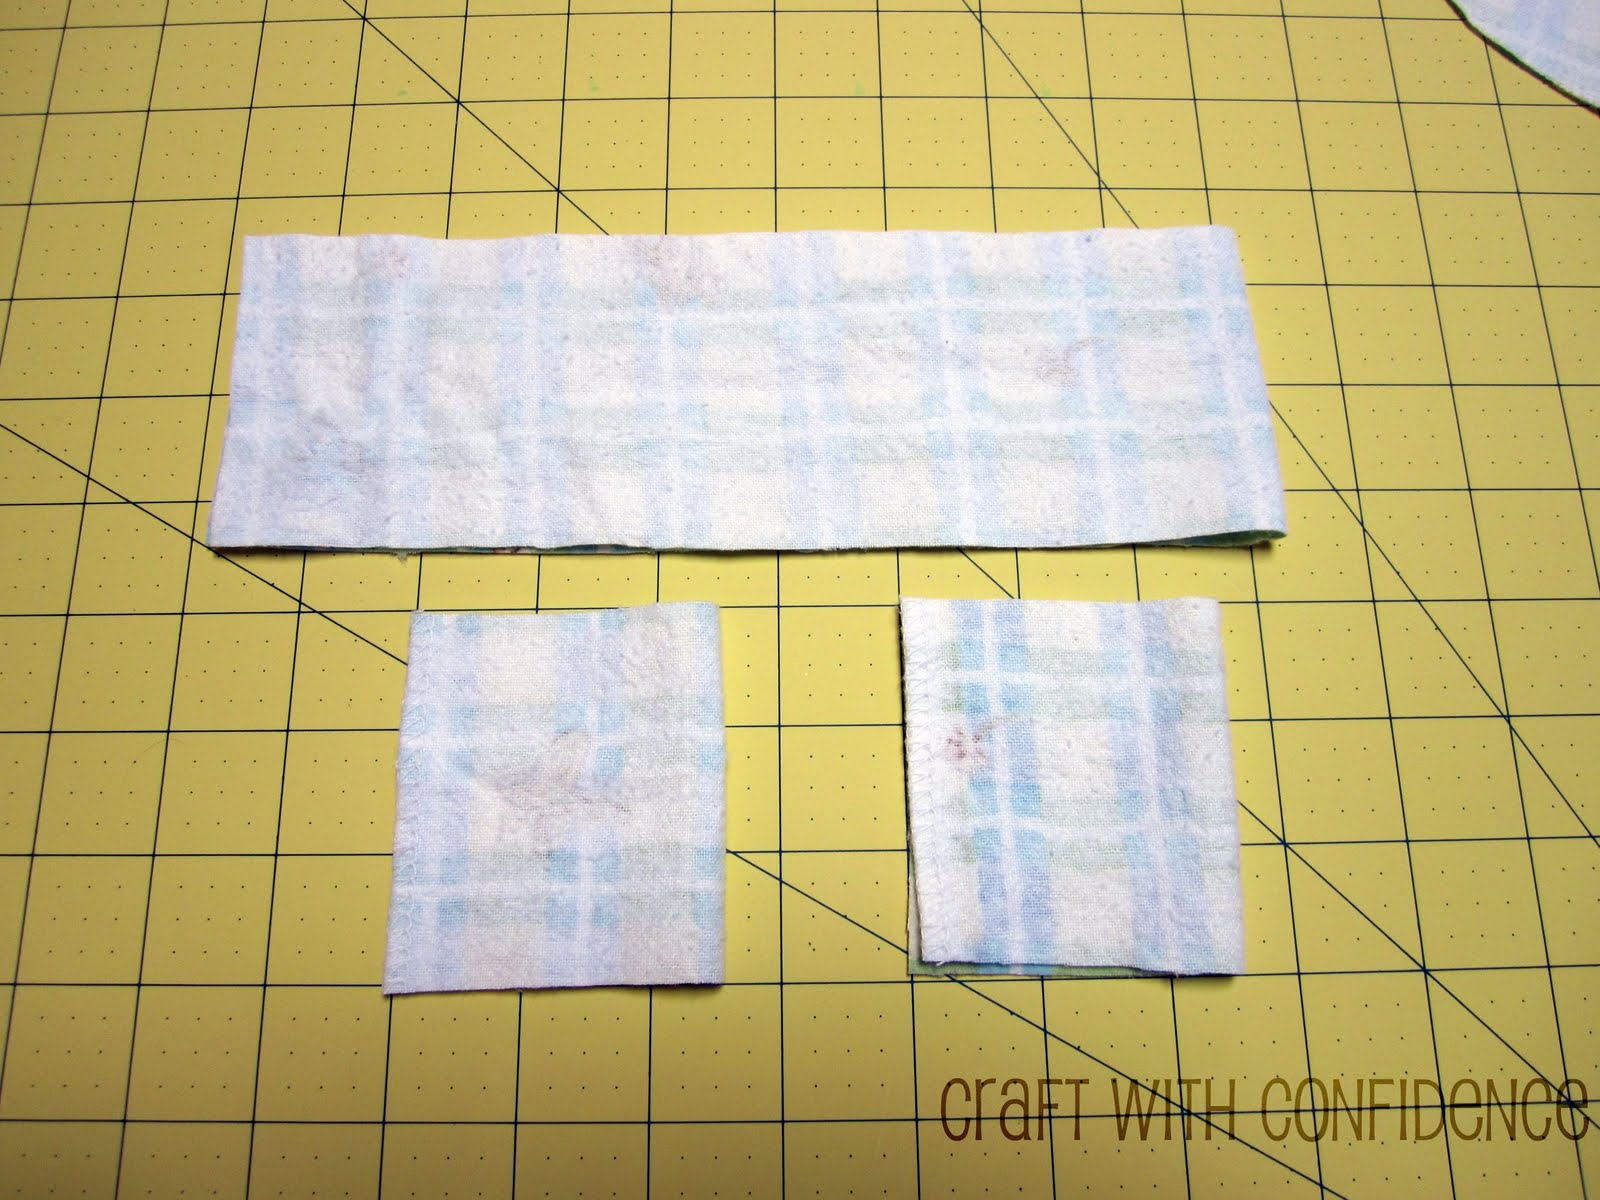
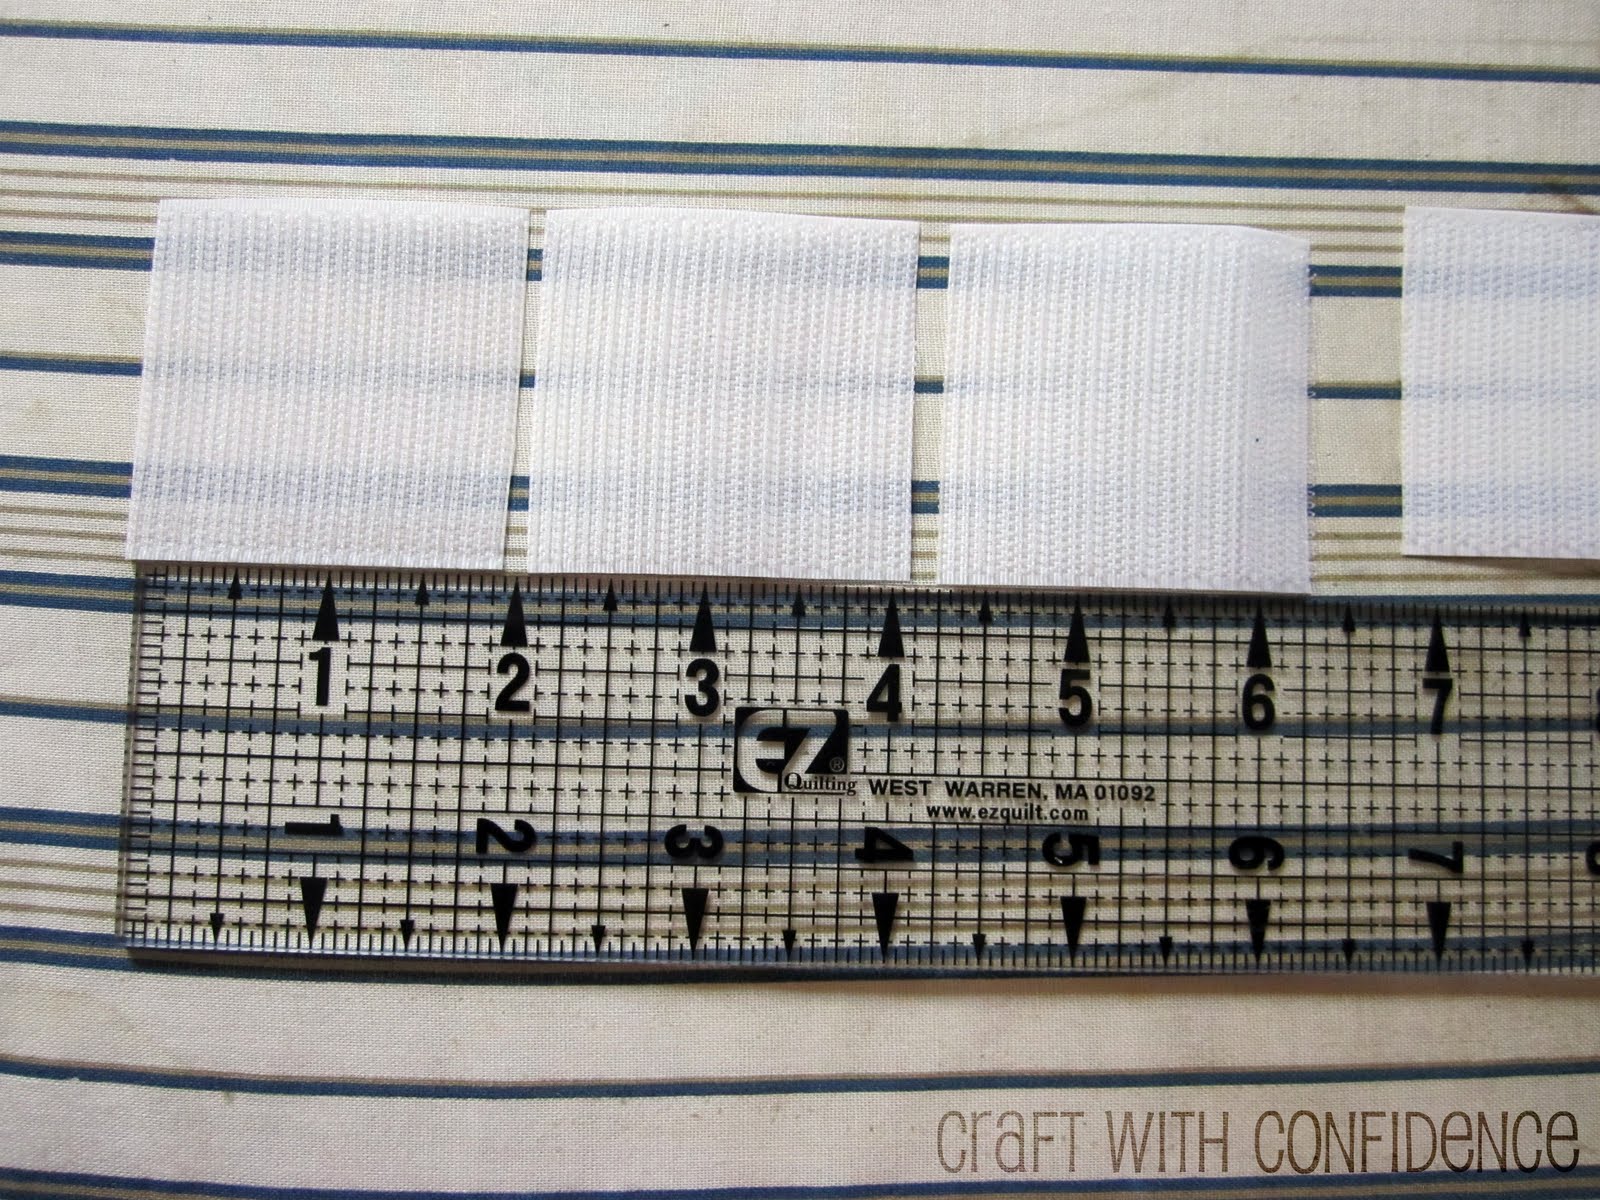
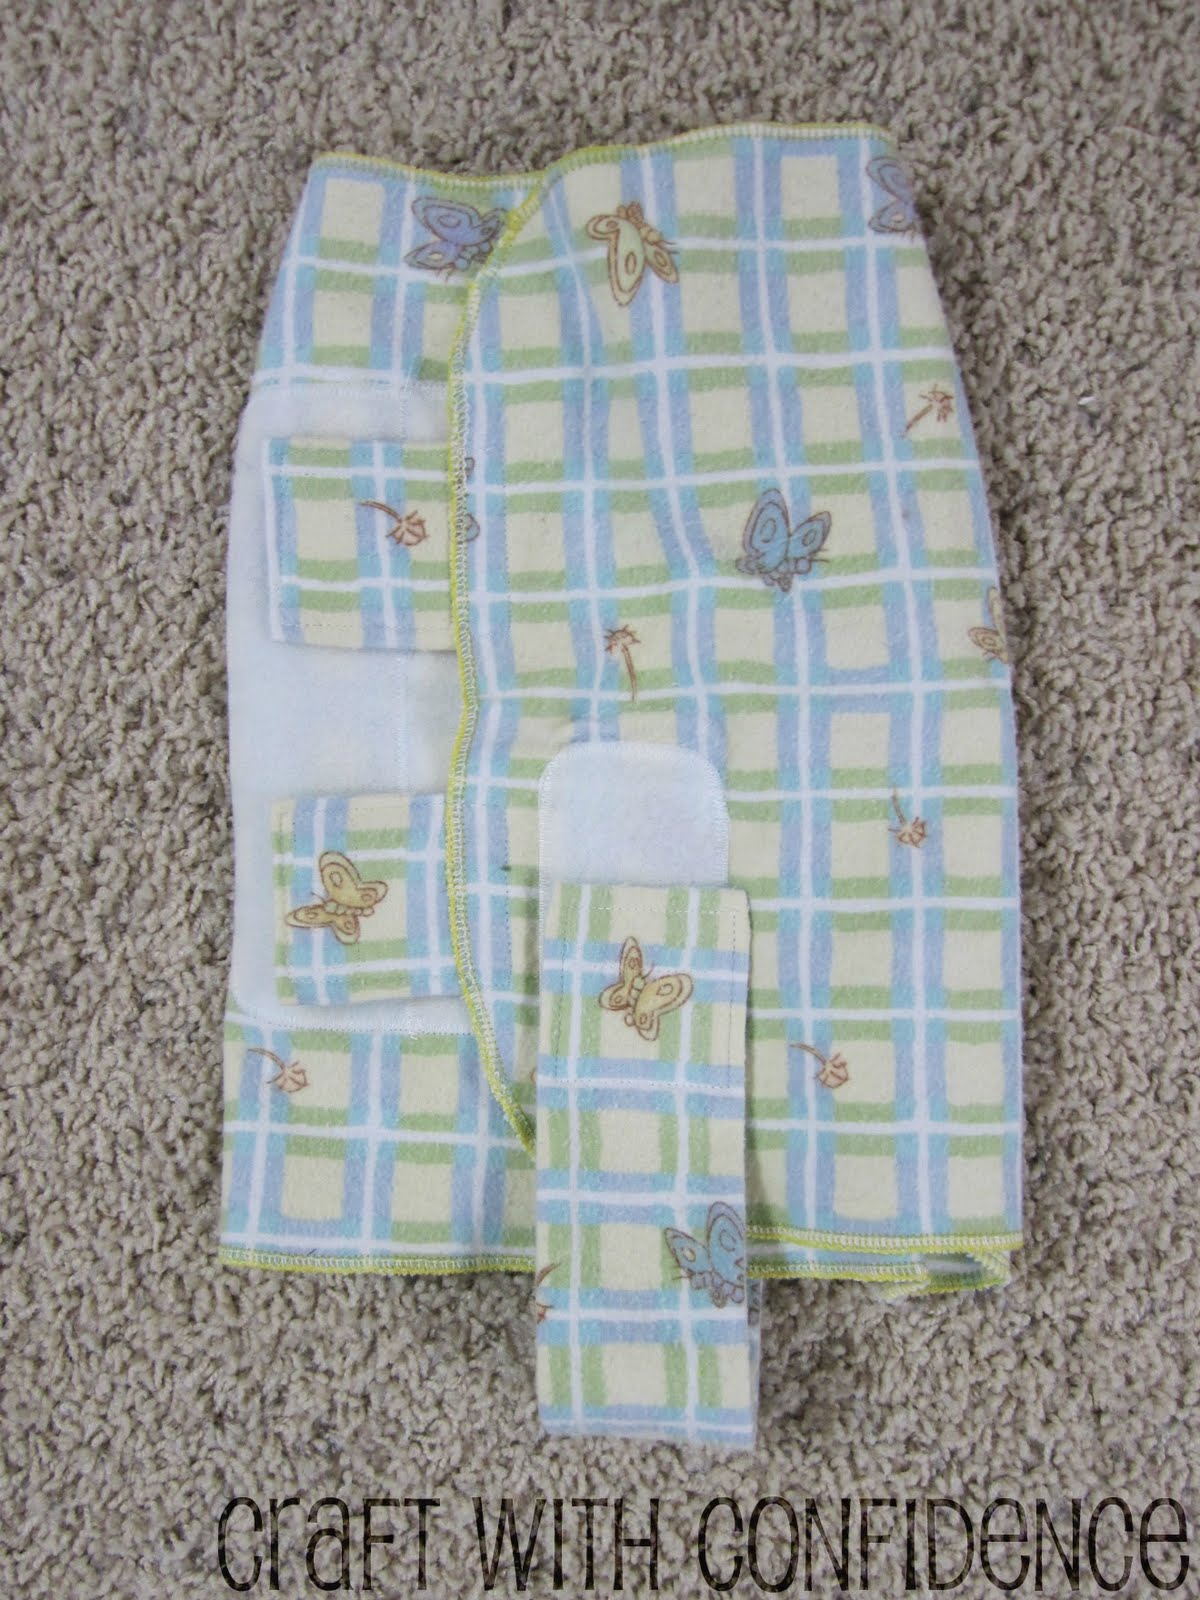
Cut three 2″ long pieces of the rough side of the Velcro.
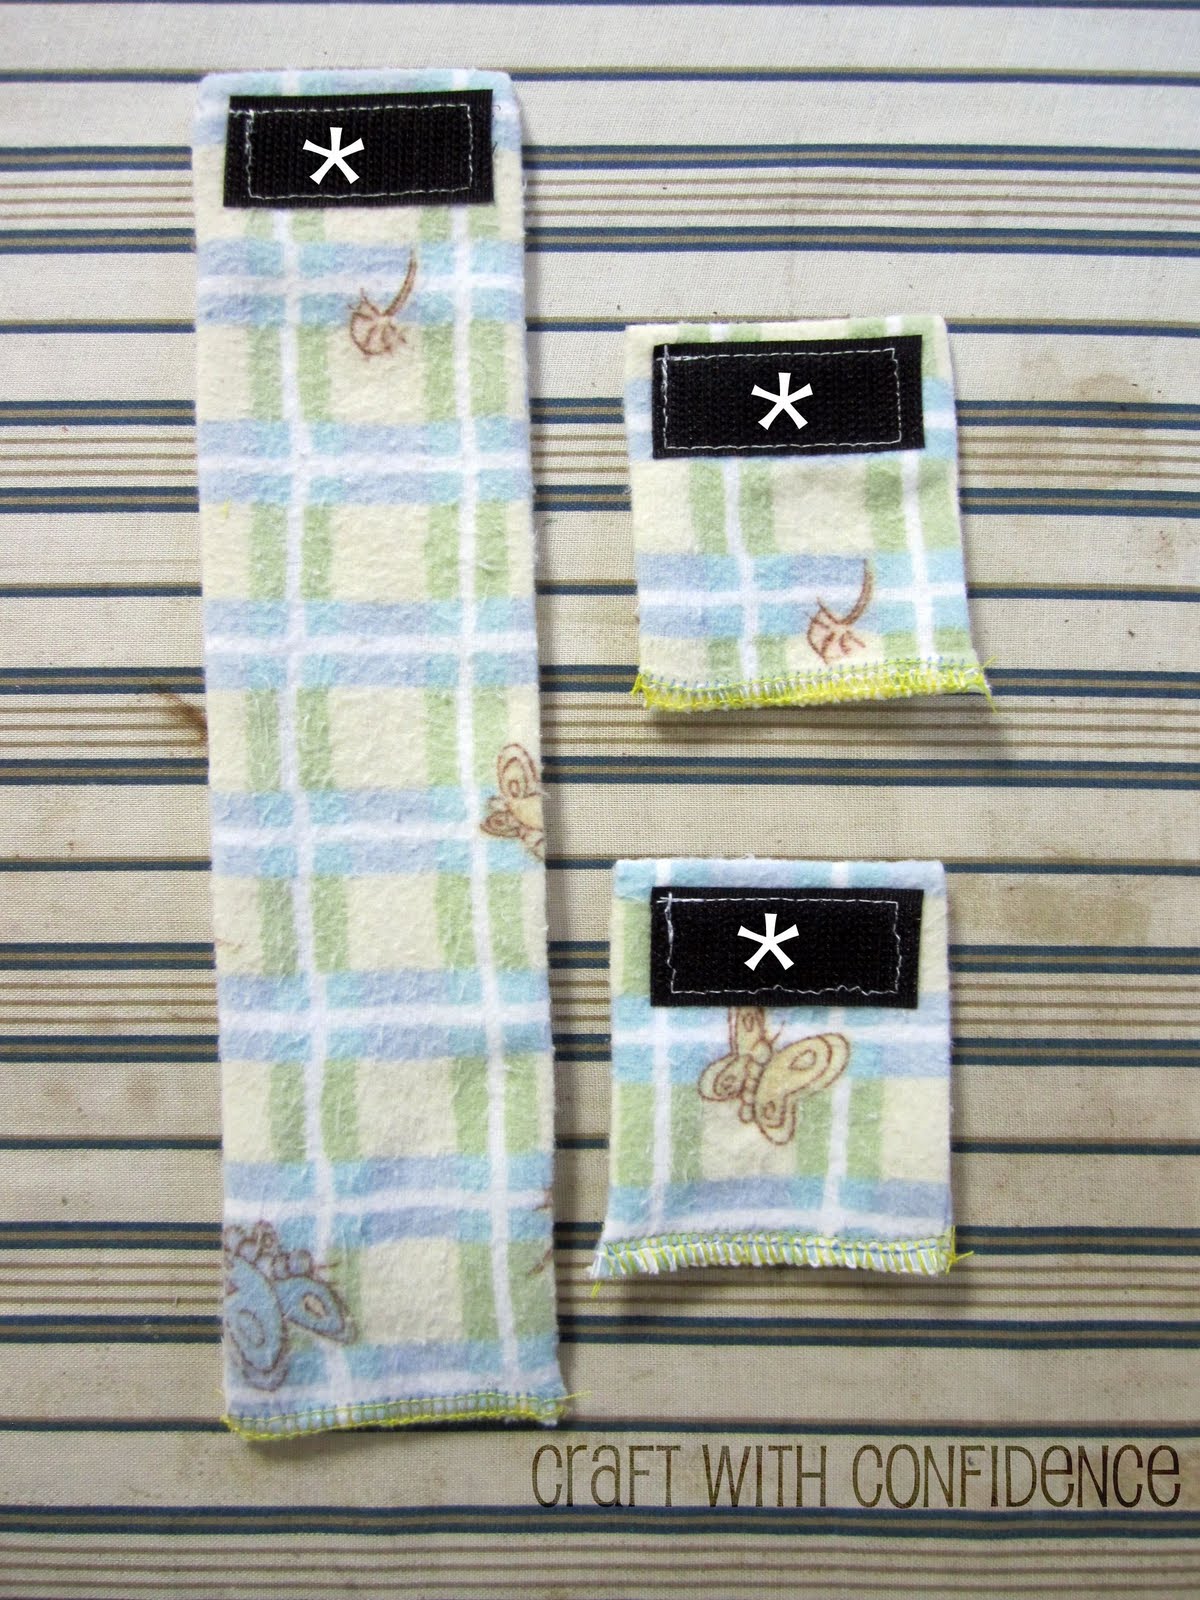
Sew one 2″ square onto the folded end of each strap, backstitching at start and stop. *At first I was using this narrower black Velcro, but switched to the wider stuff. It’s better… but the pictures were taken, so bear with me…
With the wrong side facing up, find the center of the right short side. Measure 1″ up and down from there and place the small straps (2″ gap between the straps).
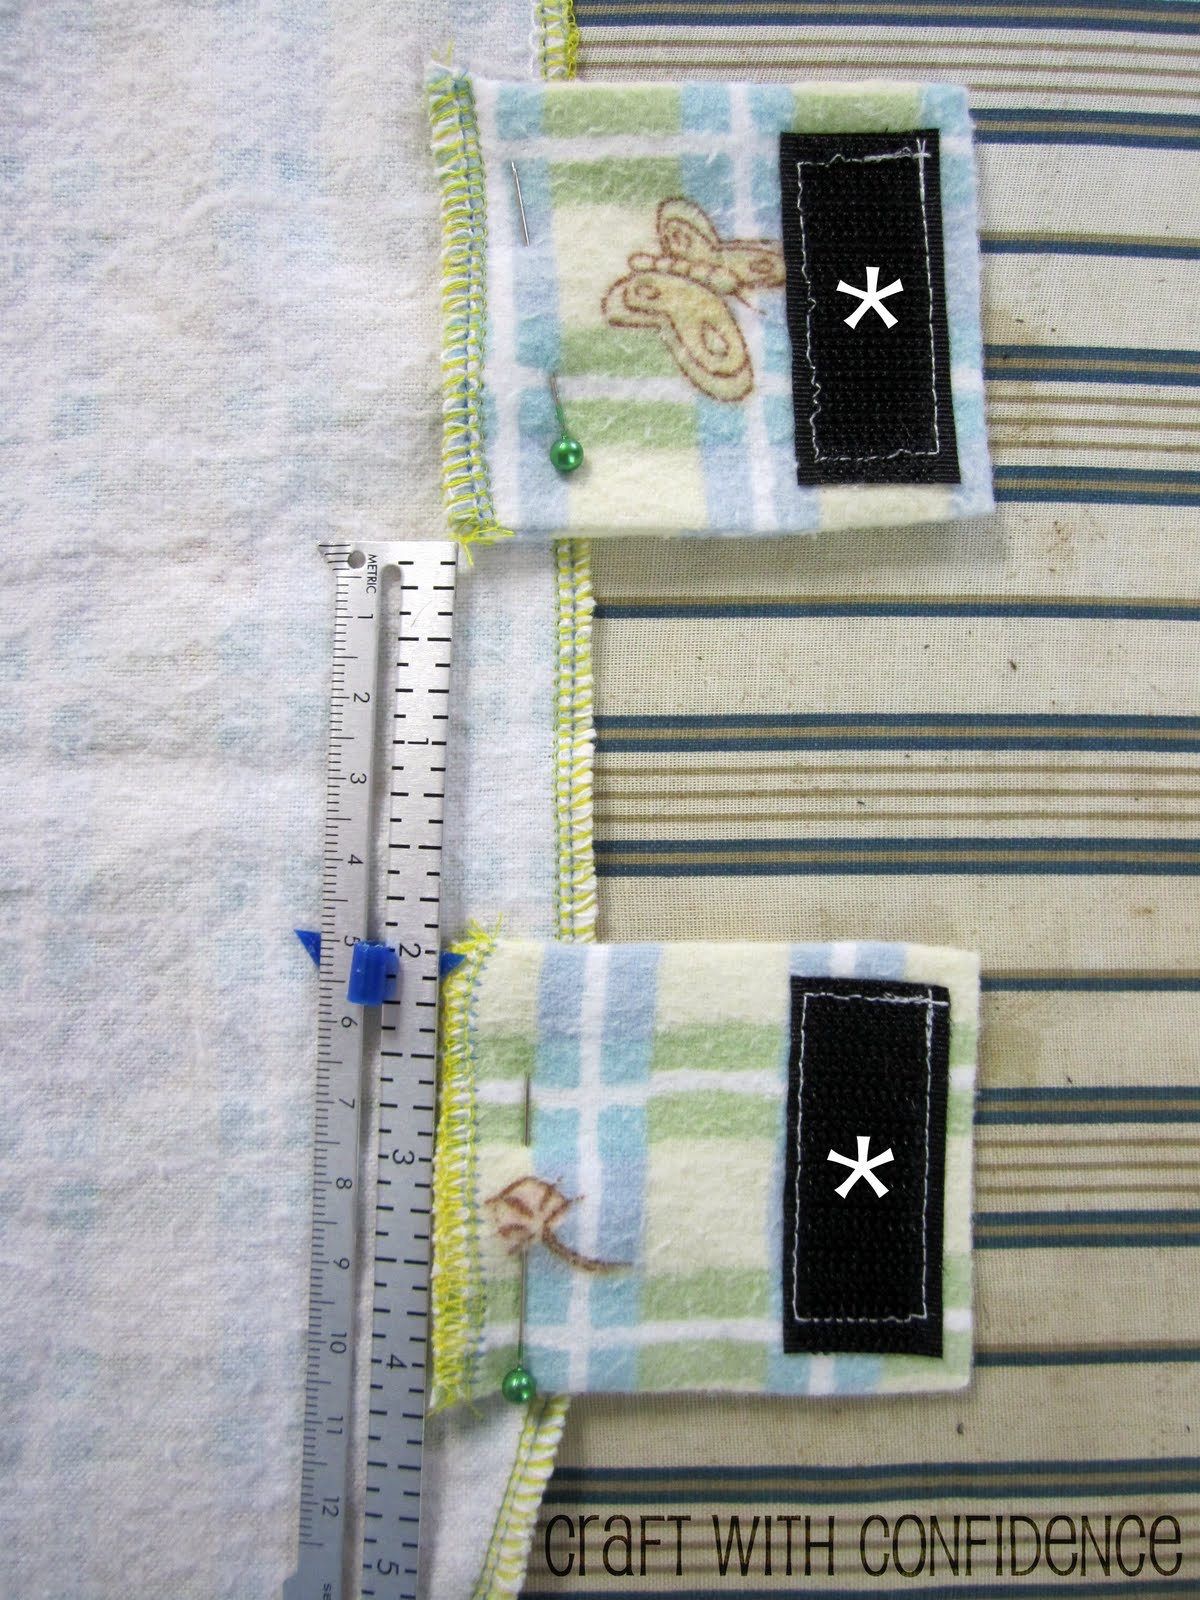
The straps will overlap with the edge of the large piece by 3/4″.
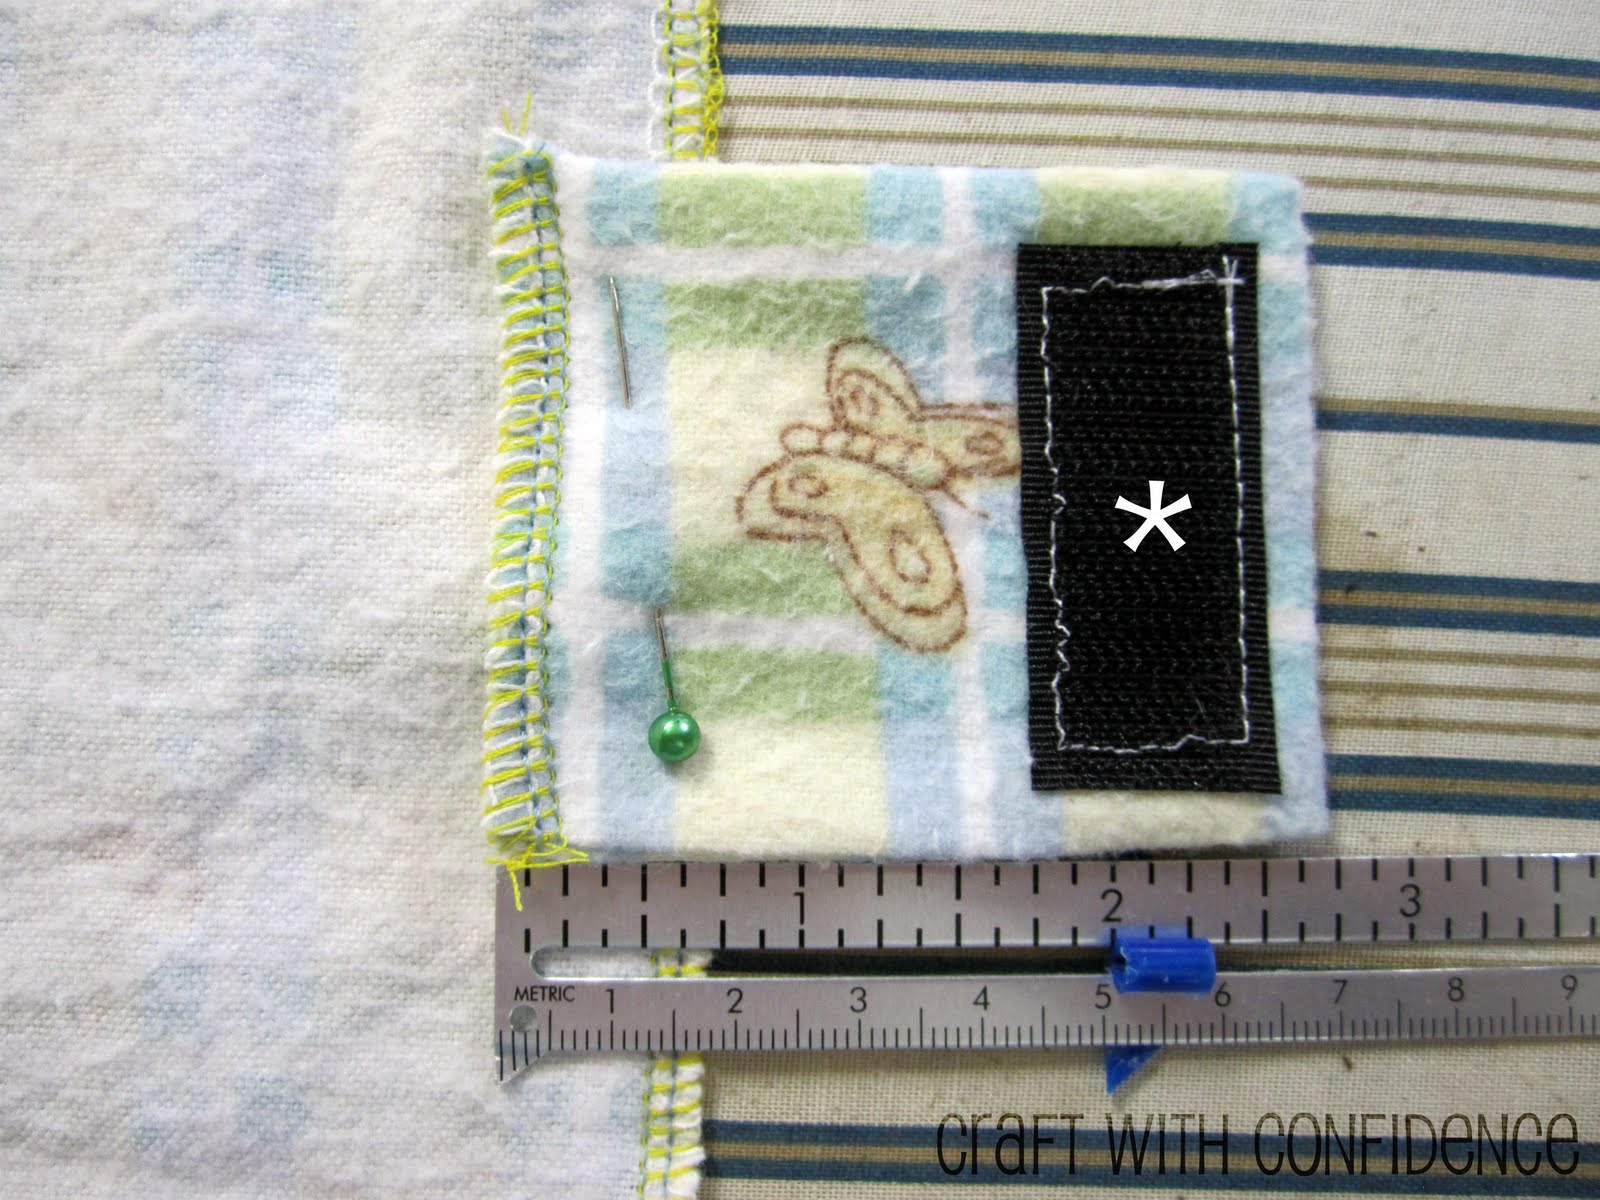
Pin and sew on securely by sewing a square following the edges of the strap that overlaps. (Other side view)
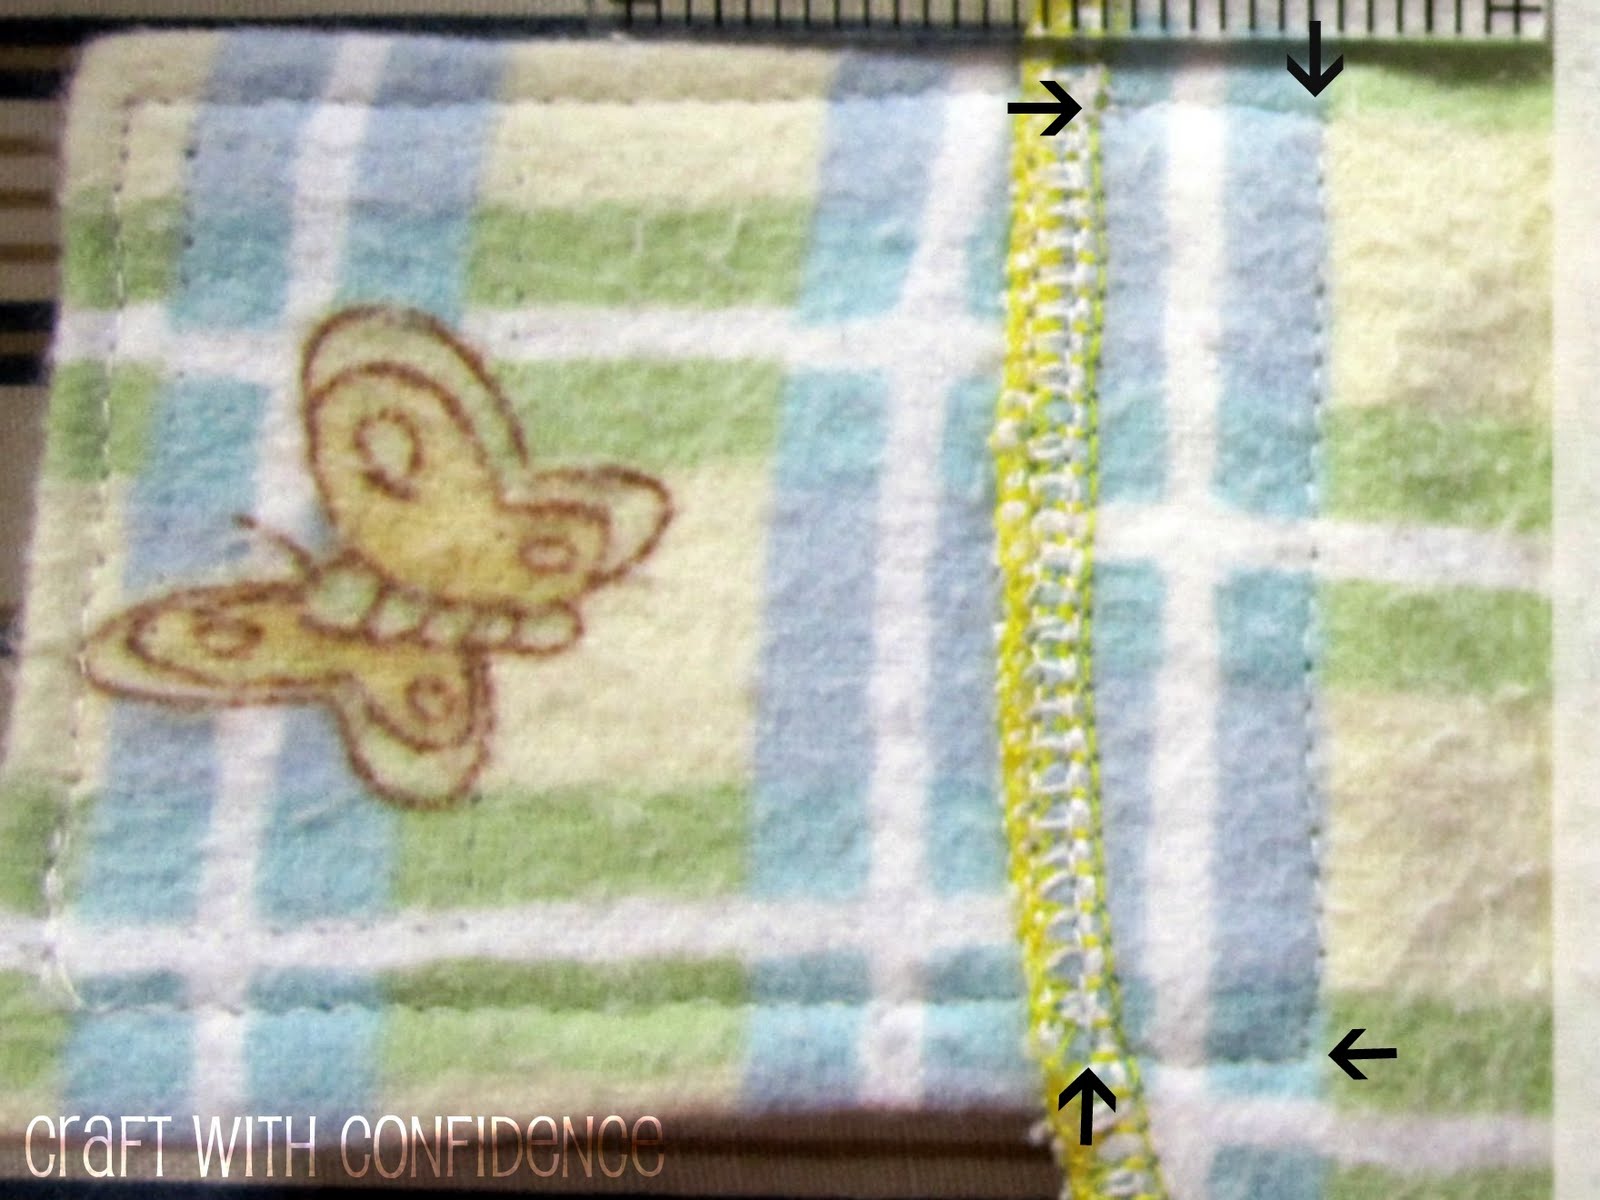
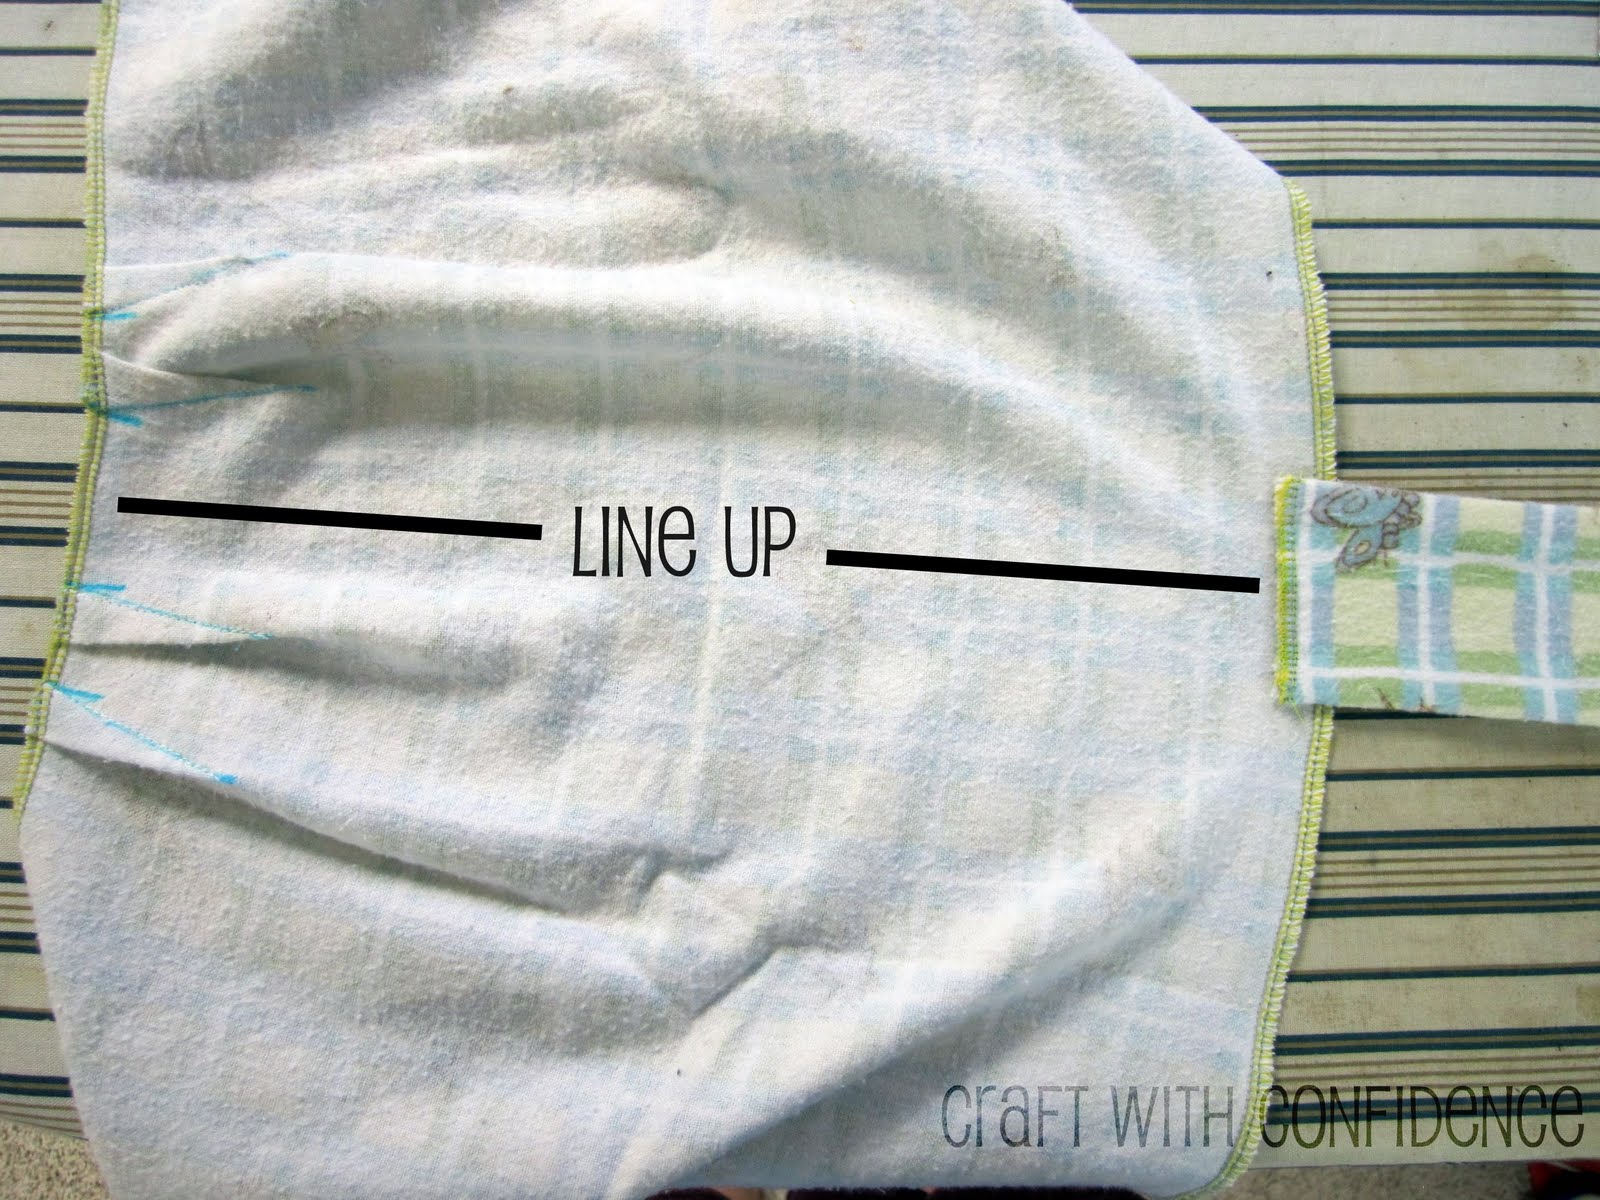
For the long strap, line it up with the center of the darts and pin on the bottom edge. Overlap the edges by 3/4″, just like the short straps. Pin and sew on securely with a square, just like the short straps.
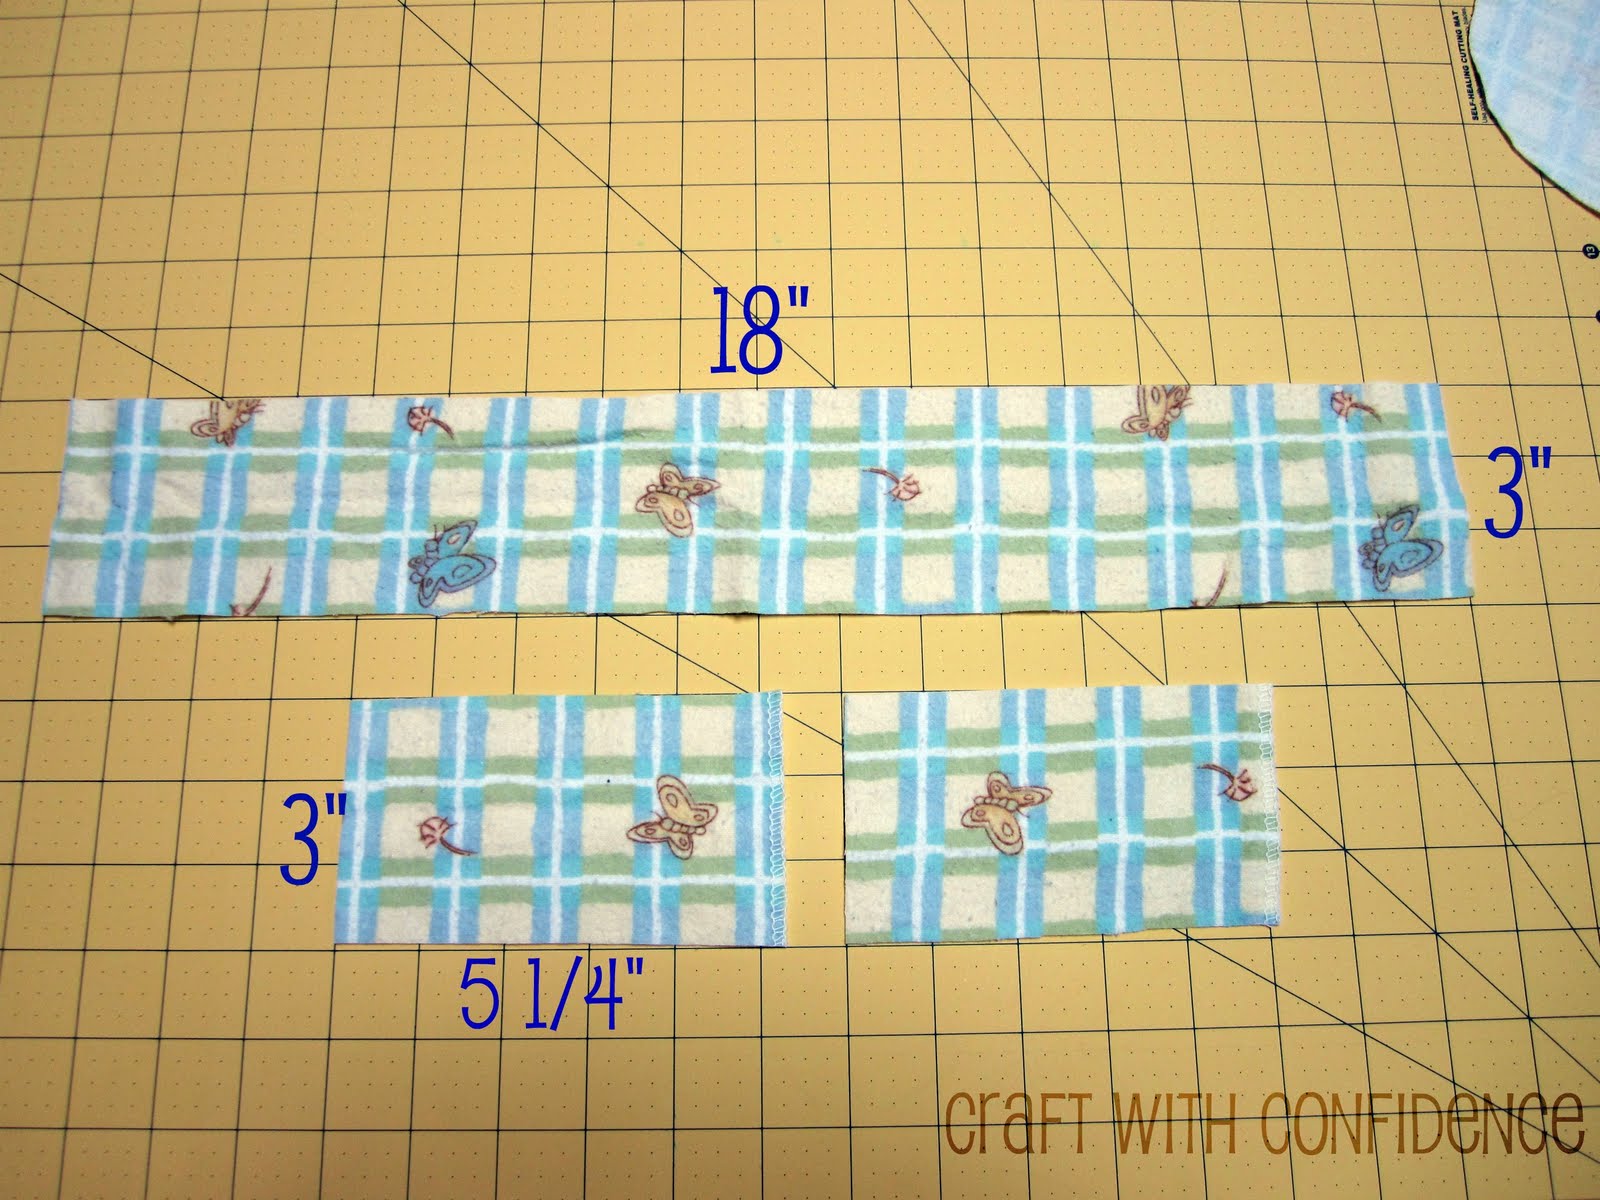
Next, cut the fuzzy side of your Velcro into two 7″ pieces and that will leave you with one 4″ piece. Round two corners on the long side on each of the 7″ pieces, so that when placed together with long sides touching, the 4 outer corners are rounded. Round all the corners of the 4″ piece.
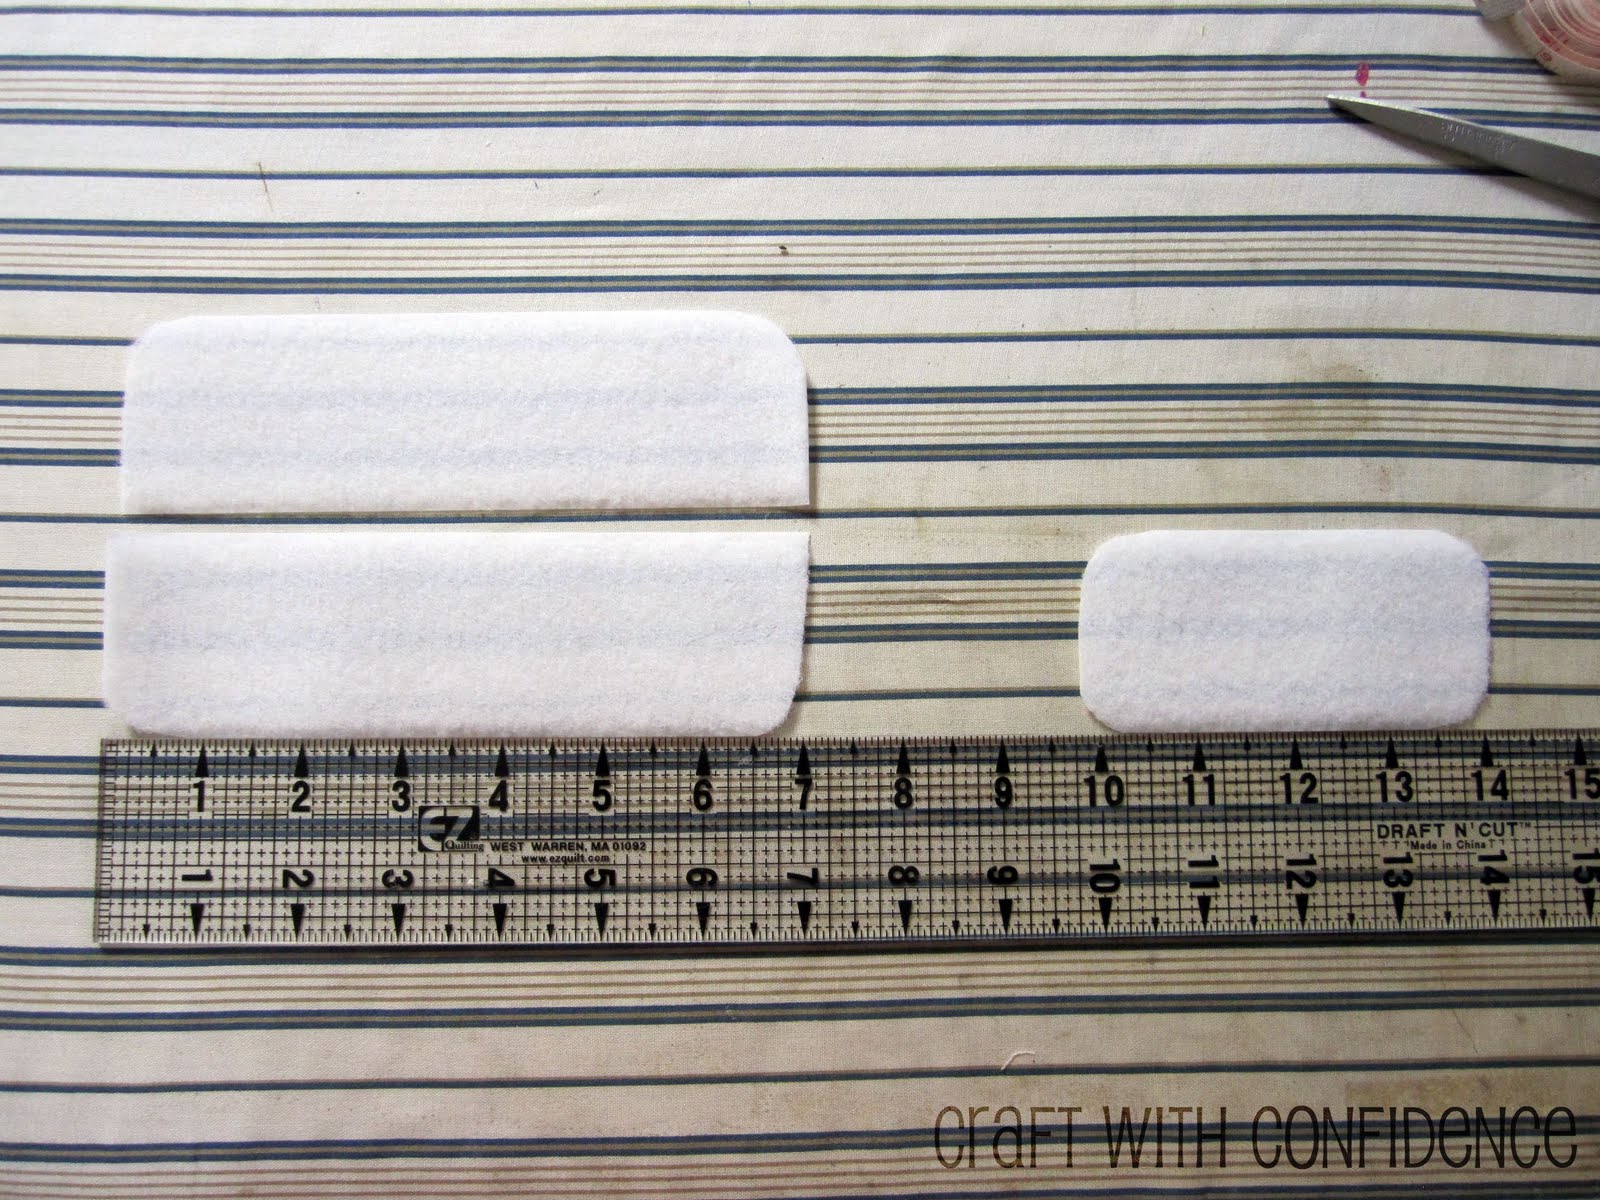
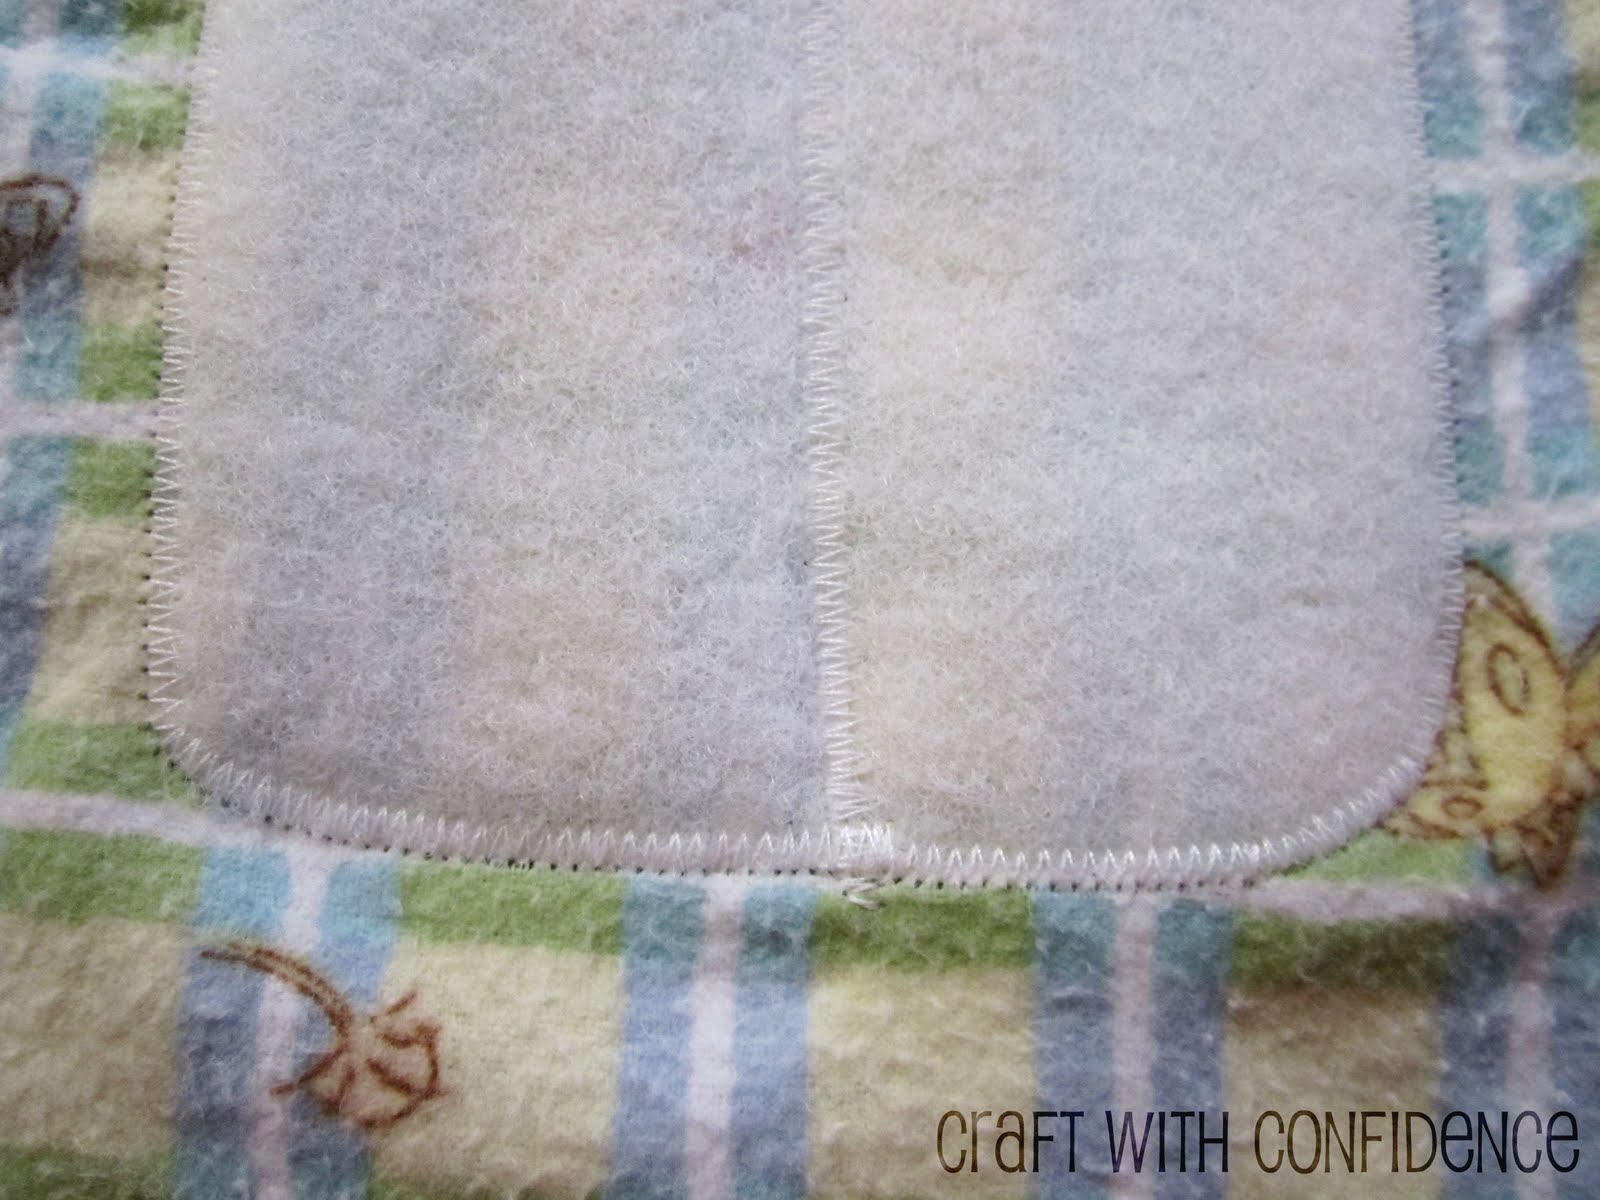
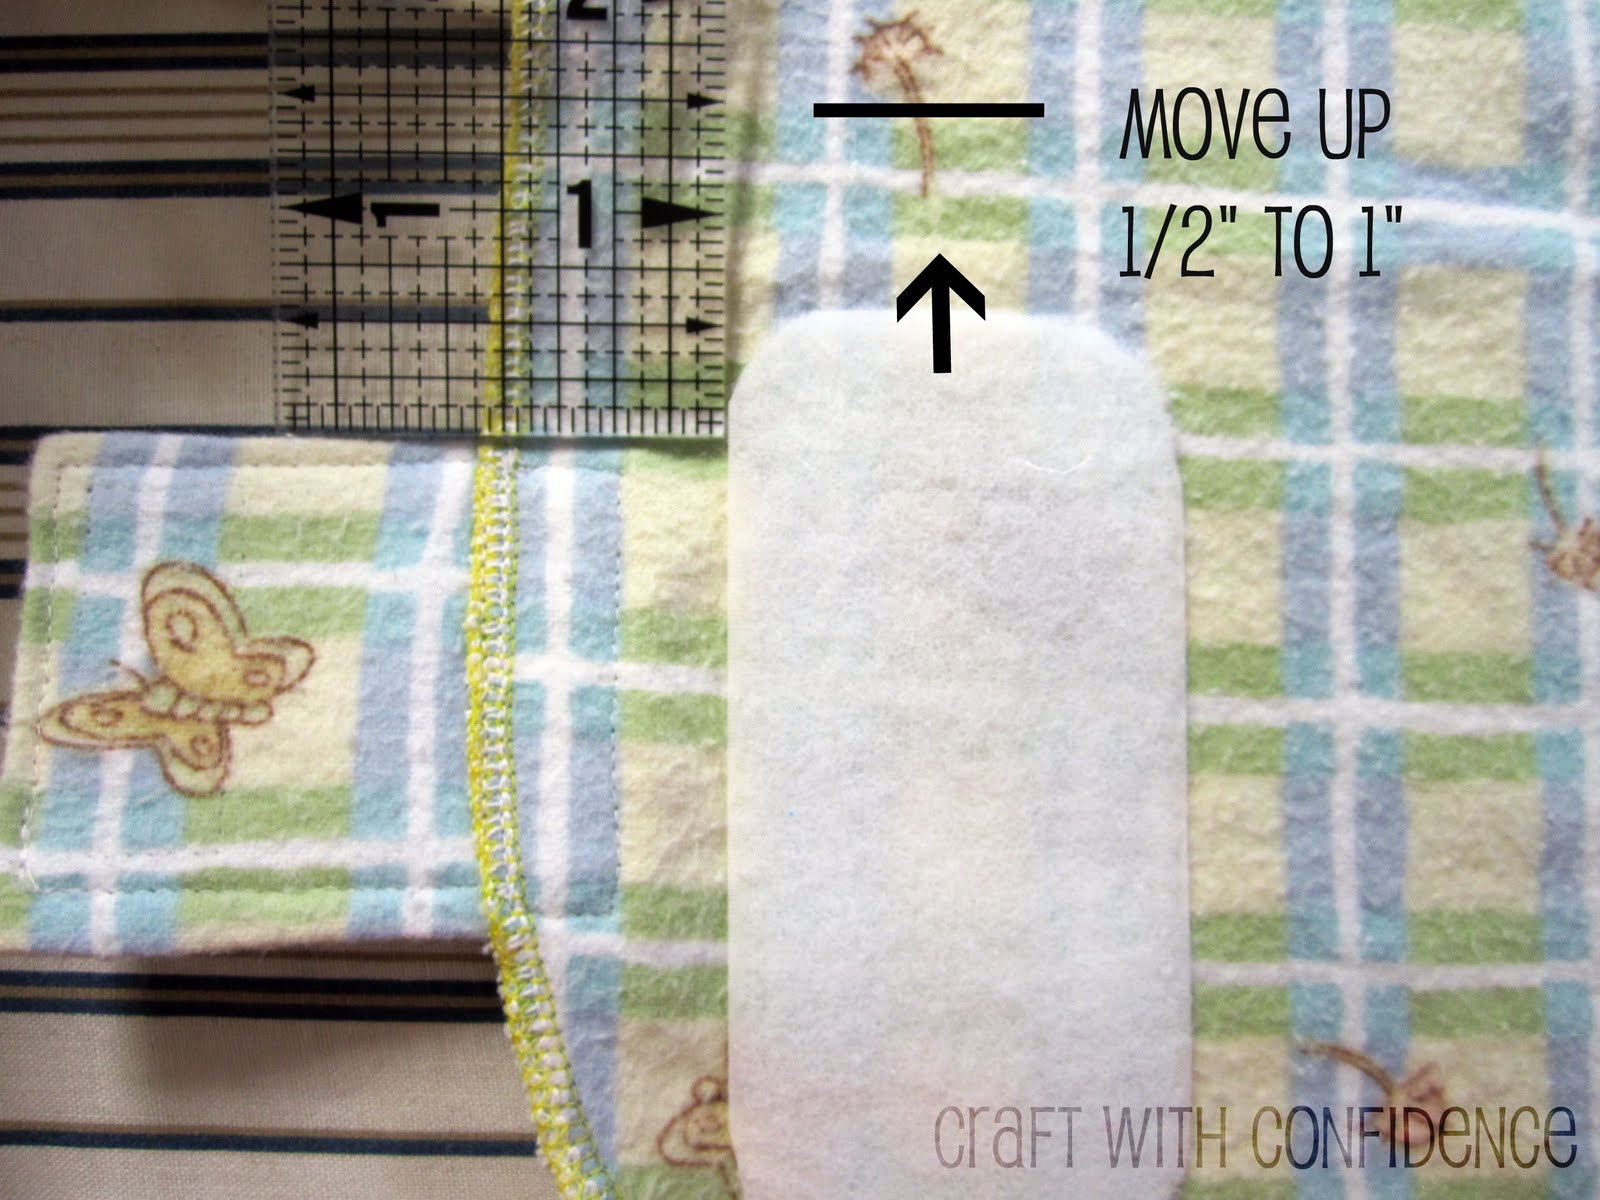
Turn the fabric right side face up and place the two 7″ Velcro pieces side by side, overlapping in the center, to create a large piece. Measure 2 1/2″ from the top and 8″ from the right edge.

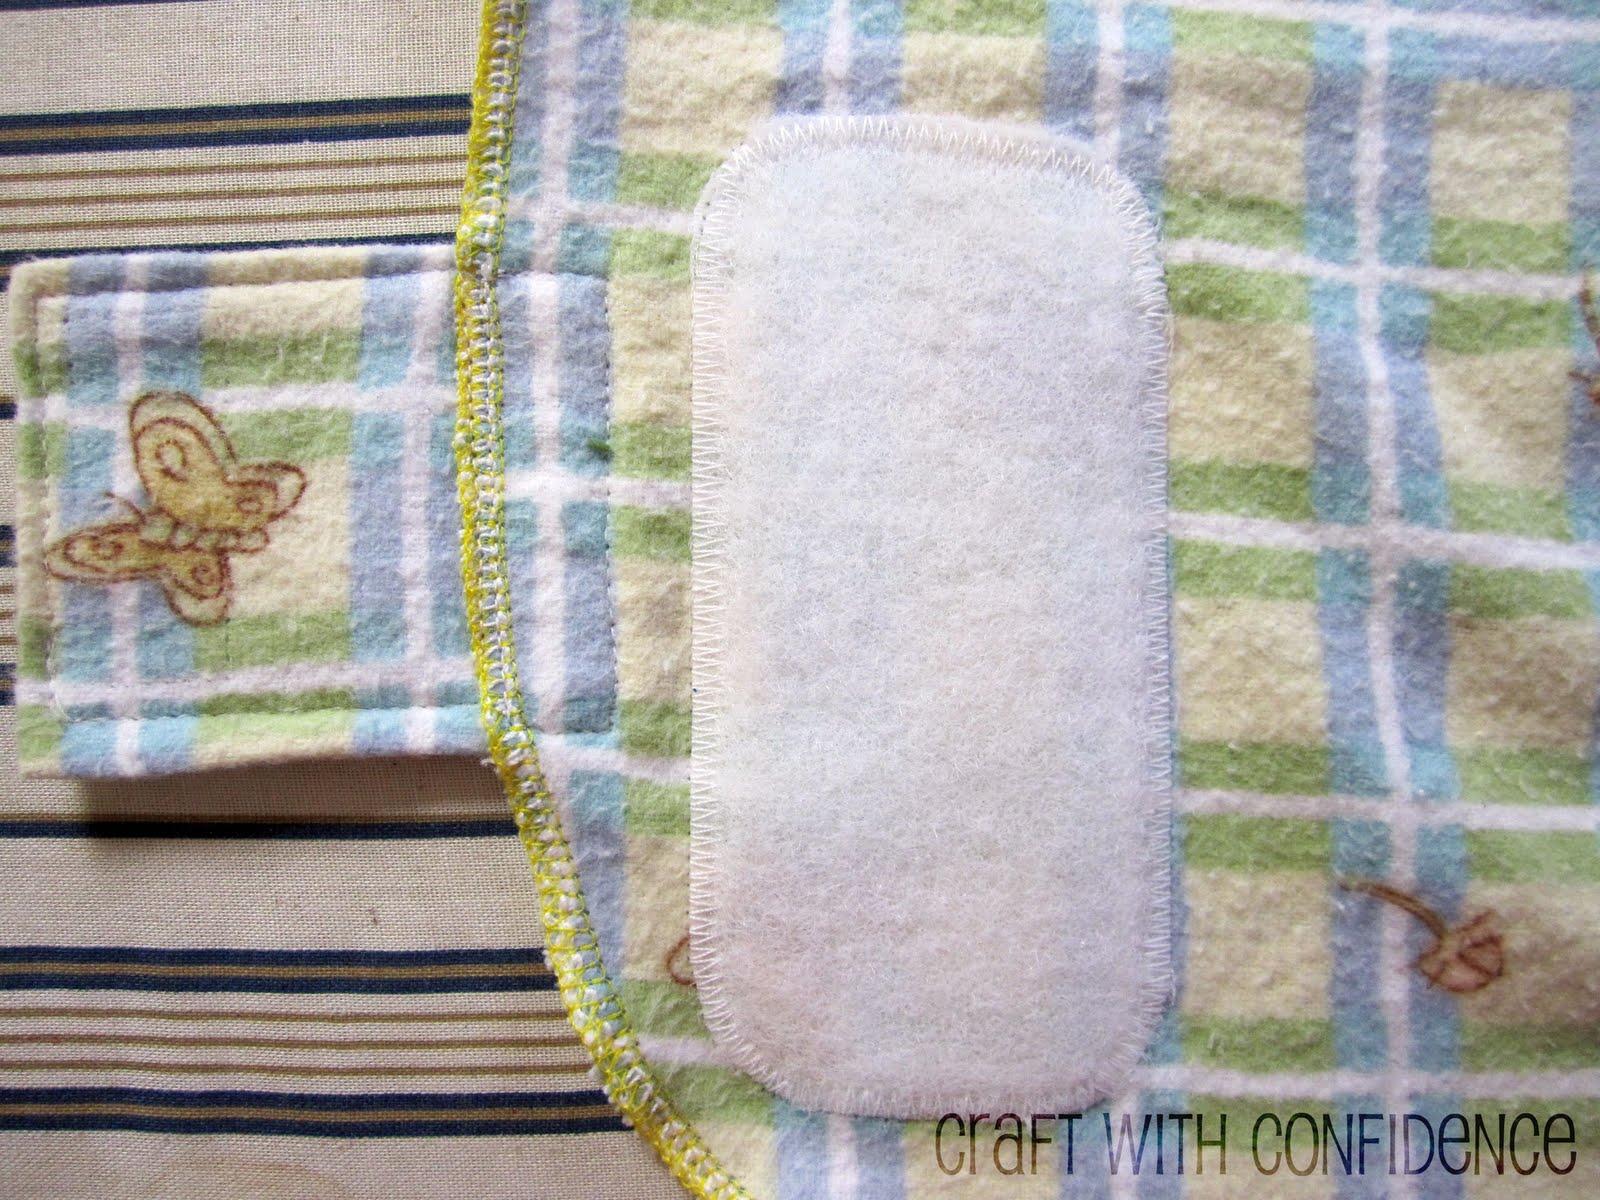
Use a satin stitch (close zig-zag) all the way around the Velcro, and down the overlapped center, to secure the Velcro. Backstitch at start and stop.

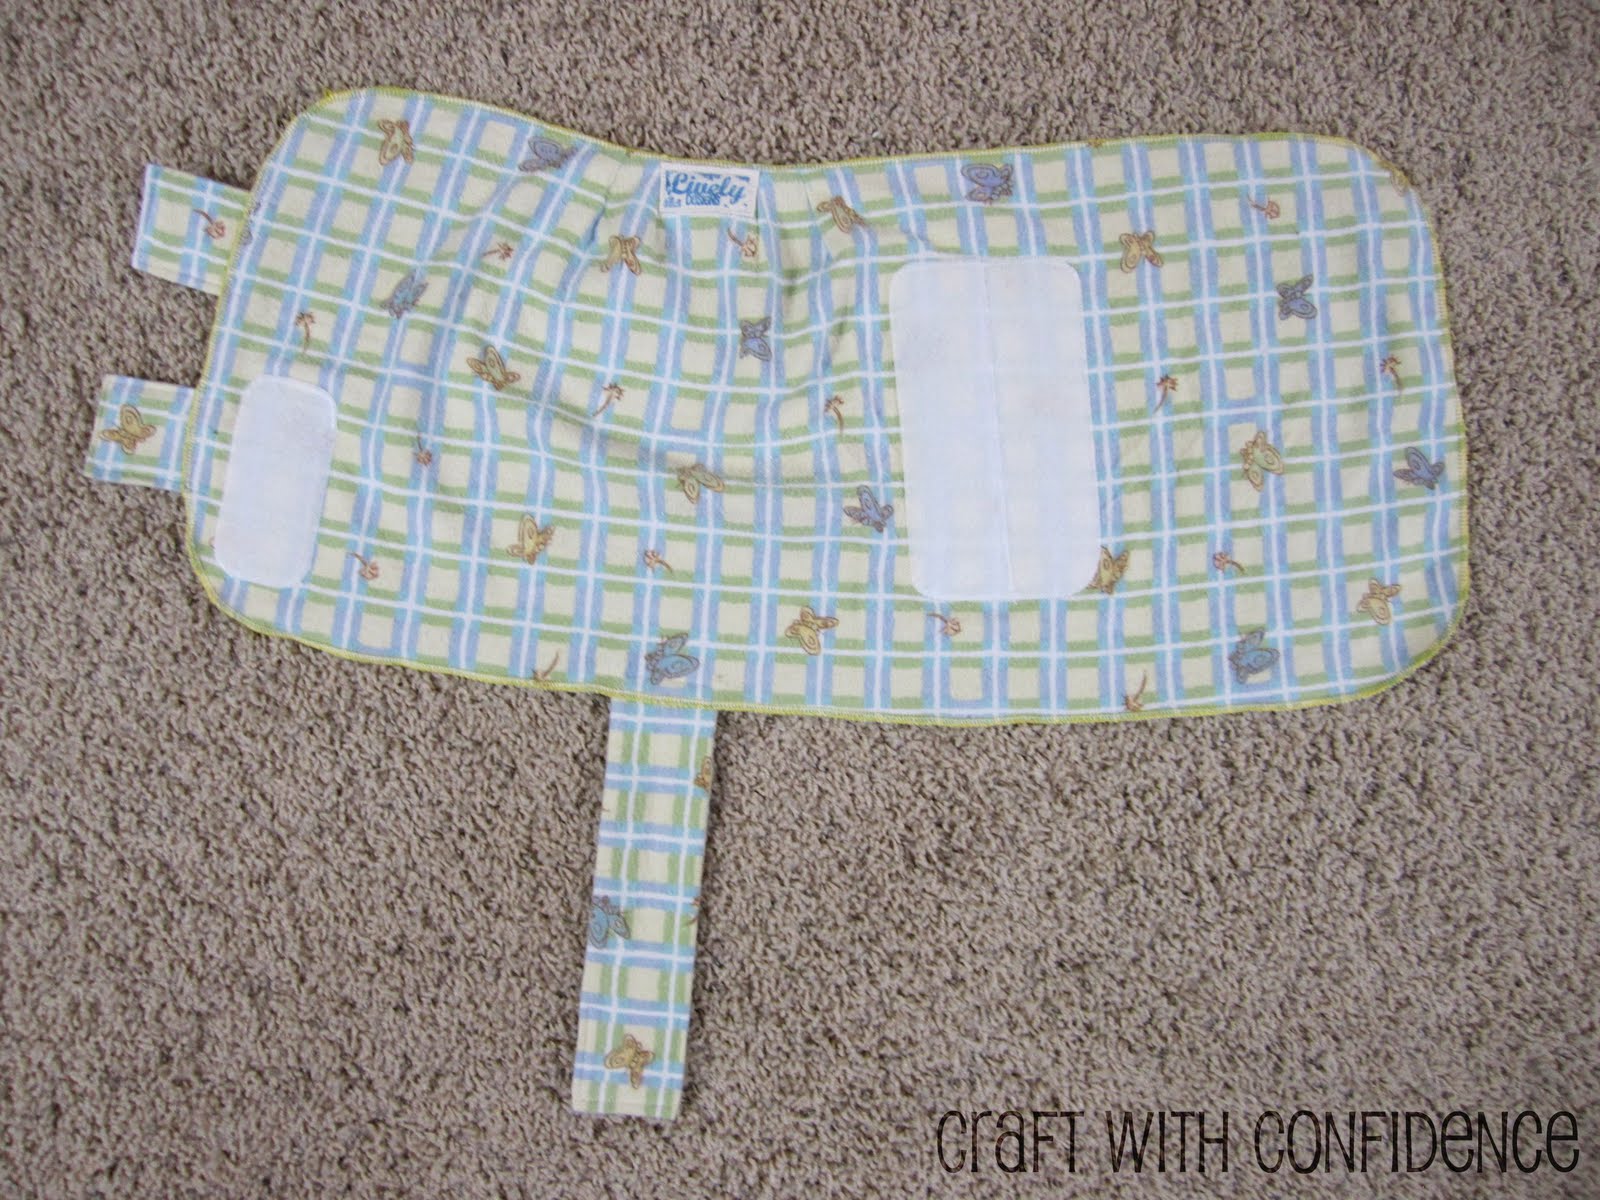
Place the 4″ piece of Velcro on the left side, next to the lower short strap. Measure 1″ from the side edge.

Sew on using the same satin stitch as with the larger pieces.
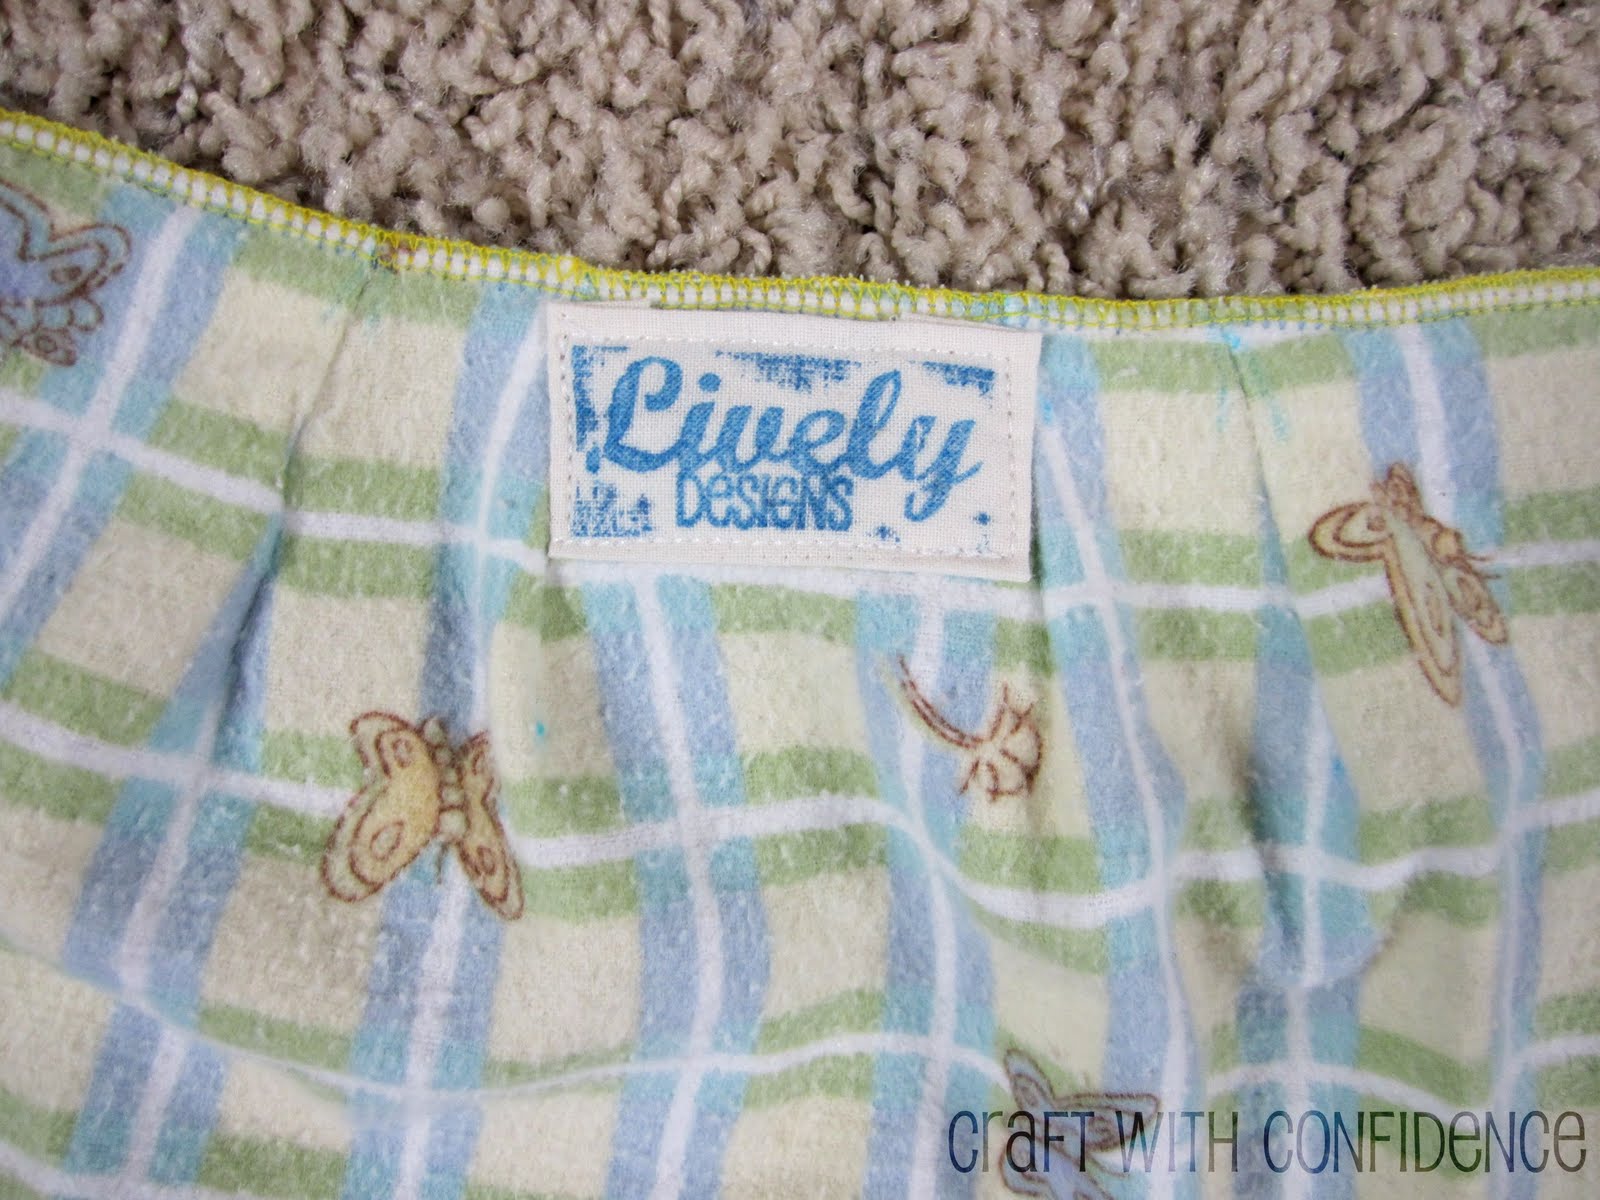
Add a label between the neck darts, if you wish.
The last step is to add an adorable baby. I suggest placing the baby’s shoulders just a bit above the top edge, like this:

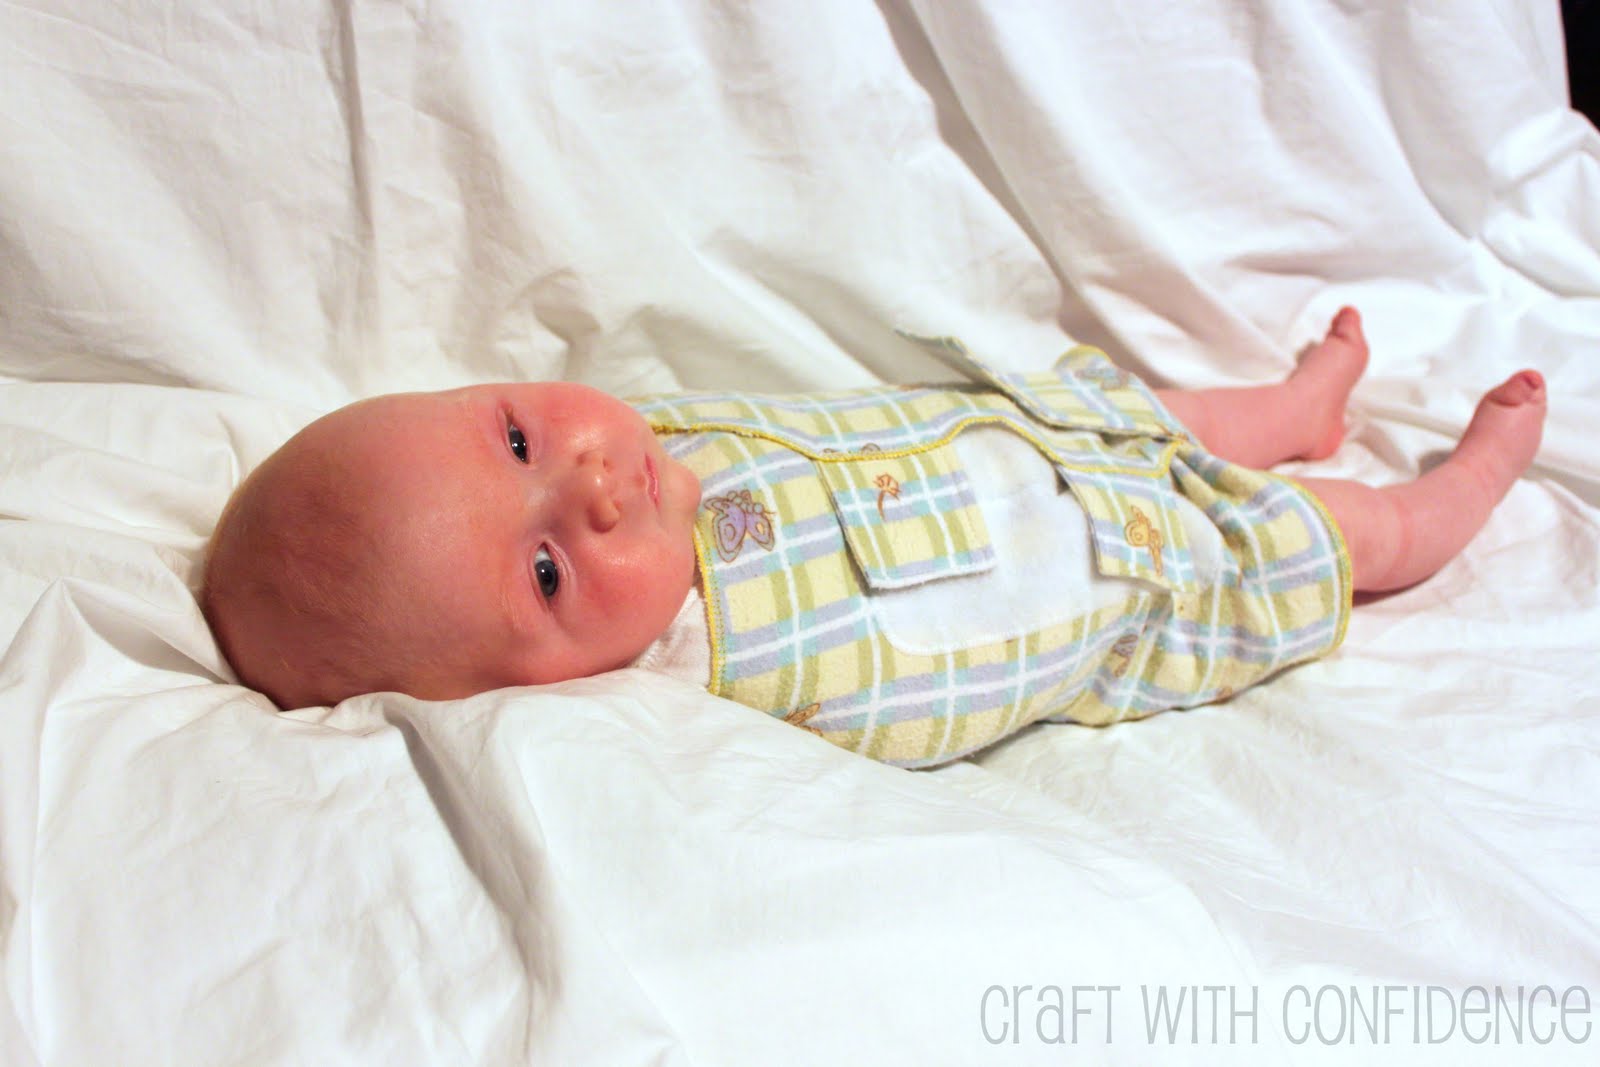
And watch him fall asleep! Which is exactly what we did to get these pictures.

This is how securely wrapped he still is after wiggling while falling asleep.

Don’t you love watching a baby sleep?

**Please remember to use this only while your child is sleeping on his/her back. Also, you should not use this after your child has learned to roll over.**

Latest posts by Linda (see all)
- Powder Room Makeover - Mar 25 2019
- Raspberry Sweet Rolls Recipe - Mar 12 2019
- Farmhouse Spring Wreath - Feb 19 2019
I love it! Like a baby straight jacket. Great tutorial! :)
Great tutorial! He looks like he loves it!
what a great tutorial! I’m going to have to file this away for my next baby!
thanks for stopping by! :)
Great tutorial and design! I used one of the swaddle blankets once and too found it around my daughters head! I love that their legs are free and that it can’t slide up! Thanks so much for sharing!!
Isn’t that so scary?! I’m glad you like the tutorial!
Hey Linda, Thanks for having Vivian here today. That baby swaddler is awesome. I never had one with my kiddos, just wrapped them tight and tucked the blanket in, you know like they show you at the hospital, but this is so much better.
I love that the legs are free, and they can still feel secure without being completely wrapped up. The tutorial was so detailed and perfect. I really enjoyed it, and while I too don’t think I will need one any more, (I already have three, and don’t plan on having more, loll) this could sure come in handy for tons of my friends who are expecting little ones soon.
Thanks for tweeting this, and letting us know.
Hugs,
Bella :)
What a great idea and a fabulous tutorial!!!
xoxo
Jen
thank you for stopping by Jen!! :)
Thanks Jen! I’m so glad you like it!
I love that you made the whole thing from a receiving blanket! I had one of the store bought one when my boys were little and they always managed to kick their way out…this is the perfect solution!
This is awesome! Thanks for the clear instructions, bookmarking it in case I need it for future babies, so much more classy than tying your kid up in a yard of fabric which is what I resorted to ;). Thanks for sharing!
Oh, this is cute! I don’t have a baby, but this would make a fabulous gift, I’m sure!
Wish I was creative enough to think of this when my boys were little. Might need to make one of these for my niece/nephew on the way. Thanks for sharing a very detailed tutorial!
p.s. That sweet sleepy baby makes me want more! :)
Rachel loves being swaddled when she sleeps, so I’m going to have to try to find time to make one of these. Such a great idea!
What a great idea! I love the name of it. It made me giggle. :)
Thank you for a great idea.
Just discovered your website
I love your tutorial.
The way you illustrate each step by step with instructions, pictures and directions.
I am a visual person and my best sewing is with illustrations and directions.
I have put you in my website to keep you for future free projects.
Keep them coming.
It’s a tadpole!
:-)
Seriously, the swaddler makes that wee baby look like a happy little tadpole.
Wish I’d known about swaddling when my kids were small.
(We just got home from my baby boy’s high school graduation ceremony — it’s true that they grow up so fast!)
I would mention what size this fits. I tried it on my 2.5 month old who weighs 14 lbs and it didn’t fit him.
I love this! I am currently using a large ace bandage on my 9 week old, because she squirms out of everything else. I am using thrift store receiving blankets as diapers. so I have a TON! I’ll make this tonight… But I think I’ll add an under wrap with the little pillows like a ‘swaddle strap’. Might also make it tie, as I’m out of velcro? Hmm…
This is great Have 2 new great grandbabies coming next year so I need to do some of these for the girls. Thanks for the great tutorial.
Thanks for sharing, this is a great tutorial. I prefer this type of swaddle because it allows me to secure my infant comfortably into his swing.
I am a NICU nurse and made a few of these to try on my unit. Our babies are often on a ventilator with a breathing tube for 4+ months but they get too hot and too strong for a regular blanket swaddle. As nurses we need peace of mind they won’t get their hands free and pull out their breathing tube when we cannot be in the room. These “straight jackets” work awesome for our kiddos! Other nurses keep asking me to make more of them.